
Learn How to Make Frozen Coffee That’s Never Watery or Icy
To make frozen coffee, blend coffee ice cubes with a smaller amount of cold liquid coffee or milk. This two-ingredient method prevents a watery result by using frozen coffee instead of regular ice, preserving the drink’s strength and flavor as it blends.
Most recipes overcomplicate this. They list a dozen ingredients and specialized syrups, convincing you that you need a barista’s pantry. The real failure point is simpler: using regular ice. It melts instantly in a blender, turning your strong coffee into a weak, slushy puddle.
This guide covers the core method that works with any blender, the exact ratios to avoid dilution, and how to customize it for dietary needs or flavor cravings. You can make a professional-grade frozen coffee in about two minutes with what you already have.
Key Takeaways
- The foundational method requires only coffee ice cubes and cold liquid coffee or milk.
- Using regular ice cubes is the most common mistake; they dilute the flavor and create a watery texture.
- A standard kitchen blender like a Ninja works perfectly, blend in short pulses and check texture every 15 seconds.
- For a dairy-free version, oat milk or almond milk blends smoothly and adds a subtle sweetness.
- If your drink separates, the ratio is off; add more frozen cubes and blend again.
The 2-Ingredient Frozen Coffee Method
This is the technique from the YouTube transcript, stripped to its essentials. You need brewed coffee and a freezer.
Pour any leftover coffee, cold brew, drip, even espresso, into an ice cube tray. Freeze it solid. This step is non-negotiable. When you’re ready to make the drink, fill your blender about one-third of the way with these coffee ice cubes. Add enough cold liquid coffee or milk to just cover the cubes. Start with a half-cup. Pulse the blender for 15 to 20 seconds.
Stop and check. The goal is a thick, creamy slush that holds its shape on a spoon. If it’s too chunky, pulse another five seconds. You should never need to blend for more than 30 seconds total. Over-blending heats the mixture and starts the melt.
Common mistake: Using water-based ice cubes, they dilute the coffee strength by half as they melt in the blender, leaving you with a bland, watery drink in under a minute.
TL;DR: Freeze coffee into cubes, blend them with a splash of cold coffee or milk, and pulse, don’t puree, to a slushy consistency.
Why Coffee Ice Cubes Are the Only Option
The physics is straightforward. A standard ice cube is pure water. When you blend it, friction generates heat, melting the cube. That water has no coffee flavor, so it dilutes your drink. A coffee ice cube is approximately 98% water and 2% coffee solids. When it melts from blending friction, the liquid that enters your drink is already coffee. The strength stays consistent from the first sip to the last.
If you use regular ice, you are fighting dilution from the first pulse. You’ll compensate by making your base coffee excessively strong, which often makes it bitter. The coffee cube method lets you brew normally.
The Exact Blending Sequence That Works
Your blender’s power matters less than your technique. Even a basic model can crush ice if you help it.
First, add the frozen coffee cubes. Then pour in the cold liquid. Putting the liquid in first can cause the blades to spin uselessly in a pool, failing to grab the cubes. Start on a low setting or use the pulse function. Pulse three times, about two seconds each. This breaks the cubes apart without generating excess heat. Then, hold the blend for a continuous 10-second burst. Stop. Check.
The texture should look like a coarse snow cone. If you see large chunks, pulse another two or three times. If it’s already smooth, you’re done. Pour it immediately. Letting it sit in the blender jar lets the residual heat from the motor start a melt cycle at the bottom.
Choosing Your Base Ingredients
Your choice of coffee and liquid base dictates the final character of the drink. This isn’t about random leftovers.
For the ice cubes, cold brew is the gold standard. Its smooth, low-acidity profile survives freezing and blending beautifully. Drip coffee works, but avoid any dark roasts that have turned bitter, freezing concentrates flavors, including harsh ones. I once froze a pot of over-extracted French roast. The resulting cubes made every frozen coffee taste like ash for a week.
Your liquid component can be more than just coffee. Using cold brew as the liquid doubles down on smoothness. Using milk or a dairy-free alternative like oat milk adds creaminess and body, reducing the need for additional sweeteners. The fat in dairy or the natural sugars in oat milk help create a richer, more cohesive texture.
| Base Liquid | Best For | Texture Result |
|---|---|---|
| Cold Brew Coffee | Pure coffee intensity | Clean, crisp slush |
| Whole Milk | Creamy, classic diner-style | Rich, smooth, and thick |
| Oat Milk (Barista Edition) | Dairy-free creaminess | Velvety, slightly sweet |
| Almond Milk | Light, nutty flavor | Lighter, can be slightly granular if not blended well |
A half-cup of liquid per cup of ice cubes is the sweet spot. Going over three-quarters of a cup almost guarantees a runny result.
Advanced Upgrades and Variations
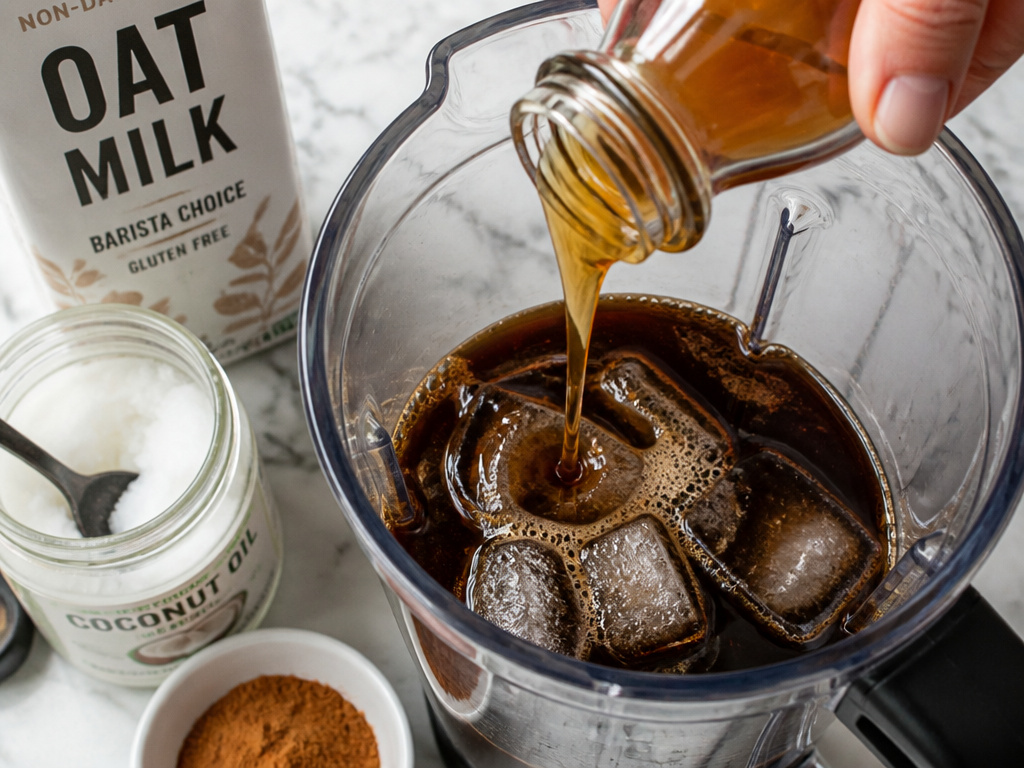 Once the basic method is solid, you can layer in flavors. Add these during the initial blend, not after.
For sweetness, avoid granulated sugar. It doesn’t dissolve fully in the cold environment and can leave a gritty mouthfeel. Use simple syrup, maple syrup, or a flavored coffee syrup. Start with a tablespoon. You can also use a brown sugar sweetener syrup for caramel notes.
For spice, add a quarter teaspoon of cinnamon or cocoa powder directly to the blender. It incorporates evenly. The health perks of a cinnamon coffee benefits are a bonus.
For a richness boost, consider fats. A teaspoon of coconut oil coffee or MCT oil coffee will make the drink incredibly satiating and give it a luxurious, smooth mouthfeel. Blend it thoroughly to emulsify.
I prefer oat milk over almond milk for dairy-free versions. The natural sugars in oat milk caramelize slightly during blending, providing a subtle sweetness that means I can use half the syrup. Almond milk can sometimes seize and become oddly chalky in the cold.
TL;DR: Add syrups, spices, or healthy fats at the blend stage. Use oat milk for the best non-dairy creaminess and inherent sweetness.
Building a Coffee Shop-Style Frappe
The commercial chain version relies on a thick, almost soft-serve consistency. You can approximate this with one extra ingredient: xanthan gum. This sounds extreme, but a tiny pinch, literally 1/16th of a teaspoon, acts as a stabilizer. It prevents separation and gives the drink that pourable-but-holds-a-straw-up texture.
Add the pinch of xanthan gum to your liquid base and whisk it briefly before adding it to the blender. It will completely eliminate any watery layer at the bottom of your glass after five minutes. Without it, even a perfect blend will start to separate as the ice crystals melt.
Troubleshooting Your Frozen Coffee
 It’s a simple process, but a few things can go wrong. Use this table to diagnose and fix the most common issues.
| Problem | Likely Cause | The Fix |
|---|---|---|
| Watery, melts instantly | Too much liquid or regular ice cubes used. | Add 4-5 more coffee ice cubes and blend for 10 more seconds. |
| Chunky, uneven texture | Not enough liquid or insufficient blending. | Add 2 tablespoons of cold liquid, pulse 3 times, then blend 5 seconds. |
| Bland, weak flavor | Coffee ice cubes were made from weak brew. | Add a shot of espresso or 1 tbsp instant coffee granules to the blender. |
| Blender stalls or struggles | Too many frozen cubes at once. | Remove half the cubes, blend the remainder with liquid, then add the rest back. |
| Drink separates in the glass | Lack of emulsifier or fat. | Next time, add a splash of cream or a tiny pinch of xanthan gum to the blend. |
If your blender simply won’t crush the cubes, let them sit on the counter for 90 seconds. They’ll develop a slight frosty melt on the surface, which gives the blades enough purchase to grab and shatter them.
Common mistake: Assuming a stalled blender needs more liquid, adding liquid often creates a vortex that pushes cubes away from the blades. The fix is usually less liquid or a brief thaw.
Tools and Equipment You Actually Need
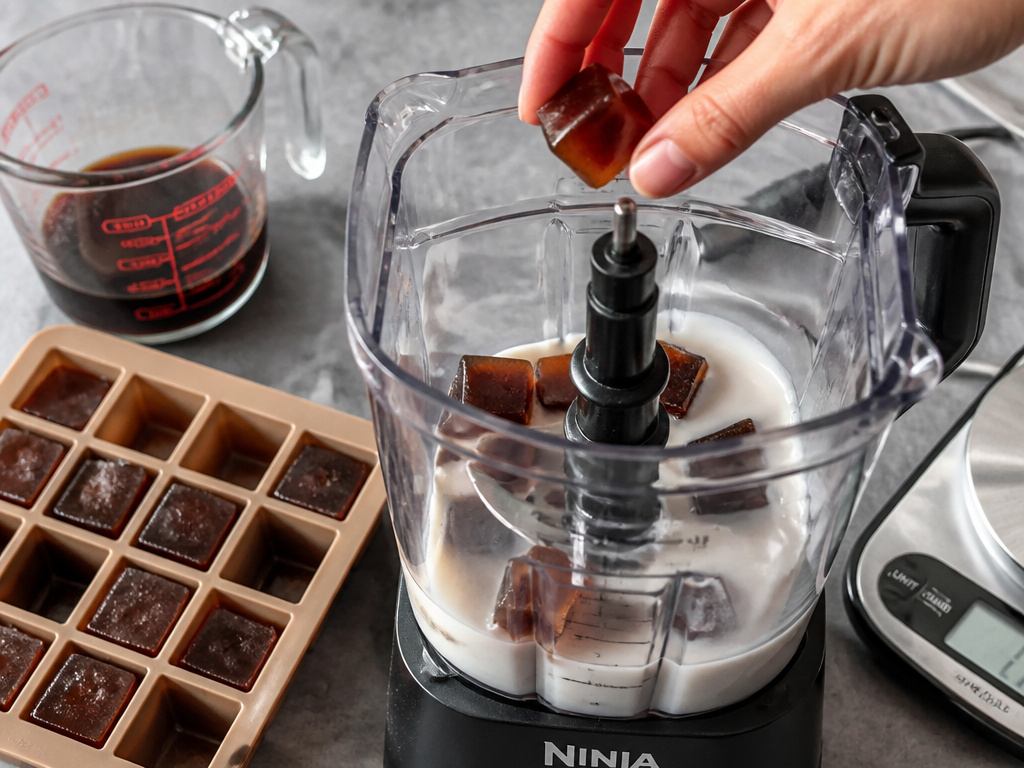 You do not need a $500 blender. The YouTube creator specifically used a Ninja, which is a powerful but accessible countertop model. Any blender with an “ice crush” setting or a pulse function will work.
The real tool requirement is an ice cube tray. Silicone trays are best because you can pop the cubes out easily. If you only have plastic trays, run the bottom under warm water for ten seconds to release the cubes.
A Ninja blender for coffee is a common multi-purpose appliance that handles this task effortlessly. If you’re using a less powerful model, the “pulse and check” method is your friend. For measuring, a standard liquid measuring cup is fine. A kitchen scale is useful if you want to replicate your perfect ratio every time, but it’s not required.
The goal is to use equipment you already own. This isn’t a specialty cocktail.
Frequently Asked Questions
Can I use instant coffee to make frozen coffee?
Yes. Dissolve instant coffee granules in a small amount of hot water first, then freeze that mixture into cubes. Do not add dry instant coffee directly to the blender with ice; it won’t dissolve properly and will leave bitter granules in your drink.
How can I make a lower-calorie frozen coffee?
Use black coffee for both your cubes and your liquid. Sweeten with a zero-calorie syrup like monk fruit or stevia. For creaminess without the calories in coffee milk, use unsweetened almond milk or a splash of protein shake.
My frozen coffee is too bitter. How do I fix it?
Bitterness is usually from the coffee itself, amplified by freezing. Next time, use a blonde roast coffee for your cubes, as it’s naturally milder. For this batch, blend in a tablespoon of maple syrup or a pinch of salt trick to counteract the bitter notes.
Can I make a large batch and save it?
No. Frozen coffee is best consumed immediately after blending. If you store it in the freezer, it will freeze into a solid block. If you refrigerate it, it will separate and become watery. The entire process is designed for a single-serving, on-demand drink.
What’s the difference between frozen coffee and a Frappuccino?
Frappuccino is a branded product that includes a proprietary base syrup containing emulsifiers and stabilizers to achieve its specific texture. A homemade frozen coffee is simpler, often with fewer ingredients and no thickeners, though you can add xanthan gum to mimic the texture.
Is the caffeine content different in frozen coffee?
It depends on your base. If you use cold brew for both cubes and liquid, the caffeine in iced coffee can be quite high. If you dilute with milk, the caffeine per ounce is lower. The freezing process itself does not destroy caffeine.
The Bottom Line
Frozen coffee fails when you treat it like a smoothie and throw random ingredients at it. Success comes from one specific swap: coffee ice cubes for regular ice. Master the two-ingredient blend of frozen cubes and cold liquid. Pulse, don’t puree.
Customize from that solid foundation. Add almond milk in coffee for a nutty twist or a dash of cinnamon for spice. The method is forgiving. If it’s too thin, add more frozen cubes. If it’s too thick, add a splash of liquid. In two minutes, you have a drink that rivals any coffee shop version, without the line or the price tag.
