
Mastering the Latte Coffee to Milk Ratio for Any Machine
This post contains affiliate links. As an Amazon Associate, we earn from qualifying purchases.
A standard latte follows a 1:4 to 1:5 coffee to milk ratio. That means for a double shot of espresso (about 2 ounces or 60ml), you’ll steam 8 to 10 ounces (240-300ml) of milk. The foam layer should be thin, about a centimeter of velvety microfoam on top.
Most people get this wrong by focusing only on volume. They forget that milk type, temperature, and the machine’s built-in programs drastically change the final balance. A ratio that works for whole dairy milk will curdle a minimalist oat milk. A Nespresso’s “Latte Macchiato” button uses a completely different structure than its “Caffè Latte” setting.
This guide breaks down the ratio by machine, by milk, and by the science of why it works. You’ll get the numbers for Starbucks, Nespresso, and home espresso, plus the tweaks needed for plant-based milks that don’t play by dairy’s rules.
Key Takeaways
- The foundational ratio is 1 part espresso to 4 parts milk. A double shot (2 oz) needs 8 oz of steamed milk for an 10 oz drink.
- Nespresso machines have preset ratios: The Gran Lattissima’s Caffè Latte uses 110ml coffee to 240ml milk+foam. Its Latte Macchiato uses 40ml coffee to 200ml milk+foam.
- Plant milks require a structural check. If your oat milk lacks a buffer like dipotassium phosphate and has under 5g of fat per cup, it will curdle or produce weak foam. Use a barista blend.
- Temperature is a silent ratio killer. Heat milk past 68°C (154°F) and the proteins denature, killing sweetness and making the drink taste flat and scalded regardless of your volume math.
- Starbucks standardizes foam at ¼ inch for hot lattes. Their size scaling shows the ratio shift: a 12oz gets one shot, a 16oz gets two.
The Core 1:4 Latte Ratio (And Its Exceptions)
Start with a double shot of espresso. Weigh 18 grams of coffee to yield 36 grams of liquid in 25 to 30 seconds. That’s your coffee component, roughly two fluid ounces.
For the milk, steam five to six ounces of cold milk. The goal is a total drink volume of eight to ten ounces. The steaming process adds volume through aeration, so you start with less liquid than the final drink holds. This yields the classic 1:4 coffee to milk ratio.
The specialty coffee standard for milk temperature is 55–65°C (130–149°F). Heating past 68°C (154°F) denatures milk proteins, causing a noticeable drop in sweetness and introducing a flat, scalded flavor. A digital thermometer matters.
This ratio creates a balanced, creamy drink where the espresso’s character remains present but softened. The foam is not a separate layer of stiff bubbles. You want microfoam, tiny, silky bubbles integrated throughout the milk, with about a centimeter of it resting on top. That foam is part of the milk volume, not an addition.
TL;DR: Use a 1:4 ratio (2 oz espresso to 8 oz milk) and steam to 150°F. The foam is part of the milk volume, not a topping.
Why Machine Presets Break the 1:4 Rule
Your Nespresso or super-automatic machine isn’t following the cafe standard. It’s following a recipe engineered for its specific water pressure, capsule coffee volume, and frothing mechanism.
The Nespresso Gran Lattissima (F531) manual specifies exact milliliter amounts. For its Caffè Latte program, it brews 110ml of coffee, adds 140ml of milk, and tops it with 100ml of milk foam. That’s a 1:2.2 coffee-to-liquid ratio if you count only the milk, or 1:2.8 including foam. It’s a much smaller, stronger drink.
The same machine’s Latte Macchiato program is fundamentally different. It uses 40ml of coffee, 100ml of milk, and 100ml of foam. Here, the coffee is layered on top of the foam and milk. The coffee to milk ratio is 1:5, but the structure inverts the classic latte.
| Machine / Source | Coffee Volume | Milk + Foam Volume | Effective Ratio | Notes |
|---|---|---|---|---|
| Home Espresso (Standard) | 60 ml (2 oz double) | 240 ml (8 oz) | 1:4 | The specialty cafe target. |
| Nespresso Gran Lattissima – Caffè Latte | 110 ml | 240 ml | ~1:2.2 | Stronger, smaller drink. Preset program. |
| Nespresso Gran Lattissima – Latte Macchiato | 40 ml | 200 ml | 1:5 | Layered drink, coffee on top. |
| Starbucks 16oz Hot Latte | ~120 ml (2 shots) | ~354 ml (12 oz milk) | 1:3 | Includes ¼” foam layer. |
Trust your machine’s presets when you use them. They’re calibrated. Trying to force a 1:4 ratio by overriding a Nespresso program usually ends with a cup that’s all foam or an overflowing mess.
How Starbucks Scales the Ratio (And Why Your Home Version Tastes Different)
Starbucks operates on consistency, not artistry. Their publicly available Beverage Resource Manual shows how the ratio changes with cup size. It’s a lesson in scalable production, not perfect balance.
A Tall (12oz) hot Caffè Latte gets one shot of espresso. The barista steams milk to fill to ¼ inch below the rim, then adds a ¼ inch layer of foamed milk. The coffee to milk ratio here is about 1:6.
A Grande (16oz) gets two shots. The same fill and foam rules apply, shifting the ratio to roughly 1:3. This is why a Grande tastes noticeably stronger than a Tall, the coffee volume doubled but the milk volume didn’t.
Common mistake: Comparing your home latte to a Starbucks Grande. You’re likely using a single shot for a 12oz cup, matching their Tall ratio. Your drink will taste milkier. To match Starbucks strength at home, use a double shot for any drink over 10 ounces.
Their syrup standardization also affects perceived balance. For a Grande flavored latte, the manual specifies four pumps (1 fluid ounce) of syrup. That added sweetness masks bitterness, allowing them to use a darker roast at this ratio without the drink tasting harsh. If you use a lighter, more acidic roast at home with no sweetener, the same 1:3 ratio might taste unpleasantly sharp.
TL;DR: Starbucks adjusts shots per size. A 16oz gets two shots (1:3 ratio), a 12oz gets one (1:6). Their dark roast and standardized syrup let this work.
Plant-Based Milk Ratios Are a Different Game
You cannot directly translate the dairy ratio to almond, oat, or soy milk. The structure is different. Plant milks are engineered emulsions, and most fail under the heat and acidity of espresso.
The two critical specs are buffer salts and fat content. Buffer salts like dipotassium phosphate prevent the proteins from clumping when they hit the coffee’s acid. Fat provides body and helps create stable microfoam.
If your plant milk lacks a buffer and has under 5 grams of total fat per 8-ounce cup, it will curdle on contact with espresso or produce weak, disappearing foam. This includes most “clean-label” organic oat milks and standard supermarket almond milk.
For a reliable plant-based latte, you must choose a barista-formulated milk. Califia Farms Oat Barista Blend and Oatly Barista Edition both contain buffers and have 6-8 grams of fat. They are designed to steam and integrate.
Even with the right milk, the process changes. Plant milk emulsions break faster when overheated. Use a digital thermometer and stop at 60°C (140°F), do not go to the upper dairy limit. The aeration phase is also shorter. Introduce air for only 1-2 seconds to create microfoam; over-aeration makes large, unstable bubbles that collapse.
| Milk Type | Buffer Present? | Fat (per 8oz) | Steam Temp | Aeration Time | Result with Espresso |
|---|---|---|---|---|---|
| Whole Dairy | Natural proteins | 8g | 55-65°C (130-149°F) | 2-4 sec | Stable microfoam, integrates smoothly. |
| Oatly Barista | Yes (dipotassium phosphate) | 7g | 55-60°C (130-140°F) | 1-2 sec | Good foam, minimal curdling. |
| Califia Oat Barista | Yes | 8g | 55-60°C (130-140°F) | 1-2 sec | Creamy, stable, slight sweetness. |
| Minimalist Organic Oat Milk | No | 3-4g | Any | N/A | High curdle risk, weak foam, thin body. |
| Regular Almond Milk | No | 2-3g | Any | N/A | Curdles, almost no foam, separates quickly. |
Homemade oat milk is the worst candidate. It lacks buffers, added oil, and commercial emulsifiers. It will curdle immediately, provide no body, and any foam will vanish before you finish pouring. Save it for cereal.
When you find a non-dairy milk option that works, stick with it. The brand matters more than the base ingredient. And if you’re counting, remember that the calorie content of milk changes significantly between dairy and these alternatives.
Temperature’s Hidden Role in Flavor Balance
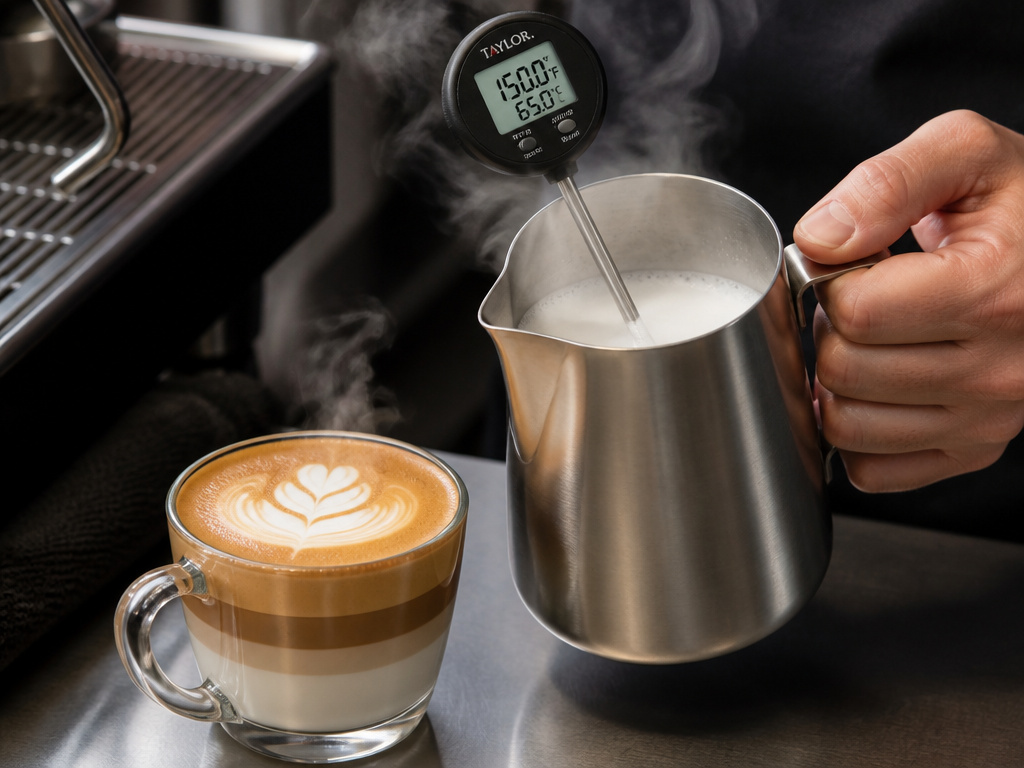
Temperature is a silent variable in your ratio. It doesn’t change the volumes, but it drastically changes the flavor perception and chemical stability of the drink.
Dairy milk’s sweetness comes from lactose, but that sweetness is most pronounced between 55°C and 65°C (130-149°F). The La Marzocco GB5 manual’s steaming instructions aim for this range. Above 68°C (154°F), the whey proteins denature. They can’t hold the sweet lactose in solution as effectively, and the milk tastes flat, even scalded. Your perfectly measured 1:4 ratio will taste weak and off if the milk is too hot.
The problem compounds with plant milks. Their emulsifiers and stabilizers are also heat-sensitive. Pushing past 60°C (140°F) risks breaking the emulsion, leading to a grainy texture and separation in the cup. The drink might look right for a minute, then split.
This is why a thermometer is non-negotiable for consistency, especially with milk alternatives. Your hand on the pitcher is not accurate enough to detect the five-degree window that separates sweet from scalded. Stop the steam when you hit 150°F for dairy, 140°F for oat barista blends.
TL;DR: Milk tastes sweetest below 154°F. Above that, proteins denature and sweetness drops, making your balanced ratio taste weak and cooked.
Tools and Tweaks for Perfect Ratio Consistency
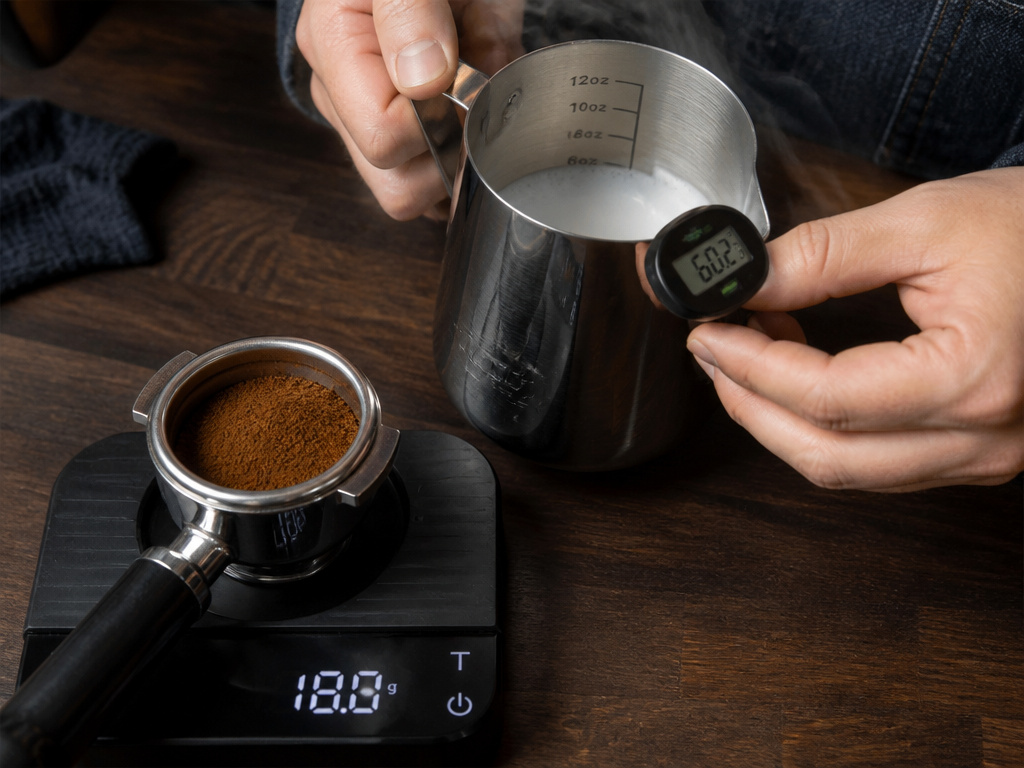
You need four things to lock in your ratio every time: a scale, a measuring pitcher, a thermometer, and the right coffee bean origins in your grinder.
First, dose your coffee by weight. Eighteen grams in, thirty-six grams out. This eliminates the variable of crema volume making your shot look bigger or smaller. Use a small scale under your glass.
Second, use a steaming pitcher with volume markings. Pour your cold milk to the 6-ounce line. After steaming and aerating, it will expand to roughly 8-10 ounces of total milk and microfoam. This visual cue is faster than math during your morning routine.
For plant milks, the digital thermometer is your anchor. Clip it to the pitcher. Steam until it reads 140°F, then stop. The difference between success and a broken, curdled mess is about ten degrees.
Finally, understand that the bean affects the needed ratio. A bright, acidic single-origin coffee might shine better with a slightly lower milk ratio, like 1:3.5, to let its fruit notes through. A dark, chocolatey blend can handle the full 1:4 or even 1:5 without getting lost. This is the final tweak after you’ve mastered the volumes and temperatures.
I used a generic organic oat milk for two weeks because it was cheap. Every latte had a faint, gritty curdle at the bottom, and the foam vanished before I could sip. Switching to Oatly Barista Edition fixed both problems on the first try. The price is higher, but a ruined drink costs more.
Frequently Asked Questions
Does a latte have more milk than a cappuccino?
Yes, significantly. A cappuccino traditionally follows a 1:1:1 ratio of espresso, steamed milk, and foam. A latte has much more steamed milk and only a thin layer of microfoam (about 1cm). The latte’s milk-to-coffee ratio is typically 4:1 or 5:1, while a cappuccino is closer to 1:1 or 2:1. For more on this, see our breakdown of cappuccino caffeine content.
Can I make a latte with regular brewed coffee?
Technically, no. A latte is defined by the use of espresso. The intense concentration and crema of espresso are necessary to hold up against the volume of milk. Using regular coffee results in a weak, milky drink often called a café au lait. If you lack an espresso machine, a strong Americano vs brewed coffee comparison shows you how to simulate espresso strength.
How much foam should be on a latte?
proper latte has about 1 centimeter (or ¼ inch) of velvety microfoam on top. This is foam with tiny, uniform bubbles that are integrated into the milk. It should not be a thick, dry, meringue-like layer of stiff foam. That’s for cappuccinos.
Why does my homemade latte taste bitter?
Bitterness usually means your espresso is over-extracted (ground too fine, tamped too hard, or brewed too long) or your milk is scalded. Before adjusting your ratio, ensure your shot time is 25-30 seconds and your milk temperature is at or below 150°F. A pinch of salt can also counteract bitterness in the cup.
How do I sweeten a latte without sugar?
You can use natural sweeteners like a dash of brown sugar sweetener for depth, or incorporate spices. Adding cinnamon while steaming the milk infuses sweetness without sugar. For a functional twist, some people add a teaspoon of MCT oil or coconut oil for richness and sustained energy.
The Bottom Line
The perfect latte ratio starts at 1:4, a double shot to eight ounces of milk. Steam that milk to 150°F for peak sweetness and top it with a centimeter of silky microfoam.
Then, adapt. If you have a Nespresso, trust its Caffè Latte or Latte Macchiato preset, they use different, machine-specific ratios. If you use plant milk, your ratio depends entirely on choosing a barista blend with enough fat and buffer salts to survive. And if you want Starbucks strength, remember they double the shots for a 16oz drink.
The numbers are a map. The taste is the territory. Weigh your coffee, measure your milk, watch your heat. Adjust the final ratio up or down by half an ounce based on your bean’s character. That’s how a recipe becomes your drink.
{
“@context”: “https://schema.org”,
“@type”: “HowTo”,
“name”: “How to Get the Perfect Latte Coffee to Milk Ratio”,
“totalTime”: “PT10M”,
“tool”: [
{
“@type”: “HowToTool”,
“name”: “Espresso machine or Nespresso”
},
{
“@type”: “HowToTool”,
“name”: “Steam wand or automatic frother”
},
{
“@type”: “HowToTool”,
“name”: “Milk pitcher (12-20 oz)”
},
{
“@type”: “HowToTool”,
“name”: “Digital thermometer (for plant milk)”
}
],
“step”: [
{
“@type”: “HowToStep”,
“name”: “Pull your espresso shot”,
“text”: “Brew a standard double shot: 18g of coffee yielding 36g of liquid espresso in 25-30 seconds.”
},
{
“@type”: “HowToStep”,
“name”: “Measure your milk”,
“text”: “For the classic ratio, steam 5-6 ounces of cold milk for your double shot, aiming for a total drink volume of 8-10 ounces.”
},
{
“@type”: “HowToStep”,
“name”: “Steam to the right temperature”,
“text”: “Heat milk to 55-65°C (130-149°F). Stop before 68°C (154°F) to avoid scalding and denatured proteins.”
},
{
“@type”: “HowToStep”,
“name”: “Create microfoam”,
“text”: “Aerate the milk for 1-3 seconds to create a thin, velvety foam layer about 1 cm thick, not stiff dry foam.”
},
{
“@type”: “HowToStep”,
“name”: “Combine immediately”,
“text”: “Pour the steamed milk and foam into the espresso, holding back the foam with a spoon to integrate it last.”
}
]
}
{
“@context”: “https://schema.org”,
“@type”: “FAQPage”,
“mainEntity”: [
{
“@type”: “Question”,
“name”: “Does a latte have more milk than a cappuccino?”,
“acceptedAnswer”: {
“@type”: “Answer”,
“text”: “Yes, significantly. A cappuccino traditionally follows a 1:1:1 ratio of espresso, steamed milk, and foam. A latte has much more steamed milk and only a thin layer of microfoam (about 1cm). The latte’s milk-to-coffee ratio is typically 4:1 or 5:1, while a cappuccino is closer to 1:1 or 2:1. For more on this, see our breakdown of cappuccino caffeine content.”
}
},
{
“@type”: “Question”,
“name”: “Can I make a latte with regular brewed coffee?”,
“acceptedAnswer”: {
“@type”: “Answer”,
“text”: “Technically, no. A latte is defined by the use of espresso. The intense concentration and crema of espresso are necessary to hold up against the volume of milk. Using regular coffee results in a weak, milky drink often called a café au lait. If you lack an espresso machine, a strong Americano vs brewed coffee comparison shows you how to simulate espresso strength.”
}
},
{
“@type”: “Question”,
“name”: “How much foam should be on a latte?”,
“acceptedAnswer”: {
“@type”: “Answer”,
“text”: “proper latte has about 1 centimeter (or ¼ inch) of velvety microfoam on top. This is foam with tiny, uniform bubbles that are integrated into the milk. It should not be a thick, dry, meringue-like layer of stiff foam. That’s for cappuccinos.”
}
},
{
“@type”: “Question”,
“name”: “Why does my homemade latte taste bitter?”,
“acceptedAnswer”: {
“@type”: “Answer”,
“text”: “Bitterness usually means your espresso is over-extracted (ground too fine, tamped too hard, or brewed too long) or your milk is scalded. Before adjusting your ratio, ensure your shot time is 25-30 seconds and your milk temperature is at or below 150°F. A pinch of salt can also counteract bitterness in the cup.”
}
},
{
“@type”: “Question”,
“name”: “How do I sweeten a latte without sugar?”,
“acceptedAnswer”: {
“@type”: “Answer”,
“text”: “You can use natural sweeteners like a dash of brown sugar sweetener for depth, or incorporate spices. Adding cinnamon while steaming the milk infuses sweetness without sugar. For a functional twist, some people add a teaspoon of MCT oil or coconut oil for richness and sustained energy.”
}
}
]
}
