
How to Use a Cold Drip Coffee Maker: The Essential Guide (58 chars)
To use a cold drip coffee maker, assemble the tiers, add medium-coarse ground coffee at a 1:10 coffee-to-water ratio, pre-wet the grounds, fill the top with ice water, and adjust the valve to a drip rate of one drop every 1 to 1.5 seconds. The process takes 3 to 5 hours and yields a smooth, complex concentrate.
Most guides tell you to aim for a “slow drip.” That’s the problem. “Slow” is subjective. Set it too fast and you get a weak, sour wash. Set it too slow and the grounds dry out, stalling the drip entirely. The difference between a brilliant cup and a wasted afternoon is a specific timing window.
This guide walks through the exact setup, the non-negotiable drip speed, and the model-specific ratios that actually work. You’ll learn how to troubleshoot a stalled brew, why your grind size matters more than your bean choice, and how to store the concentrate so it lasts.
Key Takeaways
- The drip rate is not a suggestion. Target one drop every 1 to 1.5 seconds. Faster than one drop per second leads to under-extraction and a thin, acidic cup.
- Use a medium-coarse grind, similar to what you’d use for a French press. A fine grind will compact and choke the drip, while a coarse grind will cause water to channel through too quickly.
- Always pre-wet your coffee grounds with a small amount of water before starting the main drip. Skipping this causes the water to find a single path through the dry bed, resulting in uneven extraction.
- Cold drip produces a ready-to-drink concentrate. Dilute it roughly 1:1 with water or milk. It’s not the same as the thicker, immersion-style cold brew you might be used to.
- Clean all parts, especially the filter, immediately after use. Coffee oils solidify and will clog the mesh or paper, ruining the drip rate for your next batch.
How a Cold Drip Coffee Maker Works (It’s Not Just a Slow Pour)
A cold drip tower, or Kyoto-style brewer, uses gravity and patience instead of heat. Cold water drips from a top reservoir through a bed of coffee grounds into a waiting carafe below. Because the water is cold and the contact time is long, typically 3 to 5 hours, the extraction is selective. You get bright, nuanced acidity and complex aromatics that heat often burns away, with almost none of the bitter, oily compounds that can dominate immersion brewing.
The Hario Cold Brew Coffee Maker (Water Dripper) model WP-1GDCP-600T specifies a drip rate of 1 drop every 1.5 seconds for its 600ml capacity, resulting in a brew time of 3-5 hours. This timing extracts sweetness without pulling harsh tannins.
The hardware is simple: a top water chamber with an adjustable valve, a middle chamber for the coffee, and a bottom carafe. The valve is the control panel. Your job is to calibrate it to that golden 1-1.5 second drip. The brewed coffee methods you know from a hot pot are irrelevant here. This is a different extraction physics.
TL;DR: Cold drip extracts coffee slowly with cold water, highlighting acidity and aroma while minimizing bitterness. Your only control is the drip speed from the valve.
The Gear You Actually Need (Beyond the Brewer)
Your cold drip maker comes with the vessel. These are the tools that determine success or failure.
- A kitchen scale is non-negotiable. Measuring coffee and water by volume is useless. The difference between 50g and 60g of whole beans is massive for extraction balance. Use the scale.
- A good burr grinder. Blade grinders produce a mix of dust and boulders. The dust will clog your filter; the boulders will let water rush through untouched. You need a consistent medium-coarse grind. The investment in a proper burr grinder pays off here more than in almost any other brew method.
- Filtered water. Tap water minerals and chlorine will directly imprint their flavor onto your delicate concentrate. Use the same good water you’d use for hot brewed coffee.
- Ice. Adding ice to the top reservoir isn’t just for show. It keeps the water temperature consistently cold throughout the entire brew cycle, which is essential for a clean extraction.
Forget the fancy gooseneck kettles. Your hands and these four items are what you’ll use every time.
How to Set Up Your Cold Drip Coffee Maker (Step-by-Step)
Follow this sequence. Swapping steps leads to a clogged filter or a stalled drip.
Before you start: Ensure all parts are clean and dry. A dirty filter from your last brew will have solidified oils that restrict water flow. Also, place your brewer on a stable, level surface. An uneven tower causes water to pool on one side of the coffee bed.
- Assemble the brewer. Fit the middle coffee chamber onto the bottom carafe. Insert the filter, whether it’s a fine metal mesh, a cloth sack, or a paper filter, into the coffee chamber. Paper filters, especially unbleached filters, can impart a subtle papery taste but give the cleanest cup.
- Weigh and add your coffee. Grind your beans to a medium-coarse consistency. For most brewers, a 1:10 coffee-to-water ratio is the sweet spot. That means 50g of coffee for 500ml of water, or 55g for 550ml like the Hario manual states. Add the grounds to the middle chamber and gently shake to level the bed. Do not tamp.
- Pre-wet the grounds. This is the step every impatient person skips. Slowly drizzle about 50ml of cold water over the grounds until they are evenly damp. This allows the coffee to “bloom” and swell, creating a uniform bed for the main drip. If you skip this, the first water will carve a channel straight down and the rest of your brew will be uneven.
- Place the water chamber. Set the top reservoir onto the middle chamber. Ensure the valve is in the closed position.
- Add water and ice. Fill the top chamber with cold, filtered water. Drop in a handful of ice cubes. The ice lowers the starting temperature and melts slowly, maintaining the cold environment. The OXO Compact Cold Brew maker uses a “Rainmaker” showerhead for this same reason, even, cold distribution.
- Set the drip rate. Now open the valve slightly. Your target is one drip every 1 to 1.5 seconds. Watch it for a full minute. Adjust the valve in tiny increments until the timing is consistent. This is the most important part of the entire process.
The brew will now run unattended for 3 to 5 hours. You might check on it once halfway through to ensure the drip hasn’t stopped. When the top chamber is empty, your concentrate is ready in the bottom carafe.
TL;DR: Assemble, weigh coffee (1:10 ratio), pre-wet grounds, add ice water, then calibrate the valve to a 1-1.5 second drip. Pre-wetting prevents channeling.
The Coffee & Water Variables You Control
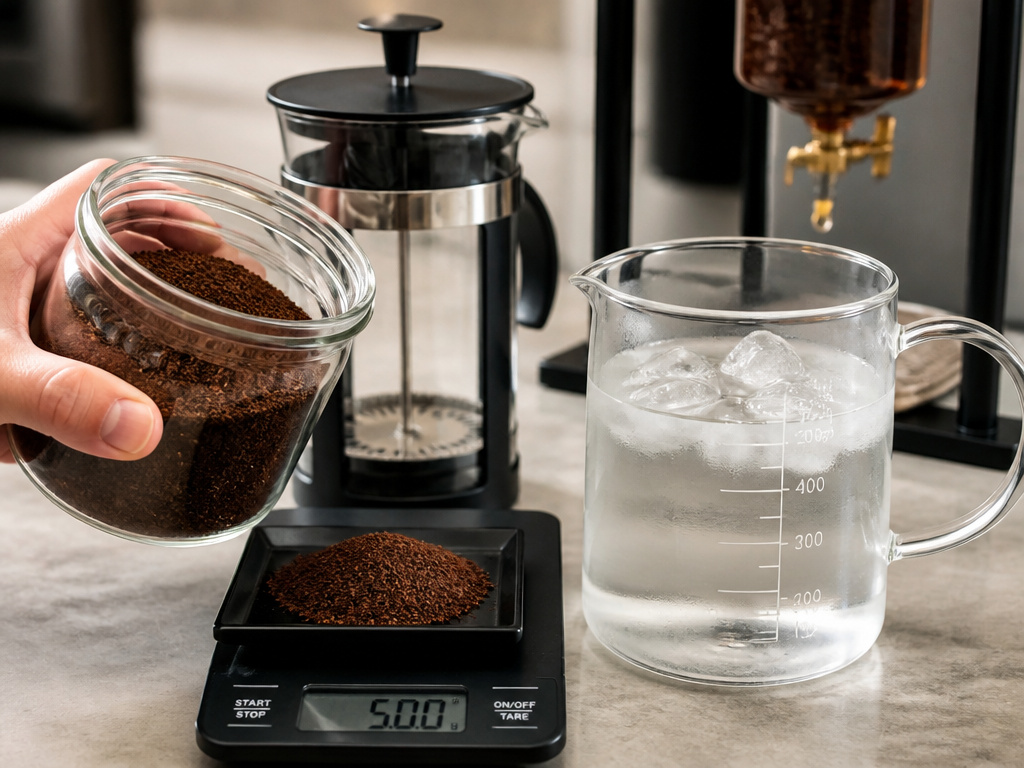
You can’t change the drip rate once it’s set. Your other levers are the coffee itself and the water you use.
| Variable | Target | Why It Matters | Risk If Wrong |
|---|---|---|---|
| Coffee Grind | Medium-coarse (French Press) | Allows water to flow through slowly but evenly, maximizing surface area for extraction. | Fine grind = clogged filter, stalled drip. Coarse grind = water channels, weak brew in 2 hours. |
| Coffee Amount | 1:10 ratio (coffee:water) | The standard for balanced strength. Produces a concentrate meant for dilution. | Higher ratio (1:8) = over-extracted, bitter. Lower ratio (1:12) = weak, sour, lacking body. |
| Water Quality | Filtered, low mineral | Pure water extracts coffee solubles cleanly without adding its own flavors. | Hard tap water = flat, chalky-tasting concentrate with muted aromatics. |
| Brew Temperature | As cold as possible (use ice) | Cold extraction minimizes bitter tannins and harsh acids. | Warm room-temperature water = faster, muddier extraction that tastes more like stale iced coffee. |
Common mistake: Using dark roast beans exclusively, the intense, smoky notes can overpower the delicate fruity and floral highs that cold drip excels at pulling out. Try a light roast coffee or a bright single-origin coffee for your first few batches.
The coffee bean roast level is a matter of taste, but the method favors brighter, more complex beans. A dense Ethiopian Yirgacheffe will reveal tea-like jasmine notes. A Brazilian natural process might give you berries and cream. A dark roast will just taste like chocolate and smoke, which isn’t bad, but you’re missing the point.
Troubleshooting Your Cold Drip Brew
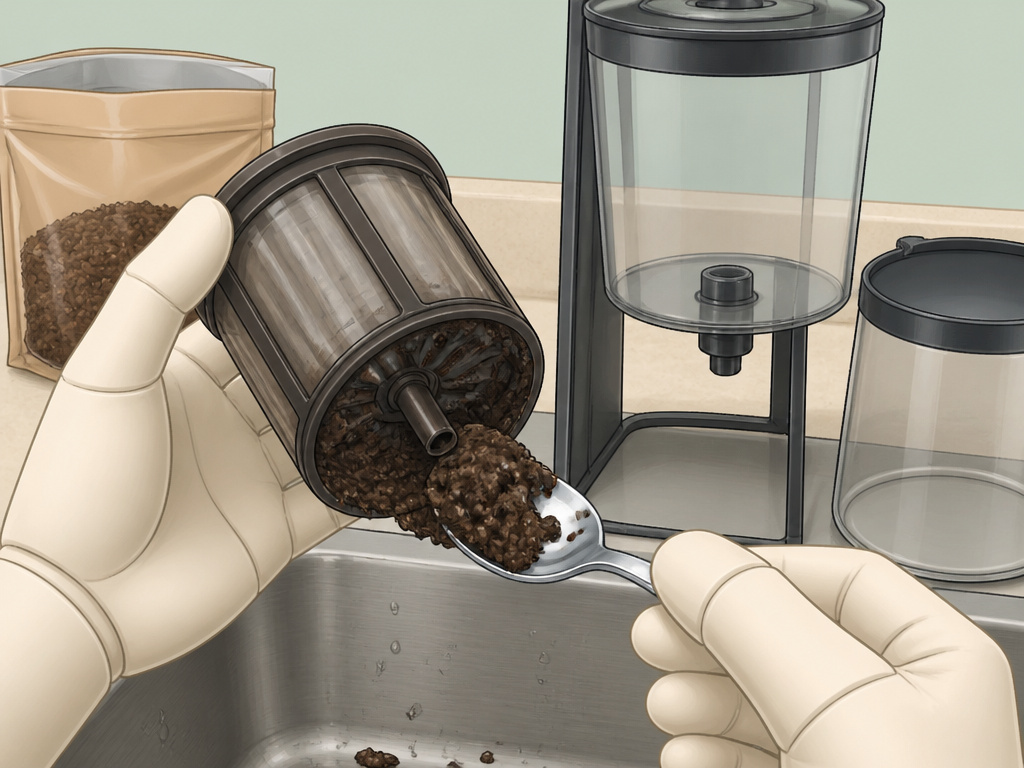
It’s a simple system, so when it fails, the causes are few. Use this table to diagnose.
| Problem | Likely Cause | The Fix |
|---|---|---|
| Drip stops completely | Coffee grounds are too fine and have clogged the filter. | Disassemble, clean the filter, and re-grind your coffee more coarsely. You cannot restart a stalled brew—dump it and start over. |
| Drip is way too fast (streaming) | Valve is too open, or coffee grind is too coarse. | Close the valve slightly. If the grind is the issue, note it for next time. The current batch will be weak and sour. |
| Finished concentrate tastes sour/weak | Drip rate was too fast, OR brew time was too short, OR coffee ratio was too low. | All three lead to under-extraction. Next time: slow the drip, ensure a full 3-5 hour brew, and check your 1:10 ratio on a scale. |
| Concentrate tastes bitter/harsh | Drip rate was too slow, OR coffee ratio was too high, OR beans were a very dark roast. | Over-extraction. Next time: slightly increase drip speed, use less coffee per water volume, or try a lighter roast bean. |
| Water pools on top of grounds | Coffee bed is uneven or was tamped, OR the pre-wet step was skipped. | The bed is preventing even flow. Gently stir the top layer with a chopstick to break the surface tension. Next time, pre-wet. |
The most common issue is the stalled drip. You walk by after two hours and the top chamber is still full, with not a drop falling. This is almost always a grind that’s too fine. The grounds swell and form a paste against the filter. Your only option is a full reset.
I tried to rush a batch once with pre-ground “espresso” fineness. The drip lasted three minutes before it clogged solid. I spent longer cleaning the packed, muddy grounds out of the filter than the brew would have taken. Now I keep a dedicated bag of beans ground just for cold drip.
Cold Drip vs. Immersion Cold Brew: Which Should You Make?
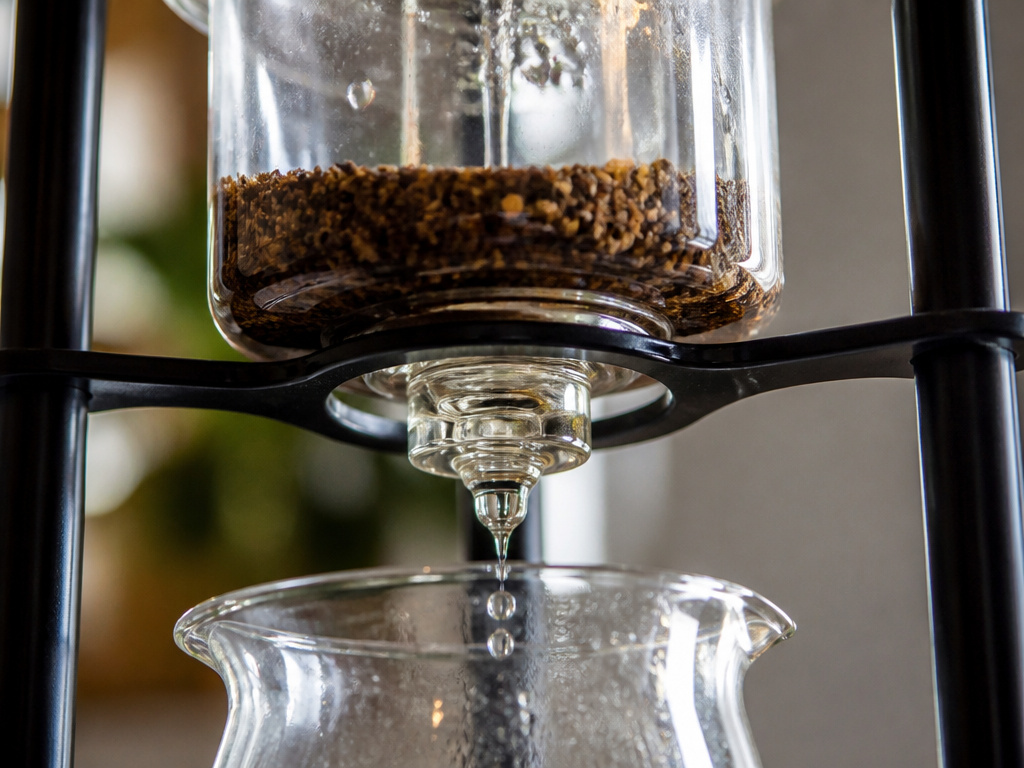
They both make cold coffee. That’s where the similarity ends. Choosing one over the other depends on what you want in your glass.
- Cold Drip (Kyoto-style): The process is active and requires attention to setup. The cup profile is brighter, more aromatic, and often more complex. It highlights acidity and floral notes. The result is a ready-to-drink concentrate with a lighter body. It’s for sipping and appreciating.
- Immersion Cold Brew (Toddy / French press): The process is passive, mix grounds and water, wait 12-24 hours, filter. The cup profile is heavier, sweeter, and much less acidic. It highlights chocolate, nutty, and smooth notes. The result is often a super-concentrate that must be diluted significantly. It’s for a strong, smooth, daily drink.
The Toddy Cold Brew System is the classic immersion model. It’s foolproof and makes a large batch of a thick, almost syrupy base. The OXO Compact Cold Brew maker is a hybrid, using immersion but with a clever rain-shower top for even saturation.
If you love the bright, winey character of a Kenyan pour-over but want it cold, go drip. If you want a smooth, low-acid coffee that you can mix with milk without thinking, go immersion. Your caffeine intake will be similar, but the experience is different.
TL;DR: Cold drip is complex and aromatic; immersion cold brew is smooth and heavy. Drip needs monitoring; immersion is set-and-forget.
Serving, Storing, and Reviving Your Concentrate
When the dripping stops, give the concentrate in the bottom carafe a good stir. The first drops are more extracted than the last; stirring homogenizes the batch.
Serve it over ice, diluted roughly 1:1 with water, milk, or even tonic water for a sparkling option. Because it’s less bitter, you might find you need less sweetener. Some people even use a pinch of salt for reducing bitterness and enhancing sweetness, a trick that works well here.
Store any leftover concentrate in a sealed glass jar or bottle in the refrigerator. It will keep for up to two weeks. The flavor will mellow slightly over time. If it tastes a little flat after a week, a splash of fresh concentrate or a tiny pinch of salt can wake it up.
Clean your brewer immediately. Rinse all parts with warm water. Use a mild detergent on the filter to remove oily residue. Let everything air-dry completely before storing. A clean brewer is a reliable brewer.
Frequently Asked Questions
Can I use any coffee grinder for cold drip?
You can, but a blade grinder will cause problems. You need a consistent medium-coarse grind, which only a burr grinder can reliably provide. Blade grinders create fine particles that clog and coarse chunks that under-extract.
How long does cold drip coffee last in the fridge?
Properly stored in a sealed container, cold drip concentrate maintains good flavor for about 10 to 14 days. After two weeks, it begins to taste stale and lose its aromatic brightness.
Why is my cold drip coffee sour?
Sourness means under-extraction. The most likely causes are a drip rate that’s too fast (less than 1 second per drop), a brew time that’s too short, or a coffee-to-water ratio that’s too low (not enough coffee). Check and slow your drip rate first.
Do I need to use ice in the top chamber?
It’s highly recommended. The ice keeps the water temperature consistently cold, which is essential for the slow, selective extraction that defines cold drip. Without ice, the water will warm to room temperature, speeding up extraction and pulling more bitter compounds.
Is cold drip stronger than regular coffee?
It’s a concentrate, so ounce-for-ounce it has a higher caffeine content than traditional drip coffee. However, you dilute it before drinking. A typical serving ends up having caffeine levels comparable to a standard cup of coffee, though this varies with your dilution ratio.
Can I use paper filters in my metal-filter dripper?
Yes, and many enthusiasts prefer it. A paper filter, especially a biodegradable filter, produces a cleaner, sediment-free cup by trapping oils and fine particles. It can slightly slow the drip, so you may need to open your valve a touch more.
The Bottom Line
Mastering a cold drip coffee maker comes down to respecting three specifics: the 1:10 coffee ratio, the medium-coarse grind, and the sacred 1.5-second drip. Get those right and the machine does the rest, rewarding you with a cup that’s unlike any other coffee you can make at home. It’s a weekend ritual, a showpiece, and a delicious testament to the fact that the best flavors often come from going slow. Start with a bright bean, watch that drip like a hawk for the first minute, and enjoy the wait.
{
“@context”: “https://schema.org”,
“@type”: “HowTo”,
“name”: “How to Use a Cold Drip Coffee Maker”,
“totalTime”: “PT4H”,
“tool”: [
{
“@type”: “HowToTool”,
“name”: “Cold drip coffee maker (e.g., Hario, OXO, or similar)”
},
{
“@type”: “HowToTool”,
“name”: “Kitchen scale”
},
{
“@type”: “HowToTool”,
“name”: “Medium-coarse ground coffee”
},
{
“@type”: “HowToTool”,
“name”: “Filtered water and ice”
}
],
“step”: [
{
“@type”: “HowToStep”,
“name”: “Assemble and add coffee”,
“text”: “Set up your brewer’s tiers. Add medium-coarse ground coffee to the middle chamber, using a 1:10 coffee-to-water ratio (e.g., 55g coffee for 550ml water).”
},
{
“@type”: “HowToStep”,
“name”: “Pre-wet the grounds”,
“text”: “Slowly drizzle a small amount of cold water over the grounds to saturate them. This prevents channeling and ensures even extraction.”
},
{
“@type”: “HowToStep”,
“name”: “Fill the top reservoir”,
“text”: “Add cold, filtered water and ice cubes to the top chamber. The ice helps maintain a low temperature throughout the brew.”
},
{
“@type”: “HowToStep”,
“name”: “Set the drip rate”,
“text”: “Adjust the valve so water drips at a rate of one drop every 1 to 1.5 seconds. This slow rate is critical for proper extraction.”
},
{
“@type”: “HowToStep”,
“name”: “Monitor and wait”,
“text”: “Let the brewer run for 3-5 hours. Check once or twice to ensure the drip hasn’t stalled. The finished concentrate will collect in the bottom carafe.”
},
{
“@type”: “HowToStep”,
“name”: “Serve and store”,
“text”: “Stir the concentrate, then dilute with water or milk over ice. Store any leftover concentrate in a sealed container in the refrigerator for up to two weeks.”
}
]
}
{
“@context”: “https://schema.org”,
“@type”: “FAQPage”,
“mainEntity”: [
{
“@type”: “Question”,
“name”: “Can I use any coffee grinder for cold drip?”,
“acceptedAnswer”: {
“@type”: “Answer”,
“text”: “You can, but a blade grinder will cause problems. You need a consistent medium-coarse grind, which only a burr grinder can reliably provide. Blade grinders create fine particles that clog and coarse chunks that under-extract.”
}
},
{
“@type”: “Question”,
“name”: “How long does cold drip coffee last in the fridge?”,
“acceptedAnswer”: {
“@type”: “Answer”,
“text”: “Properly stored in a sealed container, cold drip concentrate maintains good flavor for about 10 to 14 days. After two weeks, it begins to taste stale and lose its aromatic brightness.”
}
},
{
“@type”: “Question”,
“name”: “Why is my cold drip coffee sour?”,
“acceptedAnswer”: {
“@type”: “Answer”,
“text”: “Sourness means under-extraction. The most likely causes are a drip rate that’s too fast (less than 1 second per drop), a brew time that’s too short, or a coffee-to-water ratio that’s too low (not enough coffee). Check and slow your drip rate first.”
}
},
{
“@type”: “Question”,
“name”: “Do I need to use ice in the top chamber?”,
“acceptedAnswer”: {
“@type”: “Answer”,
“text”: “It’s highly recommended. The ice keeps the water temperature consistently cold, which is essential for the slow, selective extraction that defines cold drip. Without ice, the water will warm to room temperature, speeding up extraction and pulling more bitter compounds.”
}
},
{
“@type”: “Question”,
“name”: “Is cold drip stronger than regular coffee?”,
“acceptedAnswer”: {
“@type”: “Answer”,
“text”: “It’s a concentrate, so ounce-for-ounce it has a higher caffeine content than traditional drip coffee. However, you dilute it before drinking. A typical serving ends up having caffeine levels comparable to a standard cup of coffee, though this varies with your dilution ratio.”
}
},
{
“@type”: “Question”,
“name”: “Can I use paper filters in my metal-filter dripper?”,
“acceptedAnswer”: {
“@type”: “Answer”,
“text”: “Yes, and many enthusiasts prefer it. A paper filter, especially a biodegradable filter, produces a cleaner, sediment-free cup by trapping oils and fine particles. It can slightly slow the drip, so you may need to open your valve a touch more.”
}
}
]
}
