
How to Make Coffee Syrup: The Ultimate Cold-Infusion Method
You make coffee syrup by dissolving sugar in water, with or without heat, and adding flavorings. The two proven paths are a fast hot process for a neutral base or a cold-infusion method that captures brighter, fresher fruit and citrus notes without cooking.
Most people reach for a saucepan first. That works, but it turns fresh berry or orange flavors into a jammy, stewed version of themselves. The real shift happens when you stop cooking the flavor and let sugar pull it out cold.
This guide walks through both methods, the tools that matter, and the storage rules that keep your syrup safe. You will also see which flavors pair with light roasts versus dark espresso.
Key Takeaways
- The cold-infusion method (like oleo saccharum) extracts brighter, truer fruit and citrus flavors than heating.
- Your syrup’s shelf life depends directly on the sugar ratio: a 2:1 sugar-to-water syrup resists spoilage longer than a standard 1:1 syrup.
- Always refrigerate homemade syrup immediately and use sterile jars—this isn’t a suggestion, it’s a food safety requirement.
- Pair delicate flavors like vanilla or orange with light roast coffee; use robust flavors like cinnamon or dark caramel with espresso.
- Adding a pinch of salt or a dash of citrus zest to your syrup base can cut cloying sweetness and highlight coffee’s natural notes.
The Two Core Methods: Hot Process vs. Cold Infusion
Your first choice is the most important one. Do you cook the syrup or not? The hot process is fast and familiar. The cold infusion is slower but delivers a different kind of flavor.
The hot process is simple syrup in its most basic form. Combine sugar and water in a saucepan, apply heat, and stir until the sugar crystals disappear. The result is a clear, neutral sweetener ready in under ten minutes. You can add vanilla beans, cinnamon sticks, or herbs to the pot to infuse flavor as it heats.
A standard simple syrup is a 1:1 ratio by weight of granulated sugar to water, heated just until the sugar dissolves and the liquid turns clear. This creates an invert sugar syrup that resists crystallization.
The cold infusion method skips the stove entirely. Also called an oleo saccharum for citrus or a cheong for fruit, it relies on sugar’s hygroscopic nature. You layer fruit or citrus peels with an equal weight of sugar in a jar. Over 8 to 12 hours, the sugar pulls moisture and essential oils from the fruit, creating a potent, aromatic syrup. The flavor is notably brighter and fresher. It tastes like the fruit itself, not like cooked fruit.
TL;DR: Use the hot method for a versatile, neutral base syrup. Use the cold method when you want the pure, uncooked essence of citrus or berries.
Essential Tools & Ingredients
You do not need specialized gear. A small saucepan, a stirring spoon, and a container for storage cover the hot method. For cold infusion, you need glass jars with airtight lids.
The ingredient list is short. Granulated white sugar is the standard because it dissolves cleanly. You can substitute brown sugar for a deeper molasses note. Filtered water is better than tap water if your local water has strong mineral flavors.
For flavoring, the options are vast. Whole spices like cinnamon sticks or star anise work in the hot process. For cold infusion, use organic citrus fruits for their peels or ripe, clean berries. A pinch of salt added to any syrup base can balance excessive sweetness and enhance other flavors.
| Tool / Ingredient | Hot Process Purpose | Cold Infusion Purpose |
|---|---|---|
| Granulated Sugar | Primary sweetener, 1:1 or 2:1 ratio with water. | Draws out moisture and oils from fruit via osmosis. |
| Glass Jars | Storing cooled syrup. | Vessel for layering fruit and sugar; extraction chamber. |
| Fine-Mesh Strainer | Straining out spent spices/herbs. | Separating syrup from fruit solids after extraction. |
| Citrus Zester | Not typically used. | Essential for removing zest without bitter pith. |
The jar is critical. Use a clean glass jar with a clamp lid or a screw-top mason jar. Plastic can absorb odors. Always start with sterile jars to discourage microbial growth.
Step-by-Step: The Hot Process (Simple Syrup)
This is the default. It works every time if you avoid two common pitfalls: boiling the syrup and using dirty containers.
- Combine sugar and water in your saucepan. Use a 1:1 ratio by volume for a standard syrup. For a longer shelf life, use a 2:1 ratio (two parts sugar to one part water). This creates a saturated solution that inhibits bacterial growth.
- Heat the mixture over medium-low heat. Stir gently until the sugar is fully dissolved. The moment the liquid goes from cloudy to completely clear, you are done. Do not let it boil.
- Remove from heat and add flavorings (optional). Drop in a vanilla bean pod, a few cinnamon sticks, or fresh herbs. The residual heat will steep them.
- Cool completely. Let the syrup cool to room temperature in the pan. This usually takes 20 to 30 minutes.
- Strain and bottle. Pour the syrup through a fine-mesh strainer into your sterile glass jar. Discard the spent flavorings.
Common mistake: Boiling the syrup to “make it faster” — this can cause the sugar to re-crystallize as it cools, creating a gritty texture. It also drives off volatile aromatics from any added flavorings.
The syrup is ready to use as soon as it’s cool. Refrigerate it immediately. A 1:1 syrup lasts about 2-3 weeks. A 2:1 syrup can last a month or more because the higher sugar concentration lowers water activity.
Step-by-Step: Cold-Infusion Method (Oleo Saccharum)
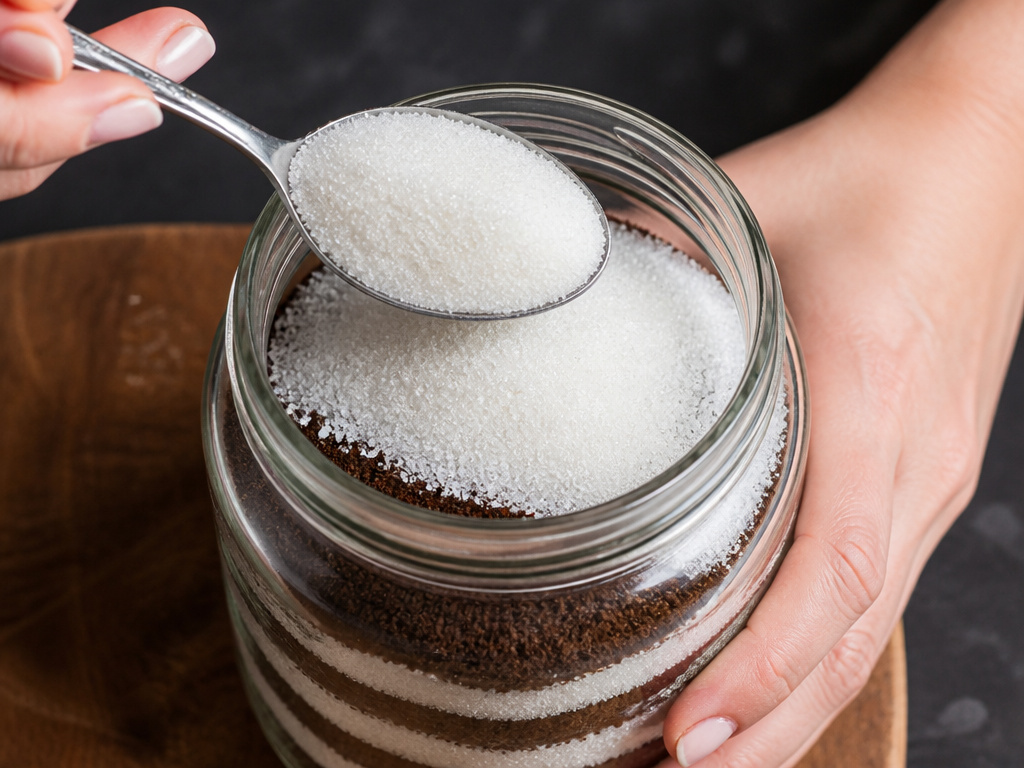
This method requires patience but almost no active work. The key is maximizing surface contact between the sugar and the flavor source.
- Prepare your fruit or citrus. Wash and dry it thoroughly. For citrus, use a zester to remove the colorful zest, avoiding the bitter white pith. For berries, crush them lightly or slice them to expose more surface area.
- Layer with sugar in a jar. Place a layer of fruit or zest in the bottom of a clean jar. Cover with a layer of sugar. Repeat until the jar is full or your ingredients are gone, ending with a sugar layer. The ratio is 1:1 by weight.
- Seal and wait. Close the jar tightly. Let it sit at room temperature for 8 to 12 hours. You will see the sugar becoming damp and liquid pooling at the bottom.
- Agitate and wait longer. Gently shake or stir the jar to redistribute the sugar. Let it sit for another few hours until most of the sugar has dissolved into syrup.
- Strain. Pour the contents through a fine-mesh strainer or cheesecloth into a clean bowl. Press gently on the solids to extract all the syrup.
The resulting liquid is intensely flavored. It is also quite thick. You can use it as-is or thin it with a small amount of water if desired. This syrup is exceptionally good in iced coffee or an espresso tonic.
Flavor Pairing & Creative Variations
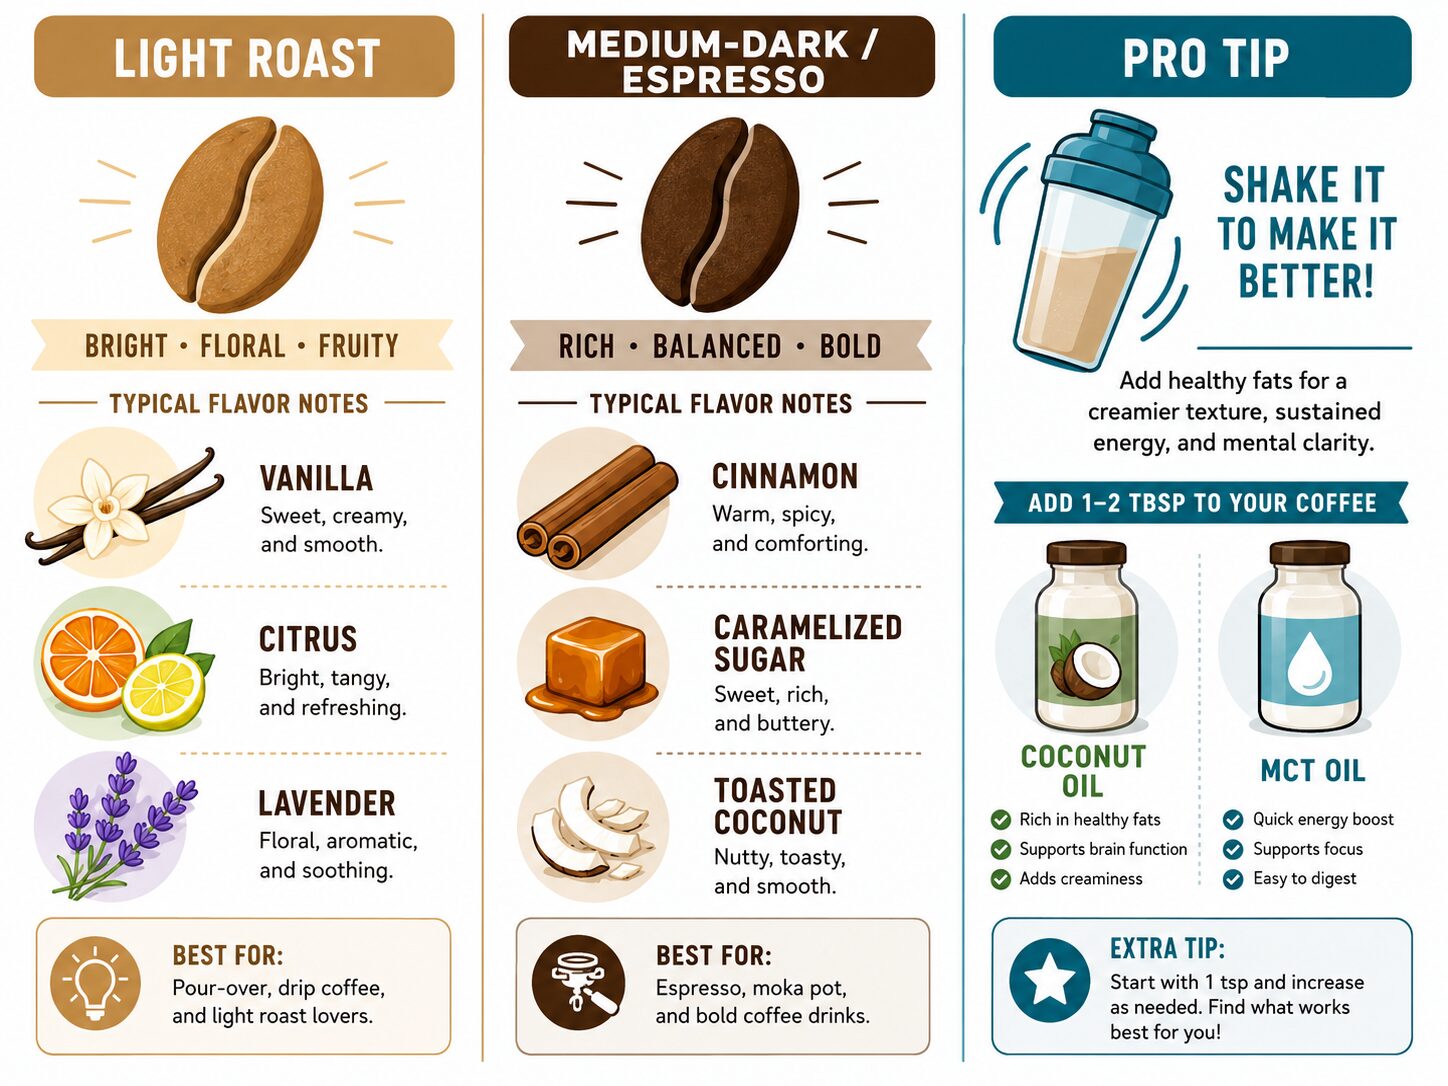
Not all syrups work with all coffees. A delicate peach syrup will vanish in a dark, bitter espresso. Think about matching intensity.
For light roast or blonde roast beans, which have brighter, floral notes, pair with subtle syrups.
* Vanilla Bean: The classic. Scrape a vanilla pod into your hot syrup base.
* Orange or Lemon Oleo Saccharum: The citrus oils cut through the coffee’s acidity beautifully.
* Lavender: Use dried culinary lavender sparingly in the hot process; it can taste soapy if overdone.
For medium-dark roasts or espresso from a coffee blend, you need bigger flavors.
* Cinnamon & Spice: Simmer cinnamon sticks, cardamom pods, and a few black peppercorns in your syrup.
* Dark Caramel: Gently caramelize some sugar first, then carefully add water to create a rich, toffee-like syrup.
* Toasted Coconut: Add unsweetened coconut flakes to the hot syrup and strain.
For a creamy, rich texture without dairy, consider adding a fat component to your syrup after it cools, like a teaspoon of coconut oil or MCT oil. Shake vigorously before each use.
Safety, Storage & Shelf Life

This is the non-negotiable part. Homemade syrup is a perishable food product.
The USDA Food Safety and Inspection Service guideline is clear: refrigerate perishable foods promptly at 40°F (4°C) or below. Your syrup, once cooled, goes directly into the fridge. Do not let it sit on the counter to cool overnight.
Before you start: Sugar syrups can grow mold and harmful bacteria if contaminated. Always use clean, sterile jars and utensils. Refrigerate immediately after the syrup reaches room temperature. If you see cloudiness, fizzing, or mold, discard the entire batch.
Shelf life is not a fixed number. It depends on your sugar ratio and kitchen hygiene.
* 1:1 Simple Syrup: Lasts 2-3 weeks refrigerated.
* 2:1 Rich Syrup: Lasts 4-6 weeks refrigerated due to lower water activity.
* Cold-Infusion Fruit Syrups: Use within 2 weeks. The fresh fruit introduces more variables.
Always store in airtight glass containers. Label your jars with the date they were made. If you are watching your calorie content, remember that a tablespoon of 1:1 syrup contains about 50 calories, almost entirely from sugar.
Frequently Asked Questions
Can I use honey or maple syrup instead of sugar?
You can, but it changes the process and shelf life. Honey can be gently warmed to make it pourable, but overheating destroys its delicate flavors. Maple syrup is already a liquid; you can use it straight or reduce it gently to thicken. Neither creates the same preservative environment as a saturated sugar syrup, so refrigerate and use within 1-2 weeks.
Why did my syrup get cloudy or form crystals?
Cloudiness in a hot-process syrup usually means undissolved sugar or impurities. Re-warm it gently and stir. Crystals mean the syrup was either boiled (encouraging re-crystallization) or stored in a very cold part of the fridge. Gently reheating and stirring will usually dissolve them back in.
How much syrup should I add to my coffee?
Start with one teaspoon for a standard 8-ounce cup. Taste and adjust. Remember, the caffeine content of your drink is unaffected by the syrup, but the flavor balance is everything. It is easier to add more than to fix an overly sweet cup.
Can I make a large batch and can it for shelf-stable storage?
True shelf-stable canning for syrups requires precise pH control, added citric acid, and a water bath canning process to prevent botulism risk. For most home cooks, refrigeration is the recommended safe method. Do not attempt canning without following a tested recipe from a reliable food preservation authority.
My syrup developed a fermented smell. Is it safe?
No. Toss it. A fermented or alcoholic smell indicates yeast or bacterial activity. This can happen if utensils weren’t clean, the syrup wasn’t cooled quickly enough, or it was stored too long. Do not taste it.
The Bottom Line
Making coffee syrup at home strips away the mystery and the long ingredient lists from store-bought bottles. You control the sugar, the flavor, and the quality.
The hot process gives you a reliable workhorse syrup in minutes. The cold infusion method is a revelation for fruit and citrus lovers—it captures a vibrancy that heat destroys. Whichever path you choose, your first move after the syrup cools is to get it into a clean jar and into the refrigerator. That habit keeps your creations safe.
Start with a plain vanilla or cinnamon-infused coffee syrup. Then try a cold-infused orange peel oleo saccharum. The difference in your iced coffee or latte will be obvious. Once you see how simple it is, the $15 bottle at the grocery store loses its appeal.
