
How to Grind Coffee Beans Without a Grinder: 3 Easy Methods
To grind coffee beans without a grinder, use a high-speed blender, food processor, or rolling pin. These provide the necessary force for uniform particles. A blender or processor works in 15-20 second pulses, while a rolling pin requires crushing beans between parchment on a sturdy surface for a coarse, French press-style grind.
To grind coffee beans without a grinder, you need a tool with enough torque and speed to fracture the roasted bean into consistent particles. A high-speed blender, a food processor with an S-blade, or a rolling pin with a heavy cutting board are the only three kitchen items that generate the necessary force. Everything else, a mortar and pestle, a knife, a hammer, produces dust and chunks that brew bitter and weak in under two minutes.
The universal mistake is assuming any crushing tool will work. Coffee extraction depends on uniform particle size. A mortar gives you flour-fine dust and pea-sized boulders in the same bowl. The dust over-extracts into bitterness instantly, while the boulders under-extract, leaving sour, weak coffee behind. You get both problems in one cup.
This guide ranks the three tools that actually work, gives you the exact pulse counts and visual checkpoints for each, and tells you which brewing methods can survive the inconsistency. It also explains why your blade grinder still counts as a “grinder” and when you should just buy a $30 Krups spice grinder instead of risking your $200 blender motor.
Key Takeaways
- A high-speed blender is your best bet for drip or pour-over coffee, but pulse in 1-second bursts and stop after 8-10 pulses to avoid turning beans into powder.
- A food processor with an S-blade can manage a coarse grind for French press, but you must shake the bowl between 12-15 one-second pulses to prevent uneven chunks.
- A rolling pin and cutting board will only produce a serviceable grind for a Moka pot or Turkish coffee; expect the process to take 5-7 minutes of vigorous crushing and sifting.
- Never use a mortar and pestle for coffee beans, the inconsistent particle size guarantees a simultaneously bitter and sour brew within two minutes.
- All ground coffee oxidizes rapidly; brew your batch within five minutes of grinding or the flavors will degrade noticeably.
What Tools Can Grind Coffee Beans? (And Which Can’t)
Not every kitchen tool can fracture a roasted coffee bean. You need shear force, not just pressure. A blade spinning at 20,000 RPM or a rolling pin transferring your full body weight through a dense cutting board creates that shear. A mortar and pestle relies on crushing and grinding, which produces a wildly inconsistent mix of dust and boulders.
A proper grind for any brewing method looks like granulated sugar or coarse sand, with most particles being roughly the same size. That consistency is what allows water to extract flavor evenly across the entire dose. When particle size varies, water finds the path of least resistance, it over-extracts the tiny particles into bitterness and under-extracts the large chunks, leaving sour notes. You taste both failures at once.
Blade grinders and burr grinders are both “grinders.” A blade grinder uses a spinning blade to chop beans; a burr grinder uses two abrasive surfaces to shear beans into a precise size. The blade creates less consistency, but it still produces a usable grind far superior to any manual crushing method.
The three tools that work each have a best-use case. Your choice depends entirely on what you’re brewing.
| Tool | Best For Brew Method | Worst For | Why It Works |
|---|---|---|---|
| High-speed blender | Drip, Pour-over | Espresso, Turkish | High RPM and sharp blades can achieve a medium-fine grind with careful pulsing. |
| Food processor (S-blade) | French press, Cold brew | Pour-over, AeroPress | The wider bowl and slower blade allow for a coarser, more controlled chop. |
| Rolling pin | Moka pot, Turkish | Drip, French press | Direct pressure can crush beans fine enough for high-pressure brewers, but slowly. |
TL;DR: Use a blender for drip coffee, a food processor for French press, and a rolling pin only for Moka pot or Turkish. Everything else in your kitchen will make bad coffee.
The Blender Method
A high-speed blender like a Ninja or Vitamix has the horsepower to chop beans. The trick is preventing it from turning them into dust. The blades are designed to puree, not grind, so you must pulse in extremely short bursts.
Common mistake: Running the blender continuously for 10 seconds, this creates a cloud of super-fine dust that immediately over-extracts and a handful of whole beans that never crack. Your coffee will taste bitter and weak simultaneously.
Chill the blender pitcher and blade assembly in the freezer for about thirty seconds before you start. Cold metal reduces static cling, so fewer grounds stick to the sides. Weigh your beans, start with 50 grams for two cups, and add them to the pitcher.
Secure the lid. Pulse for one second, then stop. Shake the pitcher vigorously to settle the beans back toward the blades. Pulse for one second again. Repeat this cycle eight to ten times. After the eighth pulse, stop and check. The grounds should resemble coarse sand, with no whole beans visible. If you see whole beans, pulse one or two more times.
Immediately pour the contents into a fine mesh sieve held over a bowl. Shake the sieve. The correctly ground coffee will fall through. Any large chunks or whole beans remain in the sieve; return them to the pitcher for another two pulses. Discard any dust-fine powder that coats the sieve, that’s pure bitterness waiting to happen.
You now have a serviceable medium grind. It works for automatic drip machines and basic pour-overs. It will not work for espresso or any method requiring a fine, consistent powder. The blender grinding method is a stopgap, not a replacement for a real grinder.
Why this works: The sharp, high-speed blades generate enough shear force to fracture the bean. The short pulses prevent heat buildup from friction, which can scorch the oils and add a burnt flavor. The shaking redistributes the beans so all pieces get equal time near the blade.
The Food Processor Method
A food processor with a standard S-shaped blade is slower than a blender, but its wider bowl gives beans more room to move. This makes it better for achieving a coarse grind, like what you need for a French press or cold brew.
I tried grinding for a French press in a KitchenAid 7-cup processor. The first batch I let run for a solid fifteen seconds. The result was a mix of powder and half-beans that clogged the French press filter and produced a muddy, over-extracted cup. The second batch, using pulses, worked.
Add your beans to the dry bowl. Do not fill it more than halfway; you need empty space for the beans to circulate. Pulse for one second, then stop. Open the lid, shake the bowl to redistribute the beans, and pulse again. Repeat this twelve to fifteen times.
The target texture is coarse, like breadcrumbs or very coarse sea salt. You should see no whole beans, but the particles will be visibly uneven. That’s okay for French press, the long steep time and metal mesh filter can handle a bit of variation. It is not okay for a pour-over, where inconsistent grounds lead to channeling and uneven extraction.
After pulsing, sift the grounds through a mesh strainer as you would with the blender method. The coarse grounds for your French press will fall through. Retain any larger pieces for another round of pulses. This method produces about 70% usable coarse grounds per batch. The remaining 30% will be either too fine or too large and should be set aside for cold brew, where extreme extraction times balance out the inconsistency.
When NOT to use a food processor: Do not attempt a fine grind for espresso or Moka pot. The blade speed and bowl shape cannot create the necessary fine, uniform powder without also making a damaging amount of dust. You’ll choke the machine or get a bitter, astringent shot.
The Rolling Pin (or Wine Bottle) Method
This is the method of last resort. It requires a sturdy cutting board, a heavy rolling pin (or a full wine bottle), and patience. It only works for brewing methods that use very fine grinds and high pressure, like a Moka pot or Turkish coffee, because you can crush beans into a powder through sheer force.
Place a small handful of beans, no more than 25 grams, in the center of a cutting board. Cover them with a piece of parchment paper or a clean kitchen towel. This contains the flying shards. Press down firmly with the rolling pin and roll back and forth, applying your full body weight.
You are not rolling dough. You are crushing. You’ll hear the beans crack. After a minute, stop and check. You’ll have a mix of chunks and powder. Use the edge of the rolling pin to scrape everything back into a pile, then crush again. Repeat this process for five to seven minutes.
The final product will be a pile of dust with some small, hard shards. Pour it all through a fine-mesh sieve. The dust is your usable grind for a Moka pot. The shards go back under the pin for another round. This method is exhausting, messy, and yields about 15 grams of usable fine grind from 25 grams of beans. You lose about 40% of your coffee to unusable chunks.
Common mistake: Trying to grind a full dose for a drip machine with a rolling pin. You will tire before reaching a medium grind, and the inconsistency will ruin the cup. Reserve this method for small-batch, fine-grind applications only.
Why Consistency Matters More Than You Think
Water is lazy. It takes the path of least resistance through a bed of coffee grounds. If the particles are all the same size, the water flows evenly, extracting flavor at a uniform rate. If the particles are different sizes, the water rushes through the gaps around the large chunks (under-extracting them) and soaks into the tiny dust particles (over-extracting them).
The result is a cup that tastes both sour and bitter at the same time. Sour from the under-extracted chunks, bitter from the over-extracted dust. This is why a mortar and pestle fails completely for coffee, it is designed to create a spectrum of particle sizes, from flour to gravel.
A blade grinder, often maligned by coffee snobs, still produces a more consistent grind than any improvised method. The spinning blade creates a vortex that pulls beans toward the center, chopping them repeatedly. While not as uniform as a burr grinder’s output, it is vastly superior to what a rolling pin produces. For a deeper dive into the mechanics, our comparison of burr vs blade grinders explains why consistency is the real goal.
The extraction timeline is brutal. In a drip brewer, water contact time is about four minutes. Dust particles over-extract within the first sixty seconds, releasing harsh, astringent compounds. Chunks under-extract over the full four minutes, leaving sour, acidic notes. You perceive both flavors simultaneously. In a French press with a four-minute steep, the problem is the same. Only cold brew, with its 12-24 hour immersion, has the time to compensate for inconsistent particle size.
Matching Your Method to Your Brewer
Your choice of grinding tool dictates which brewing method will actually work. Pushing a method too far leads to immediate, undrinkable coffee.
| Brewing Method | Tolerable Grind Tool | Ideal Grind Size | What Happens If You Use the Wrong Tool |
|---|---|---|---|
| Espresso | None (requires burr grinder) | Fine powder | A blender or food processor produces too many boulders and fines; the shot channels, runs in 5 seconds, and tastes sour. |
| Drip / Pour-over | High-speed blender | Medium (table salt) | A rolling pin yields uneven chunks that cause channeling and weak coffee; a food processor often leaves boulders that stall the flow. |
| French Press | Food processor | Coarse (breadcrumbs) | A blender creates too many fines that slip through the mesh, making the cup muddy and bitter; a rolling pin cannot produce a coarse grind without also making powder. |
| Moka Pot | Rolling pin | Fine (powder with grit) | A blender or food processor cannot achieve the fine, compact grind needed; the pot will sputter and produce weak, under-extracted coffee. |
| Turkish Coffee | Rolling pin | Superfine (flour) | Only the rolling pin method can approach the necessary fineness; all other tools leave chunks that sink and refuse to foam. |
TL;DR: Your brewer decides your tool. Use a blender for drip, a food processor for French press, and a rolling pin only for Moka pot or Turkish. Any other combination wastes beans.
For Drip or Pour-Over: The Blender Is Your Only Real Option
The medium-fine grind required for drip coffee sits in a narrow band. Too coarse, and the water runs through too fast, producing weak coffee. Too fine, and it clogs the filter, leading to over-extraction and bitterness. A high-speed blender, with its controlled pulses, can hit this band.
Set your blender to its lowest pulse setting. Use the one-second pulse, shake, repeat method outlined earlier. The goal is grounds that look like granulated sugar. If you see visible chunks, pulse two more times. If the grounds look like flour, you’ve gone too far, that batch is only usable for a stronger brew method, or you should start over.
The paper coffee filters you use matter here. A thicker, bonded filter can handle a slightly finer grind from a blender without clogging. A thin, single-ply filter will clog instantly with the fines a blender inevitably produces. Choose your filter accordingly.
For French Press or Cold Brew: The Food Processor Wins
French press needs a coarse, even grind to allow the metal mesh to filter cleanly. A food processor’s wider bowl and slower blade are better suited to chopping beans into coarse chunks rather than powder. You still get fines, but fewer than with a blender.
After pulsing and sifting, let the grounds sit for a minute before adding them to your French press. This allows the ultra-fine dust to settle at the bottom of your bowl. When you pour the grounds into the press, try to leave the dust layer behind. It makes a noticeable difference in clarity. For cold brew, the extended steep time mitigates grind inconsistency, so you can use all the output from the food processor, fines included.
If you own a specific machine like a Bunn, always check its manual for recommended grind sizes. Using a grind that’s too fine for a fast-brewing Bunn coffee pot can lead to overflow and a mess. The same logic applies to other machines; understanding coffee machine filters and their limitations is part of dialing in any method.
For Moka Pot or Turkish Coffee: The Rolling Pin Is the Only Path
These methods demand a fine, almost powdery grind. No blender or food processor can achieve this without also generating excessive heat and turning half the batch into unusable dust. The rolling pin’s direct, crushing force is the only way.
Expect the process to be labor-intensive. It takes about seven minutes of vigorous crushing to get 20 grams of usable fine grind for a Moka pot. You will sweat. The noise is loud. It is not a peaceful morning ritual. But for a strong, stovetop espresso-like brew, it works. The fine grind creates the resistance needed for pressure to build in the lower chamber, forcing water up through the coffee.
Because this method produces such a fine grind, consider your water quality. Minerals in hard water can react with the increased surface area of the fine grounds, amplifying bitter flavors. A pinch of salt, a topic we explore in adding salt to coffee, can help counteract that bitterness.
When to Give Up and Buy a Real Grinder
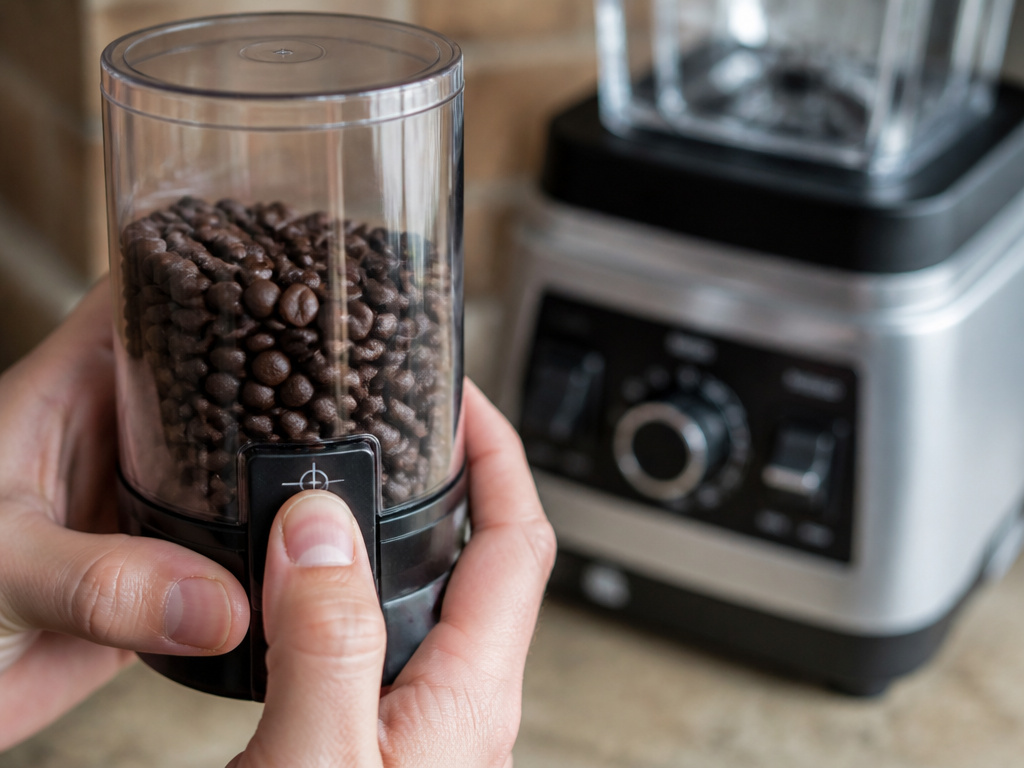
Improvised grinding works in a pinch. It does not work as a daily practice. The inconsistency wastes coffee, the process is messy, and you risk damaging your expensive kitchen appliances.
Blender blades are not designed for dry, hard beans. Repeated use can dull the blades or overheat the motor. Food processor blades can chip or crack if a hard bean gets wedged. A $30 Krups spice grinder, essentially a dedicated blade grinder, is cheaper than replacing a $200 blender. It is also far more consistent.
If you drink coffee more than once a week, buy a dedicated grinder. A blade grinder is a massive upgrade from improvised methods. A burr grinder is a further leap in consistency and control. The choice between them is detailed in our guide on grinder types, but for someone currently using a rolling pin, even a basic blade grinder will feel revolutionary.
Your coffee will taste better immediately. You’ll use fewer beans per cup because you won’t be sifting out 30% waste. And you’ll get five minutes of your morning back.
Frequently Asked Questions
Can I use a mortar and pestle to grind coffee beans?
No. A mortar and pestle is designed for crushing and grinding herbs and spices into a paste or powder. It cannot create the uniform particle size coffee extraction requires. You will get a mix of dust and whole bean fragments. The resulting brew will be simultaneously bitter and sour. It is the single worst tool for the job.
Will grinding coffee beans ruin my blender blades?
It can. Blender blades are sharpened for cutting through soft fruits and vegetables, not for fracturing hard, dry coffee beans. Repeated use will dull the blades faster. It also puts extra strain on the motor. For occasional use, it’s a low risk. For daily grinding, you should buy a dedicated coffee grinder.
How fine should I grind for a French press without a grinder?
Aim for a coarse grind, similar to breadcrumbs or very coarse sea salt. Using a food processor, pulse in one-second bursts 12-15 times, shaking the bowl between pulses. Sift the grounds to remove the fine dust, which will make your French press coffee muddy. The remaining coarse chunks are what you want.
Can I grind coffee beans in a Nutribullet or magic bullet?
Yes, but with extreme caution. These personal blenders have small, sharp blades and powerful motors. Use the same pulse-and-shake method as a standard blender, but limit pulses to 5-7 seconds total. These motors heat up quickly, and overheating the beans will scorch the oils and add a burnt flavor to your coffee.
How long does ground coffee last without a grinder?
Ground coffee begins oxidizing, losing its volatile aromatics, the moment it’s exposed to air. For best flavor, brew within five minutes of grinding. If you must store it, use an airtight container and keep it in a cool, dark place. It will be noticeably stale after 24 hours. Whole beans stored properly last for weeks.
Before You Go
Your morning coffee doesn’t have to suffer because your grinder broke or hasn’t arrived yet. A high-speed blender can handle drip coffee. A food processor manages French press duty. A rolling pin and determination will get you through a Moka pot craving. Just match the tool to the brewer, pulse instead of blend, and sift out the dust.
Remember that these are emergency methods. They produce drinkable coffee, not great coffee. The inconsistency wastes beans and your time. If you find yourself reaching for the blender more than twice a week, buy a dedicated grinder. Even a simple blade grinder will outperform any kitchen workaround.
And if your improvised grind still tastes a bit harsh, remember that a tiny pinch of salt can smooth out bitterness, and a spoon of brown sugar sweetener can balance sour notes. For those using almond milk in coffee or exploring coconut oil benefits as an additive, a consistent grind is even more important, these additions highlight off-flavors from uneven extraction. Start with the best grounds you can manage, even if you had to make them yourself.
