
Learn How to Make Coffee While Camping With Simple Tools
To make coffee while camping, match your brewing method to your trip’s demands: weight, cleanup, and flavor. The AeroPress Go offers the best balance of portability and control, while a Moka pot delivers strong espresso-like coffee for group mornings. Pre-grind your beans at home or pack a manual burr grinder, and always start with boiling water adjusted for your altitude.
Most people ruin camp coffee by using the wrong grind size. They follow the manufacturer’s advice on the Moka pot box and end up with a bitter, over-extracted mess. Or they use instant because they think real brewing is too complicated.
This guide walks through six practical methods, from cowboy coffee to precision pour-overs. You will get specific gear recommendations, fuel-saving boil times, and the one adjustment that fixes bitter camping coffee every time.
Key Takeaways
- Use a coarser grind than you think for Moka pots on camp stoves; manufacturer-recommended fine grinds over-extract on uneven heat.
- The Jetboil Flash system boils 0.5L in 100 seconds, using about 9 grams of fuel, calculate this against your trip length.
- Pre-heat your brewer with a splash of hot water before adding grounds; cold metal or glass steals brew heat instantly in the outdoors.
- Pack out your spent grounds in a ziplock bag; coffee grounds are not native to forest soil and decompose slowly.
- For high-altitude trips above 3,000 meters, increase your brew time by 30 seconds to compensate for lower water boiling temperatures.
The Gear That Actually Fits in Your Pack
Your kitchen scale and gooseneck kettle stay home. Camp coffee gear prioritizes three things: pack size, weight, and robustness. A stainless steel French press seems rugged until you realize it’s a 1.5-pound glass cylinder waiting to shatter.
The AeroPress Go is the benchmark for packable quality. It nests inside its own 8-ounce mug, weighs 11.4 ounces total, and includes 350 filters. You can make a clean, concentrated coffee that rivals your morning cup at home. Its limitation is serving size, one strong brew at a time.
For groups, a 6-cup Bialetti Moka Express is a workhorse. The aluminum body is nearly indestructible. It yields about 270ml of strong coffee, enough for two mugs when diluted. Remember, “cup” here means tiny espresso cups. Its packed size is bulky, but it justifies its space on car camping trips.
Your heat source is more critical than the brewer. The Jetboil Flash cooking system exemplifies efficiency. It boils half a liter in 100 seconds. That speed conserves fuel, a real concern on multi-day treks. An isobutane canister and this stove are the core of a reliable camping coffee setup.
Before you start: Assume all metal parts on stoves and brewers are hot for at least five minutes after use. Use a glove or bandana to handle them. Spilling boiling water on uneven ground is a quick path to a burn. Secure your stove on a flat, stable surface away from dry grass.
TL;DR: Choose the AeroPress Go for solo backpacking, a Moka pot for car camping groups, and a Jetboil stove for fast, fuel-efficient boils.
Choosing Your Brewing Method: A Side-by-Side Guide
Your campsite conditions, backcountry, drive-in, or winter, dictate the smart choice. This table compares the six main methods across the metrics that matter when you’re outside.
| Method | Best For | Weight/Bulk | Cleanup Effort | Flavor Control |
|---|---|---|---|---|
| AeroPress Go | Solo backpacking, precision | Low (11.4 oz) | Very Easy | High |
| Moka Pot | Car camping, strong coffee | Medium | Moderate | Medium |
| French Press | Base camps, group brewing | High (if glass) | Moderate | Medium |
| Pour-Over | Light backpacking, clarity | Very Low | Easy | High |
| Cowboy Coffee | Survival, minimal gear | None | Difficult | Very Low |
| Instant | Speed, extreme weight save | None | None | None |
Instant coffee is the emergency fallback. Modern specialty instant has improved, but it remains a taste compromise. Cowboy coffee, boiling grounds directly in water, is a last-resort method. It leaves a sludge at the bottom of your pot and a gritty film in your cup. The cleanup is a hassle without a proper sink.
The French press is a crowd-pleaser but fragile. An all-stainless-steel model solves the breakage problem but adds weight. It requires coarse grounds and a four-minute steep. Pour-over setups, like a collapsible silicone dripper, are brilliantly light. They demand a steady hand and a gooseneck kettle for best results, which is often impractical in the wind.
Your choice hinges on how much you value flavor versus convenience. For most, the AeroPress strikes the perfect balance. It uses a paper coffee filter for a silt-free cup and the immersion brew method for full flavor.
The Three Pillars of Camp Coffee: Beans, Grind, Water
Great home coffee starts here. Camp coffee is no different, but the constraints are tighter.
Beans: Freshness degrades faster with pre-ground coffee. Grinding at the campsite is ideal. If you must pre-grind, do it the morning you leave and store the grounds in an airtight container. Use a light roast coffee for faster, more forgiving extraction, especially with cooler water.
Grind: This is where almost everyone fails. The number one cause of bitter camp coffee is too fine a grind.
– AeroPress/French Press: Coarse to medium-coarse. Think kosher salt.
– Moka Pot: Drip grind, not espresso. Slightly coarser than table salt.
– Pour-Over: Medium grind, like smooth sand.
A consistent grind is non-negotiable. A blade grinder creates dust and boulders that extract unevenly. A manual burr coffee grinder is the single best upgrade for camp coffee. The Timemore C2 is a popular, durable pick. It fits in a pack and delivers the coffee grind consistency that makes every method work.
The official Bialetti manual often suggests a medium-fine grind for the Moka pot. On a home stovetop with steady heat, that might work. On a camping stove with aggressive, uneven flame, that fine grind scorches and over-extracts in under a minute. Go coarser.
Water: Start with the cleanest water you have. If you’re purifying stream water, let any chemical treatment (iodine, tablets) complete before boiling for coffee, as it can impart off-flavors. The ideal brew temperature is 90-96°C (195-205°F). At sea level, boil water and let it sit for 30 seconds. At altitude, you’ll need to adjust.
TL;DR: Grind coarse for immersion brews, use a manual burr grinder for consistency, and let boiled water cool for 30 seconds before brewing.
Mastering the Moka Pot on a Camp Stove

The Moka pot is the most misunderstood camping brewer. It feels like an espresso machine but acts like a percolator. Getting it right delivers a rich, intense coffee that stands up to a splash of cold stream water or a dairy-free creamer.
Step 1: Fill the base with hot water. This is the rule. Never start with cold water in the base chamber. Fill it with hot water from your kettle up to just below the safety valve. This reduces the time the coffee grounds are exposed to high heat, preventing burnt flavors.
Step 2: Fill the basket, don’t tamp. Add your medium-coarse grounds to the filter basket. Shake it gently to level the grounds. Do not press or tamp them down. A mound is fine, but an uneven bed will channel.
Step 3: Assemble and apply medium heat. Screw the top chamber on tightly. Place the pot on your camp stove over a medium flame. Keep the lid open. You want to see the extraction.
Step 4: Watch the flow and reduce heat. When coffee starts to stream into the top chamber, it should be a steady, honey-colored flow. If it blasts out in a frantic, frothy spray, your heat is too high. Immediately lift the pot slightly off the flame or turn the stove down.
Step 5: Cut the extraction. The moment the stream turns pale, sputters, and makes a gurgling sound, remove the pot from the heat. Run the base under cool water (if you have some to spare) or set it on a rock to stop the brewing. This prevents the last, bitter bit from entering your cup.
Common mistake: Letting the Moka pot sputter to completion on high heat, the final output is pure over-extracted bitterness that ruins the entire brew. You’ll taste harsh, ashy notes no amount of brown sugar sweetener can mask.
The 3-cup Bialetti model makes about 130ml of concentrate. Split it between two mugs and add hot water for americanos. That’s two strong coffees from one compact brewer.
How to Adapt Your Brew for Altitude and Cold
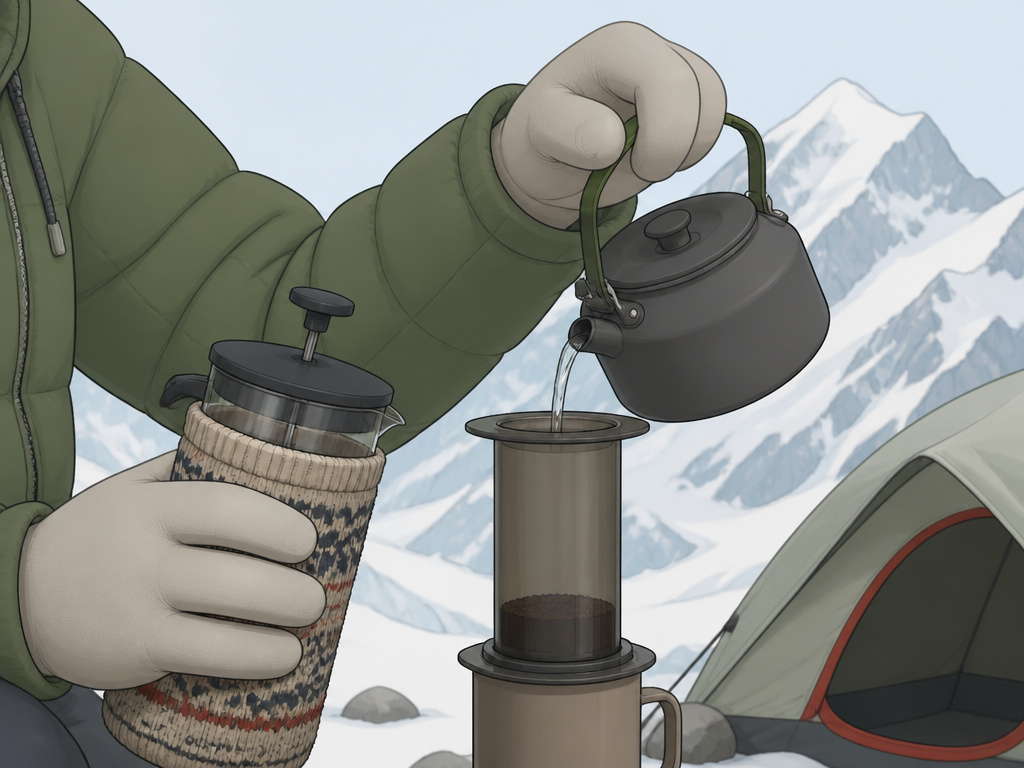
Physics doesn’t stop at the trailhead. Two environmental factors directly change your extraction: altitude and ambient temperature.
High-Altitude Brewing (Above 3,000 ft / 1,000 m): Water boils at a lower temperature. At 10,000 feet, it boils around 90°C (194°F). Lower temperature means slower extraction. Your coffee can taste weak and sour.
- Fix for French Press/AeroPress: Increase your steep time. Add 30 seconds to your usual four minutes. A finer grind can also help, but adjust time first.
- Fix for Moka Pot: Pre-heat the water in your kettle to a rolling boil before adding it to the base chamber. This gives you a head start. You might also need a slightly finer grind.
Cold-Weather Brewing (Below 40°F / 4°C): Your brewer loses heat fast. A ceramic or metal pour-over dripper can chill the water mid-brew, stalling extraction.
- Fix for Any Method: Pre-heat everything. Rinse your brewer and mug with a generous amount of hot water before you start. Wrap your French press in a spare sock or beanie during the steep. Use an insulated mug to serve.
These adjustments are small but decisive. They turn a mediocre, thin cup into the robust, warming brew you packed the gear for.
The Leave-No-Trace Coffee Protocol
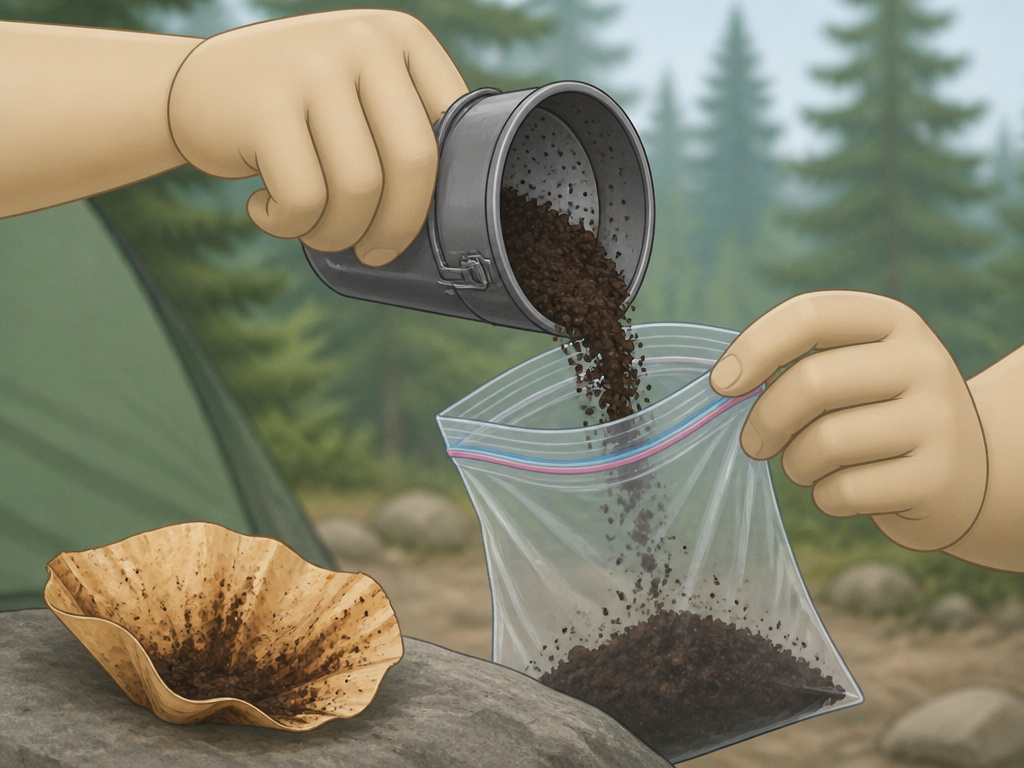
Coffee grounds are organic, but they are not a natural part of most wilderness ecosystems. They decompose slowly and can attract animals to campsites. The USDA Forest Service’s Leave No Trace principles are clear: pack it in, pack it out.
This means your used coffee grounds go into a ziplock bag with the rest of your trash. Do not scatter them around your site or bury them. If you use biodegradable coffee filters, the rule is the same, pack them out. Industrial composting facilities break them down efficiently; forest soil does not.
Wash your mug and brewer with a small amount of biodegradable soap, if any, and scatter the wastewater at least 200 feet from any water source. Better yet, wipe them clean with a paper towel and pack out the towel. This simple ethic preserves the site for the next person and protects local wildlife.
TL;DR: Always pack out your spent grounds and filters. Dispose of wastewater far from lakes and streams.
Frequently Asked Questions
What is the easiest way to make coffee while camping?
The easiest reliable method is the AeroPress Go. It’s lightweight, nearly unbreakable, and cleanup involves just popping out a puck of spent grounds. It requires no delicate pouring and makes a clean, strong cup in about two minutes total.
Can you make coffee while camping without a filter?
Yes, using the French press or cowboy coffee methods. A French press has a built-in metal filter. Cowboy coffee involves boiling grounds directly in water and allowing them to settle before carefully pouring. Both leave some sediment in your cup.
How do you boil water for coffee when camping?
The most efficient way is with a dedicated backpacking stove like the Jetboil Flash. It concentrates heat directly onto a small pot. For car camping, a standard propane burner works fine. Never boil water directly in an aluminum Moka pot base over an open fire, it can warp the seal.
Does campfire coffee taste better?
The taste comes from the coffee and the method, not the heat source. A campfire can impart smokiness if you’re not careful, and it’s impossible to control heat precisely for methods like Moka pot. A portable stove gives more consistent, better-tasting results. The “campfire” taste is often just nostalgia.
How can I make my camping coffee less bitter?
First, use a coarser grind, especially for Moka pots. Second, remove your coffee from the heat the moment it’s done brewing (stop the sputter). Third, try the old trick of adding a pinch of salt to your grounds before brewing; it counteracts perceived bitterness.
Before You Go
Skip the expensive, single-use pour-over packets and the gamble of cowboy coffee. Pack an AeroPress Go or a small Moka pot. Grind your beans to the size your campsite stove demands, not what the manual says. Boil your water fast, pre-heat your gear, and watch the brew like it’s the only task that matters.
The goal isn’t just caffeine. It’s the five minutes of quiet ritual as the sun comes up, the steam mixing with the cold morning air, and the first sip that tastes like the world is right. That’s worth the extra 11 ounces in your pack. Now you know how to make it happen.
{
“@context”: “https://schema.org”,
“@type”: “HowTo”,
“name”: “How to Make Coffee While Camping”,
“totalTime”: “PT10M”,
“tool”: [
{
“@type”: “HowToTool”,
“name”: “Portable coffee brewer (AeroPress, French press, or pour-over)”
},
{
“@type”: “HowToTool”,
“name”: “Camp stove or heat source (e.g., Jetboil Flash)”
},
{
“@type”: “HowToTool”,
“name”: “Coffee grinder (manual burr recommended)”
},
{
“@type”: “HowToTool”,
“name”: “Insulated mug”
}
],
“supply”: [
{
“@type”: “HowToSupply”,
“name”: “Freshly roasted coffee beans (light or medium roast)”
},
{
“@type”: “HowToSupply”,
“name”: “Clean water (0.5 liters per serving)”
},
{
“@type”: “HowToSupply”,
“name”: “Paper filters (if using pour-over or AeroPress)”
}
],
“step”: [
{
“@type”: “HowToStep”,
“name”: “Grind your beans to the correct size”,
“text”: “Grind your coffee just before brewing. For most camping methods like AeroPress or French press, use a coarse to medium-coarse grind. For a Moka pot, use a drip grind, not espresso-fine.”
},
{
“@type”: “HowToStep”,
“name”: “Boil water efficiently”,
“text”: “Use a fast-boiling system like a Jetboil to conserve fuel. Bring water to a boil, then let it sit for 30 seconds to reach the ideal 90-96°C (195-205°F) range for brewing.”
},
{
“@type”: “HowToStep”,
“name”: “Pre-heat your brewer”,
“text”: “Pour a little hot water into your empty French press or AeroPress chamber to warm it up. Dump this water out. This stabilizes brew temperature, especially in cold air.”
},
{
“@type”: “HowToStep”,
“name”: “Brew with control”,
“text”: “Add coffee grounds, then pour hot water in a slow, circular motion to saturate all grounds. Start your timer. For French press, steep for 4 minutes. For AeroPress, plunge gently over 30 seconds.”
},
{
“@type”: “HowToStep”,
“name”: “Press, pour, and pack out”,
“text”: “Press the plunger or strain the coffee into your mug. Immediately dispose of the spent grounds in a sealable bag. Never dump coffee grounds at the campsite.”
}
]
}
{
“@context”: “https://schema.org”,
“@type”: “FAQPage”,
“mainEntity”: [
{
“@type”: “Question”,
“name”: “What is the easiest way to make coffee while camping?”,
“acceptedAnswer”: {
“@type”: “Answer”,
“text”: “The easiest reliable method is the AeroPress Go. It’s lightweight, nearly unbreakable, and cleanup involves just popping out a puck of spent grounds. It requires no delicate pouring and makes a clean, strong cup in about two minutes total.”
}
},
{
“@type”: “Question”,
“name”: “Can you make coffee while camping without a filter?”,
“acceptedAnswer”: {
“@type”: “Answer”,
“text”: “Yes, using the French press or cowboy coffee methods. A French press has a built-in metal filter. Cowboy coffee involves boiling grounds directly in water and allowing them to settle before carefully pouring. Both leave some sediment in your cup.”
}
},
{
“@type”: “Question”,
“name”: “How do you boil water for coffee when camping?”,
“acceptedAnswer”: {
“@type”: “Answer”,
“text”: “The most efficient way is with a dedicated backpacking stove like the Jetboil Flash. It concentrates heat directly onto a small pot. For car camping, a standard propane burner works fine. Never boil water directly in an aluminum Moka pot base over an open fire, it can warp the seal.”
}
},
{
“@type”: “Question”,
“name”: “Does campfire coffee taste better?”,
“acceptedAnswer”: {
“@type”: “Answer”,
“text”: “The taste comes from the coffee and the method, not the heat source. A campfire can impart smokiness if you’re not careful, and it’s impossible to control heat precisely for methods like Moka pot. A portable stove gives more consistent, better-tasting results. The \”campfire\” taste is often just nostalgia.”
}
},
{
“@type”: “Question”,
“name”: “How can I make my camping coffee less bitter?”,
“acceptedAnswer”: {
“@type”: “Answer”,
“text”: “First, use a coarser grind, especially for Moka pots. Second, remove your coffee from the heat the moment it’s done brewing (stop the sputter). Third, try the old trick of adding a pinch of salt to your grounds before brewing; it counteracts perceived bitterness.”
}
}
]
}
