
How to Make a Coffee Latte at Home With Perfect Milk Froth
To make a coffee latte at home, you need a double shot of espresso and steamed milk textured into microfoam. Pull a 1:2 ratio espresso shot (18g coffee to 36g liquid in 25-30 seconds) at 9 bar pressure. Steam whole milk to 60-68°C (140-155°F) using a two-stage technique: stretch for volume, then texture for silkiness. The Breville Barista Express’s 54mm portafilter requires a grind fine enough to hit that 30-second target, which often means setting its integrated grinder near its finest calibration.
Most home latte attempts fail at the milk. People just heat it until it’s hot and bubbly. That gives you hot milk with unstable macro-bubbles on top, not the integrated, velvety microfoam that defines a latte. The difference is a loud, frothy mess versus a silent, swirling vortex in the pitcher.
This guide walks through the espresso fundamentals you can’t skip, the two-stage steaming technique most manuals gloss over, and how to adapt for everything from oat milk to high altitudes. We’ll use specific machine settings, explain the milk science, and show you where the standard advice breaks.
Key Takeaways
- A proper latte requires microfoam, not just froth. Achieve it by steaming milk in two distinct phases: stretching (adding air) and texturing (incorporating air).
- Espresso is non-negotiable. Target a 1:2 brew ratio (e.g., 18g coffee, 36g output) extracted in 25-30 seconds at 9 bars of pressure.
- Whole milk’s fat and protein content make it the most forgiving for steaming. For non-dairy coffee creamers like oat or almond, you must use a “barista blend” and steam at a lower temperature to avoid curdling.
- The grind consistency from your grinder is more critical than your machine’s brand. Inconsistent grounds cause channeling, which makes espresso taste sour and weak.
- Warm your cup. Pouring hot espresso into a cold cup drops the temperature by 10-15°F immediately, muting flavor and aroma.
The Foundation: Espresso That’s Worth the Milk
You cannot build a good latte on bad espresso. The milk amplifies the coffee’s flavors, both good and bad. A sour, under-extracted shot becomes a sour latte. A bitter, over-extracted shot becomes a bitter latte.
The Specialty Coffee Association defines the standard for espresso extraction: 9 bar of pressure. This is the force that pushes hot water through the compacted coffee puck. Most home machines, including the popular Breville Barista Express, aim for this. Your first checkpoint is ensuring your machine is actually reaching pressure. You’ll hear a steady, hissing pump, not a weak sputter.
Technical Snippet: Espresso extraction parameters per the Specialty Coffee Association (SCA) specify a pressure range of 9 ± 1 bar and a brew ratio between 1:1 and 1:2.5 (coffee dose to beverage weight). For a latte, a 1:2 ratio (e.g., 18g dose, 36g beverage) in 25-30 seconds provides the balanced strength needed to hold up to steamed milk.
What’s your espresso brew ratio?
A brew ratio is your coffee dose compared to your final beverage weight. For a latte, you want a double shot. A standard starting point is 18 grams of ground coffee yielding 36 grams of liquid espresso. Use a digital scale. Guesswork here guarantees inconsistency.
| Component | Target Measurement | Consequence of Missing Target |
|---|---|---|
| Coffee Dose | 18-20g | Under-dosing (<16g) produces a weak, watery shot that disappears in milk. |
| Beverage Yield | 36-40g (for 18g dose) | Over-extracting (>40g) pulls bitter, astringent compounds from the coffee. |
| Extraction Time | 25-30 seconds | A shot under 20 seconds will be sour; over 35 seconds risks bitterness. |
| Water Temperature | 90-96°C (194-205°F) | Too cool (<90°C) under-extracts; too hot (>96°C) burns the coffee. |
The most common home machine struggle is the grinder. The Breville Barista Express manual suggests a medium grind setting. For most beans, that’s wrong. You’ll likely need to set its integrated grinder much finer, often near its finest calibration, to hit that 25-30 second extraction window. If you’re already at the finest setting and the shot still gushes through in 15 seconds, you’ve hit the machine’s limit. This is the moment many home baristas start looking at separate burr grinder benefits.
TL;DR: Weigh 18g of finely ground coffee, tamp evenly, and pull 36g of espresso in 25-30 seconds. If your shot runs fast, grind finer. This is the non-negotiable base.
The Physics of Froth: Why Your Milk Matters
Steaming isn’t magic. It’s applied dairy science. Whole milk contains proteins (casein and whey) and fat. When you introduce steam, you do two things: heat the milk and inject air.
The protein molecules are key. They have one end that’s attracted to water and one that’s repelled by it. As you inject air bubbles, these proteins rush to the bubble surfaces, with their water-hating ends pointing into the air and their water-loving ends anchored in the milk. This creates a stable film around each bubble.
The fat globules get in the way. They disrupt the protein networks, which is why whole milk makes foam that’s stable but not overly stiff—perfect for latte art. Skim milk, with no fat, makes stiff, dry foam because the proteins can link up unimpeded. This is why understanding milk calories and fat content directly impacts your technique.
Common mistake: Steaming milk in one continuous, shallow phase — This creates large, unstable air bubbles (macrofoam) that separate from the liquid milk within 30 seconds, leaving you with hot milk and a dry, collapsing head of froth.
The target temperature is 60-68°C (140-155°F). Go hotter, and you scald the milk. The proteins denature irreversibly, creating a burnt taste and killing the foam’s sweetness. You’ll know it’s too hot when the pitcher is painfully hot to the touch and the milk smells like boiled dairy.
The Two-Stage Steam: Stretch, Then Texture
This is the core technique every video tutorial shows but rarely names. You have two distinct jobs, done in sequence.
Before you start: Purge your steam wand for 2 seconds into an empty cup or towel. Condensed water in the wand will spit into your milk. Also, start with cold milk in a cold pitcher. It gives you more time to work.
- Stretching (Aeration). Submerge the steam wand tip about half an inch. Turn on the steam full blast. Immediately lower the pitcher so the tip breaks the surface. You’ll hear a distinct, crisp tearing or chirping sound. This is air being sucked into the milk. Hold this position for 3-5 seconds—no more. You’re adding the air volume.
- Texturing (Integration). After stretching, raise the pitcher slightly to fully submerge the wand tip. Position the pitcher so the steam’s force creates a strong, swirling vortex in the milk. You should hear the sound change from a chirp to a low, quiet rumble. This vortex spins the air bubbles you just created, shearing them into microscopic size and folding them evenly into the milk. This creates microfoam. Keep this vortex rolling until the pitcher’s base is almost too hot to hold against your palm (about 3-5 more seconds).
The moment the pitcher feels hot, turn off the steam. The residual heat will carry the milk the last few degrees to the target. Immediately wipe the steam wand with a damp cloth and purge it again to clear the milk inside.
TL;DR: Chirp for 3-5 seconds to add air (stretch), then create a silent vortex to make it silky (texture). Stop when the pitcher is almost too hot to hold.
Step-by-Step: Pulling and Pouring Your Home Latte
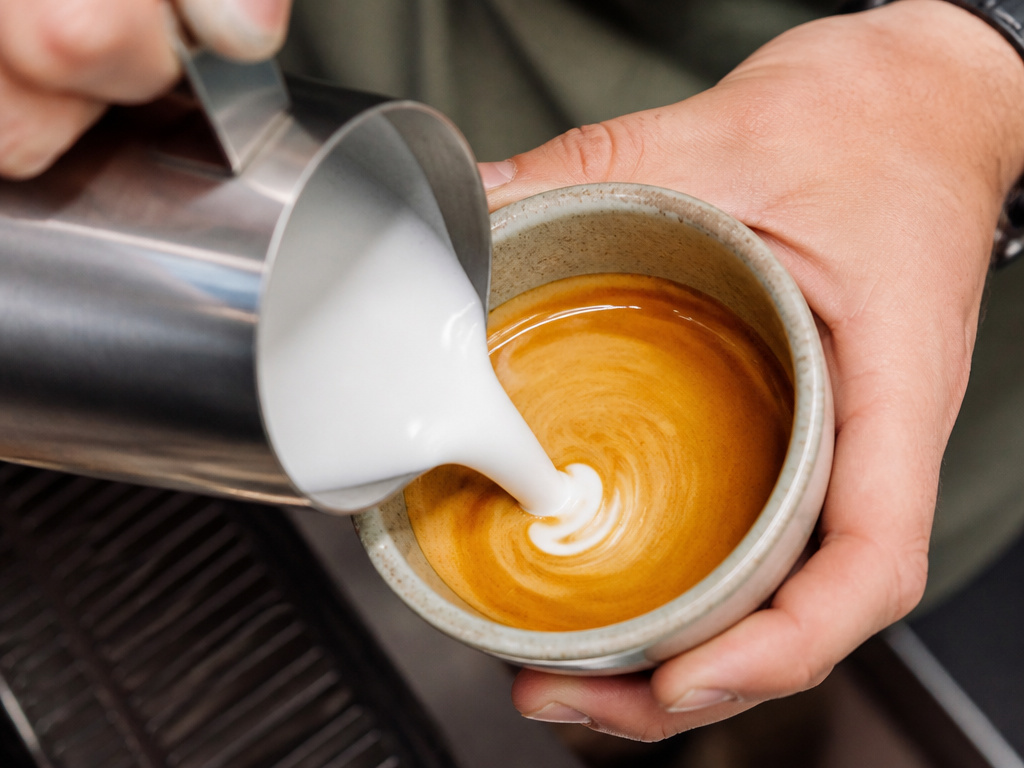
Let’s wire the espresso and milk techniques together into a single workflow. This assumes you have your grinder dialed in.
Tools & Ingredients You’ll Need:
- Espresso machine
- Burr coffee grinder
- Digital scale
- 12-20 oz stainless steel milk pitcher
- Tamper (58mm standard, or 54mm for Breville Barista Express)
- Fresh espresso beans (100-200g)
- Whole milk (or barista-style alternative)
-
Filtered water
-
Grind, Dose, Tamp. Grind 18g of coffee directly into your portafilter. Distribute the grounds evenly with a shake or a tool. Tamp with firm, even pressure until you feel solid resistance. A crooked tamp is the top cause of channeling.
- Pull the Shot. Start your shot timer. You should see a slow, steady drip that coalesces into a mouse-tail stream after 5-8 seconds. It should look like dark honey. Stop the shot at 36g. Your timer should read 25-30 seconds. If it’s 36g at 20 seconds, grind finer tomorrow.
- Steam the Milk. While the shot pulls, pour cold milk into your pitcher to just below the spout’s base. Follow the two-stage steam process above. Your goal is glossy, paint-like milk with no visible bubbles.
- Tap and Swirl. Tap the pitcher firmly on the counter to pop any large bubbles. Then swirl the milk vigorously. It should look like wet paint or melted ice cream. If it’s bubbly or thin, your stretching phase was too long or your vortex was weak.
- Combine Immediately. Don’t let the espresso sit. Pour the steamed milk into the center of the espresso from a height of about 3 inches. Pour steadily and with confidence. To integrate the foam for a simple design, pour faster at the end, bringing the pitcher spout close to the cup’s surface.
I spent my first six months steaming milk with the wand too deep, creating hot milk with zero foam. Then I overcorrected, chirping for 15 seconds, which made a dry, meringue-like foam that plopped out in a blob. The 3-5 second rule was the fix. It’s the difference between a cappuccino and a latte.
Troubleshooting Your Home Latte
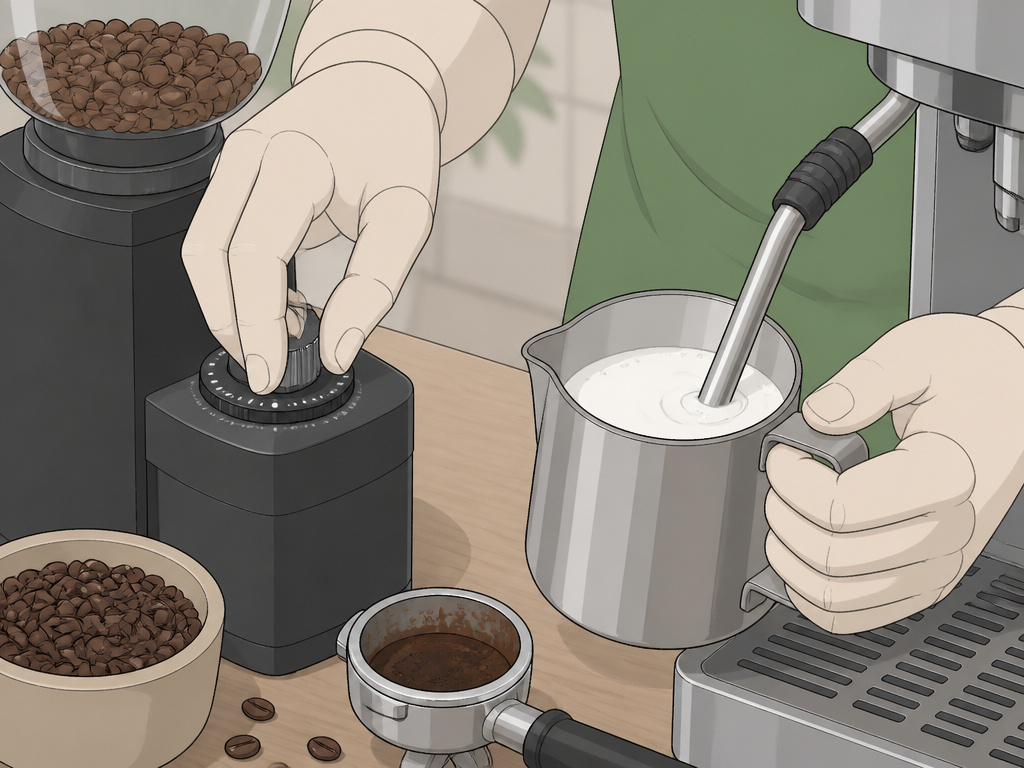
Things will go wrong. Here’s how to diagnose the usual suspects.
Problem: Espresso shots are sour and run fast (under 20 seconds).
- Cause: Grind is too coarse, dose is too low, or tamp pressure is inconsistent.
- Fix: Grind finer. If already at your grinder’s finest setting, increase your dose by 0.5g. Ensure you’re tamping level every time.
Problem: Milk has large, soapy bubbles that pop quickly.
- Cause: The stretching (chirping) phase was too long or the wand tip was too high above the surface, blasting in large bubbles.
- Fix: Shorten your stretch to 3 seconds. Focus on a gentle, consistent tearing sound, not a loud gulping.
Problem: Milk is thin and flat, with no foam at all.
- Cause: The steam wand tip was fully submerged the entire time. You heated the milk but added no air.
- Fix: Next time, consciously lower the pitcher at the start to hear the chirp. Mark a line on your steam wand to visualize the half-inch depth.
Problem: Alternative milk (oat, almond) curdles or separates.
- Cause: Plant-based milks have different protein structures and stabilizers. Overheating or aggressive stretching breaks them.
- Fix: Use a “barista blend” specifically formulated for steaming. Steam to a lower temperature (55-60°C / 130-140°F) and stretch for only 1-2 seconds. For more on this, see our guide to frothing almond milk.
Latte Variations and Flavor Twists
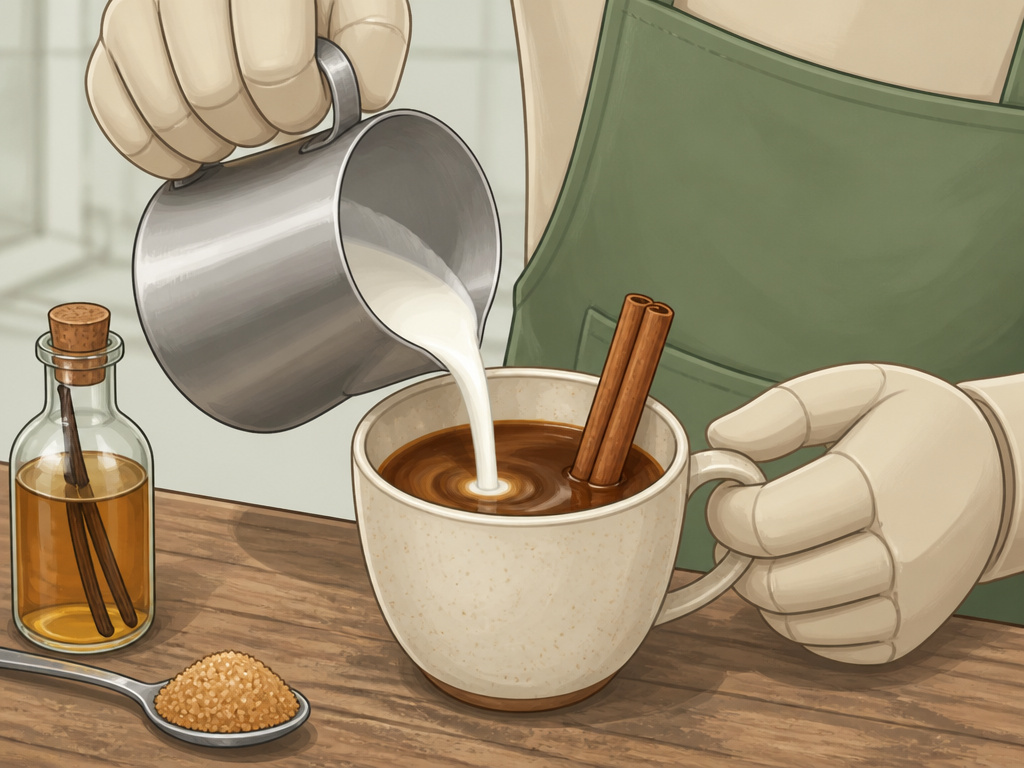
Once you’ve mastered the classic, the canvas is yours. A latte is a 1:3 to 1:5 ratio of espresso to milk. A cappuccino is closer to 1:1:1 of espresso, milk, and foam. A flat white is a latte with less foam and a higher espresso concentration.
To flavor it, add syrups or spices to the cup before the espresso. The hot espresso will help dissolve and integrate them. A pump of vanilla, a sprinkle of cinnamon topping, or a dash of brown sugar are all classic moves. For a richer, thicker texture, some people add a teaspoon of coconut oil coffee or MCT oil and blend it—the modern “bulletproof” style.
If you’re watching your intake, swapping whole milk for a low-calorie milk option like skim or almond changes the texture, but the technique remains. Just expect drier foam from skim and less stable foam from almond.
TL;DR: A latte is espresso + silky microfoam. A cappuccino has more foam. Add flavors to the cup first. Plant milks need gentler, cooler steaming.
Frequently Asked Questions
Can I make a latte without an espresso machine?
You can make a strong coffee concentrate, but it won’t be espresso. The 9 bars of pressure are required to create crema and extract the specific oils that balance milk. A Moka pot makes a strong, bitter coffee that makes a decent café con leche, but the texture and flavor profile of a true latte require an espresso machine.
What’s the difference between a latte and a cappuccino?
The ratio and foam texture. A latte is typically 1 part espresso to 3-5 parts steamed milk with a thin layer (about 1cm) of microfoam. A cappuccino is equal parts espresso, steamed milk, and thick, dry foam. For a deeper dive, see our comparison of cappuccino vs latte preparation.
Why does my homemade latte not taste like the coffee shop’s?
Three likely reasons: your coffee beans aren’t as fresh (use beans roasted within 2-4 weeks), your espresso caffeine content and extraction is uneven due to channeling, or your milk texture is wrong. The silky microfoam from a coffee shop integrates with the espresso, while home froth often sits on top.
Is a latte stronger than regular coffee?
In terms of caffeine in lattes, a double-shot latte has roughly the same caffeine as an 8-oz cup of drip coffee (about 80-100mg). The perceived “strength” is different because the espresso’s intensity is diluted and sweetened by the milk, whereas drip coffee’ flavor is undiluted.
How do I clean my espresso machine after making lattes?
After steaming milk, always purge and wipe the steam wand immediately. Backflush your machine’s group head with a blind filter and cleaning detergent once a week if it has a three-way solenoid valve. Run water through the group head and steam wand daily to prevent milk and coffee oil buildup.
Before You Go
A great home latte hinges on two technical skills: pulling a balanced espresso shot and steaming milk into true microfoam. The shot needs weight, time, and pressure. The milk needs a deliberate two-step steam. Your biggest lever is your grinder’s consistency. Your most common mistake will be over-aerating the milk.
Start with whole milk—it’s the most forgiving. Weigh your coffee and your shot output every time until the process is muscle memory. When you move to dairy-free milk for coffee like oat or soy, lower your temperature expectations and shorten the stretch. The goal isn’t to replicate a cafe on day one. It’s to understand why the milk swirls, why the espresso drips, and how the two combine into something better than the sum of their parts. Then you pour.
