
Master Your Machine: How to Operate a Keurig Coffee Maker
To operate a Keurig coffee maker, you fill the water reservoir, power it on to preheat, insert a K-Cup, select your brew size, and press brew. The critical step most manuals bury is enabling the high altitude setting if you live above 5,000 feet, skip it and the machine sputters, producing weak, under-extracted coffee.
People think these machines are foolproof. They fill the reservoir, pop in a pod, and hit a button. Then they wonder why the coffee tastes thin or the machine makes a gurgling sound halfway through the cycle. The problem is almost never the machine. It’s missing one of three model-specific settings or ignoring the water you’re using.
This guide walks through the correct operation for any Keurig, from the compact K-Mini to the carafe-brewing K-Duo. We’ll cover the initial setup, the purpose of every button, and the maintenance that keeps it running for years. You’ll also learn what to do when the standard procedure doesn’t work.
Key Takeaways
- Enable the high altitude setting on models like the K-Elite if you live above 5,000 feet. Failure to do this causes low pressure, leading to sputtering and weak coffee.
- Descale every three months with Keurig’s own solution or citric acid. Hard water mineral buildup is the leading cause of slow brewing, leaks, and eventual pump failure.
- Never use distilled or softened water. The minerals in fresh, cold tap or filtered water are necessary for the heating element to sense temperature correctly.
- For the strongest coffee, use the Strong Brew button if your model has it. It slows the water flow for a longer contact time with the grounds.
- Always run a water-only cleansing brew after descaling and before storing the machine. Residual descaling solution left in the internal lines will ruin your next dozen cups.
The First Brew and Initial Setup
Unbox the brewer and place it on a stable, level surface. Leave at least four inches of clearance behind it for the power cord and above it for the handle to open fully. This seems obvious. I’ve seen a K-Elite tucked under a cabinet where the handle smacked the wood on every open, the plastic stress cracks appeared within a month.
Remove all packaging tape and stickers, especially the one inside the water reservoir. Wash the reservoir with warm, soapy water and rinse it thoroughly. Do not put any other parts in the dishwasher.
The Keurig K-Elite brewer features a 75 oz water reservoir, programmable brew sizes of 4, 6, 8, 10, and 12 oz, and dedicated Strong Brew, Iced, and Hot Water on Demand buttons. Its high altitude setting is activated through a specific menu sequence.
Fill the reservoir with fresh, cold tap water up to the maximum line. Do not use distilled, purified, or softened water. The heating element relies on mineral content to correctly gauge temperature. Using distilled water can cause the machine to overheat or misread fill levels. Slide the reservoir back onto the machine until it clicks into place.
Plug the power cord directly into a wall outlet. Avoid power strips or extension cords if possible, the initial heating surge can trip weak circuits. Press the power button. The machine will take two to four minutes to heat. A blinking light indicates heating; a solid light means it’s ready.
This is when you check for the high altitude setting. If your manual mentions it and you live above 5,000 feet, find the sequence. On the K-Elite, you hold the 8oz and 10oz buttons together for three seconds. A small icon appears on the display. Ignoring this step is the most common reason for complaints of “weak coffee” in mountain towns. The lower atmospheric pressure affects the pump’s ability to build pressure, so the machine adjusts its cycle.
TL;DR: Give the machine space, use cold tap water, and find the high altitude toggle in your manual if you need it. That four-minute heat-up is non-negotiable.
Navigating Buttons, Settings, and Brew Sizes
Your model determines your options. A basic K-Mini has a simple power button and a brew lever. A K-Duo has a carafe mode. The buttons aren’t just for show, they change the machine’s internal timing.
| Button/Setting | Primary Function | When to Use It |
|---|---|---|
| Brew Size (4-12 oz) | Controls water volume through the pod. | Standard brewing. Smaller cup = stronger coffee, larger cup = milder. |
| Strong Brew | Slows water flow, extending brew time by ~30%. | For bold K-Cups or when coffee tastes weak. |
| Iced | Brews a concentrated shot over ice. | Making iced coffee without dilution. |
| Hot Water on Demand | Dispenses hot water without a pod. | For tea, instant soups, or preheating a mug. |
| Carafe (K-Duo) | Brews a full carafe using ground coffee. | Serving multiple people at once. |
The Strong Brew function is the most misunderstood. It doesn’t add more coffee. It reduces the water flow rate, allowing the hot water to spend more time in contact with the grounds. This extracts more solids. Use it for dark roasts or any time your regular brew tastes watery. The difference is noticeable.
The Iced setting is not a gimmick. It brews a smaller, more concentrated amount of coffee directly over a full cup of ice. If you use the regular brew setting over ice, you’ll get a watered-down cup. The machine knows the difference.
For Hot Water on Demand, let the machine reach full ready status first. Place your mug and press the button. The water comes out near-boiling, so handle the mug carefully. This function also helps clear the needle if you suspect a partial clog.
Common mistake: Using the largest brew size (12oz) with a light-roast K-Cup, the high water volume over-extracts the delicate flavors, turning bright notes bitter. Stick to 6oz or 8oz for light roasts.
If your machine has a programmable auto-on feature, set it after the initial setup. The clock must be set first. This is a convenience, but remember the water has been sitting in the reservoir overnight. Some people prefer to dump that first bit of water and refill it fresh.
Daily Operation and Brewing Cycle
Lift the handle to open the brew head. You’ll see the K-Cup holder. Place a pod in the center. It doesn’t need to be forced. The top of the pod should face up. Close the handle firmly until it locks. You will hear a faint puncture sound as the needles pierce the foil.
Place your mug on the drip tray. The tray is adjustable for tall travel mugs. Select your brew size. Press the button. The pump will activate, pulling water from the reservoir through the heated tube.
Here’s what happens inside: The upper needle punctures the K-Cup’s foil lid, and the lower needle punctures the bottom filter. Near-boiling water is forced under pressure through the top needle, saturating the ground coffee. It steeps briefly before draining out the bottom needle into your cup. The entire process takes about a minute.
When the stream slows to a drip, the cycle is complete. Lift the handle. The used pod drops into the built-in storage compartment. Some models eject it automatically. Your coffee is ready.
Do not open the handle during the brew cycle. You’ll release pressure and spray hot water. It also interrupts the extraction, leaving a mess of wet grounds in the holder.
The drip tray and pod holder collect spills and grounds. Remove the drip tray and wash it with warm soapy water once a week. A clogged drip tray well will overflow onto your counter. The pod holder can be rinsed under the tap to clear out any residual coffee oils or stray grounds.
Maintenance and Troubleshooting
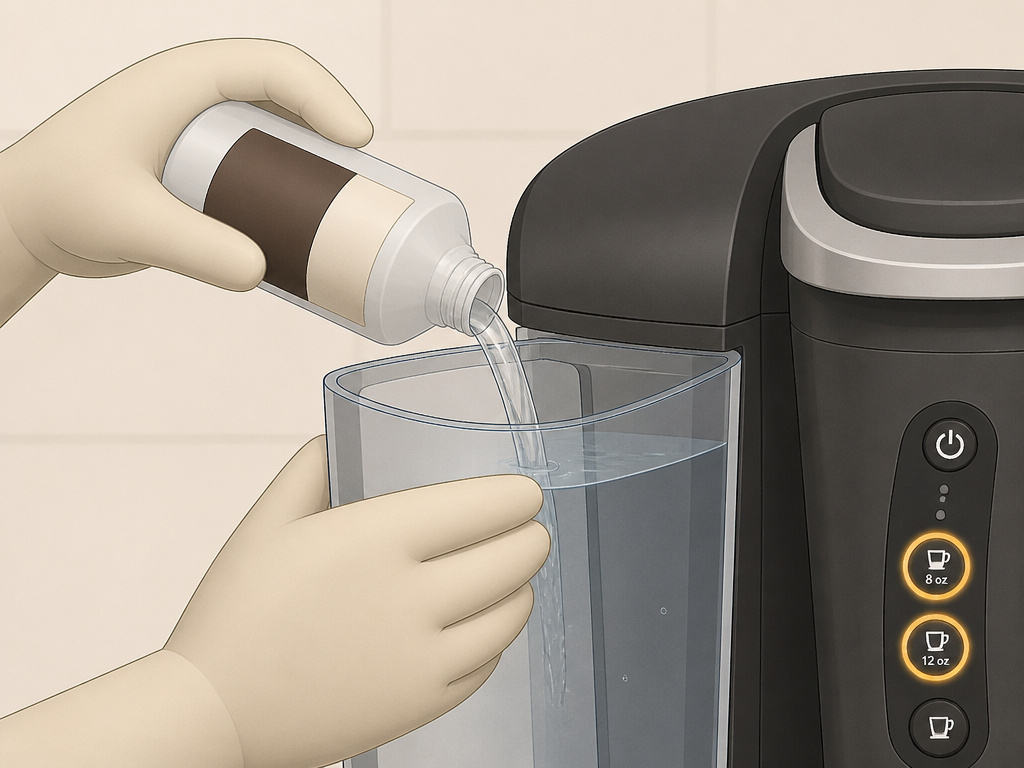
Maintenance is not optional. It’s the price of convenience. The schedule breaks down into daily, weekly, and monthly tasks.
- Daily: After your last brew, turn the machine off. Open and close the handle to relieve any residual pressure. This extends the life of the needle seals.
- Weekly: Remove and wash the water reservoir, drip tray, and pod holder. Wipe the exterior with a damp cloth. Never use abrasive cleaners.
- Monthly: Run a water-only cleansing brew. Fill the reservoir with fresh water, do not insert a K-Cup, and run the largest brew size into a mug. Discard the water. This flushes loose scale and coffee oils from the internal lines.
Descaling is the critical monthly task. The manual says every three to six months. In areas with hard water, make it every three. You’ll know it’s time when the brew cycle slows down, the machine sounds louder, or coffee output decreases.
To descale, you need Keurig Descaling Solution or a homemade citric acid mix. Do not use vinegar. The smell permeates the plastic and is nearly impossible to remove, tainting coffee for weeks.
Common mistake: Using vinegar to descale, the acetic acid smell lingers in the plastic reservoir and internal tubes, giving the next 20+ brews a sour, off-putting taste. Use citric acid or the branded solution.
The descaling mode is usually activated by holding specific buttons. For the K-Elite, you hold the 8oz and 12oz buttons. Follow the on-screen prompts. The machine will pump the solution through, then pause. You must let it sit for 30 minutes to dissolve scale. After the pause, you’ll refill the reservoir with fresh water and run multiple rinse cycles until the water runs clear. Skip the sitting step and the scale remains.
| Symptom | Likely Cause | Immediate Fix |
|---|---|---|
| Machine turns on but won’t brew | Empty water reservoir or airlock in line. | Refill reservoir. Unplug machine for 60 seconds, then retry. |
| Coffee is weak or watery | High altitude setting disabled, or incorrect brew size. | Enable high altitude setting if applicable. Use Strong Brew or smaller cup size. |
| Machine drips or leaks from bottom | Clogged exit needle or overfilled drip tray. | Clean exit needle with a paperclip. Empty and wash drip tray. |
| Loud noise during brew | Severe mineral scale in pump or heater. | Descale immediately. If noise continues, pump may be failing. |
| “Add Water” light on, but reservoir is full | Mineral scale on water level sensor. | Descale. Gently clean sensor contacts in empty reservoir with a cotton swab. |
If your machine is a recalled Keurig MINI Plus (models K10/B31, serial numbers starting with “31” and ending with “60”), stop using it immediately. The recall was for hot liquid spraying. Contact Keurig for remediation.
TL;DR: Wash the removable parts weekly. Descale with the right solution every three months. If coffee tastes bad, clean the needle and run a water cleanse before you blame the beans.
Water Quality and Accessories
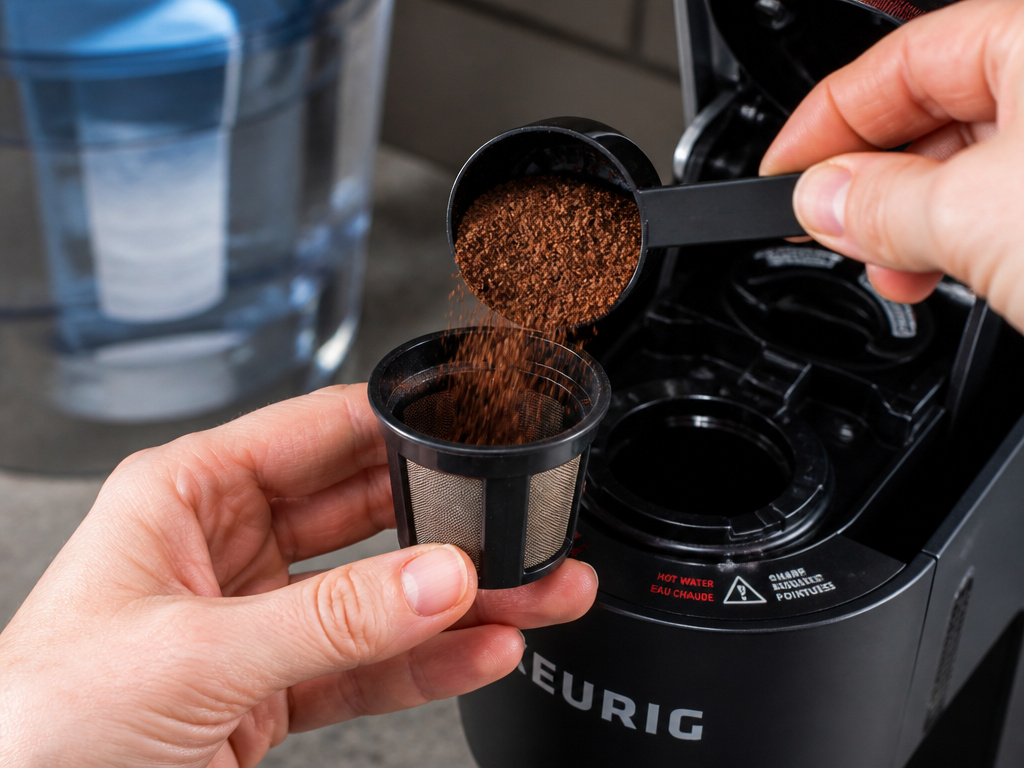
The water you use is half the equation. Keurig officially recommends using fresh, cold water. They explicitly warn against distilled, purified, or softened water.
Distilled water lacks minerals. This can cause the heating element to overheat, as minerals help conduct heat. It also leads to slower brewing. Softened water has high sodium content, which can corrode internal metal parts over time and alter taste. The best practice is to use filtered tap water. A simple Breville coffee filter pitcher is sufficient to remove chlorine and large particulates without stripping all minerals.
For those concerned about waste, consider reusable K-Cup pods. They are a simple mesh basket you fill with your own ground coffee. The grind size matters, aim for a medium consistency, similar to pre-ground drip coffee. A too-fine grind will clog the needle and create a muddy cup. A too-coarse grind will result in a sour, under-extracted brew. Using a proper burr coffee grinder gives you the control to dial this in.
When you’re out of filters or want to experiment, you can use a Ninja blender grinder in a pinch. Pulse the beans for two to three seconds at a time and shake the carafe to achieve a semi-even grind. It’s not perfect, but it works for a single cup.
Your choice of add-ins also changes the dynamic. Adding almond milk in coffee after brewing is fine, but the machine’s Hot Water on Demand is not for frothing. The pressure is wrong. For sweeteners, something like brown sugar sweetener dissolves well in the hot stream. Avoid thick syrups directly in the K-Cup holder, they gum up the needle.
Frequently Asked Questions
Why is my Keurig not pumping water?
Check that the water reservoir is fully seated. If it is, an airlock is the most common cause. Unplug the machine for one full minute. Remove and reseat the reservoir, then plug it back in. This often resets the pump. If the problem persists, the water line may be clogged with scale, requiring descaling.
Can I use my own coffee in a Keurig?
Yes, with a reusable K-Cup filter. Fill it with a medium-ground coffee, level with the top, do not pack it. The machine will brew as normal. Clean the reusable pod thoroughly after each use to prevent rancid oil buildup.
How do I clean the needles?
Unplug the machine. Lift the handle. You’ll see the upper exit needle in the center of the brew head. Use a straightened paperclip to gently insert into the needle opening and clear any debris. Wipe the area with a damp cloth. Never use a toothpick; it can break off inside.
What does the “Descale” light mean?
The machine’s internal timer estimates scale buildup based on usage and triggers this alert. You must run a full descaling procedure to turn it off. Simply running vinegar or water through will not reset the counter. Follow the model-specific descaling instructions in your manual.
Is it okay to leave water in the Keurig?
For daily use, yes. If you plan to not use the machine for more than a week, empty and dry the water reservoir. Stagnant water can develop biofilm and affect taste. For seasonal storage, run a cleansing brew, empty all water, and let the internal tank dry out with the lid open.
The Bottom Line
Operating a Keurig correctly means respecting its engineering. It’s not a magic box. It’s a precision pump, heater, and timer. The high altitude setting exists for a mechanical reason. The three-month descaling reminder is based on the average rate of mineral deposition. Ignore those and performance degrades.
Start with good water and keep the needles clean. Use the Strong Brew button when you want more intensity. Remember that the Black & Decker manual or Braun coffee maker manual for a drip machine is different, this system is built around pressure and single-serve pods. Your choice of filter, like bleached coffee filters for a reusable pod, or even Bunn coffee filters for a different machine, doesn’t apply here.
The goal is a consistent, fast cup. That requires a little consistent, fast maintenance. Do that, and the machine will outlast its warranty.
