
The Method for Making an Espresso Shot with Instant Coffee
To make a shot of espresso with instant coffee, you need a specific, intense ratio: 2 teaspoons of instant espresso powder dissolved in just 2 tablespoons of hot water, then vigorously frothed. This creates a concentrated, foamy drink that mimics the body and crema of a true espresso shot.
Most people dump instant coffee into a mug of hot water and call it a day. That makes a weak, flat cup, not an espresso. The difference isn’t the machine. It’s the ratio and the technique.
This guide covers the exact measurements, the two-step mixing method that preserves flavor, and how to fake the crema with a frother. You’ll also learn which instant products work, which ones fail, and why your milk might not froth.
Key Takeaways
- Use instant espresso powder (like Nescafé Taster’s Choice) or a dark roast instant coffee for a flavor closer to real espresso.
- The working ratio is 2 teaspoons of powder to 2 tablespoons of hot water (195–205°F / 90–96°C). More water dilutes the shot.
- Start with a cold-water paste (about 20ml) before adding hot water. This stops volatile aromatics from steaming off and keeps the flavor sharp.
- Froth the finished shot with a handheld milk frother for 15–20 seconds to create a dark, dense foam that mimics crema.
- Whole milk or barista-style almond milk froths best for lattes and cappuccinos. Skim milk and some dairy alternatives produce larger, less stable bubbles.
Why You Can’t Just Add Hot Water
Espresso is defined by concentration and pressure. A standard shot pulls about 18 grams of coffee through 30 grams of water in 25–30 seconds under 9 bars of pressure. Instant coffee dissolves. You can’t replicate pressure, but you can replicate the intense coffee-to-water ratio.
Common mistake: Using a regular instant coffee ratio (1 tsp per 8 oz water) — the result is a weak, tea-like coffee with no body. You need at least 4x that concentration.
The goal is a liquid that’s roughly 1 part coffee solids to 2 parts water by volume after dissolution. That’s why the 2-teaspoon-to-2-tablespoon formula works. One tablespoon holds 3 teaspoons. Two tablespoons of water is 6 teaspoons. So you’re mixing 2 parts powder into 6 parts water. That’s a 1:3 coffee-to-water ratio by volume, which is extremely strong.
Skip the frothing step and you just have strong coffee. The foam is what gives it the mouthfeel of an espresso crema.
Choosing Your Instant: Powder vs. Granules
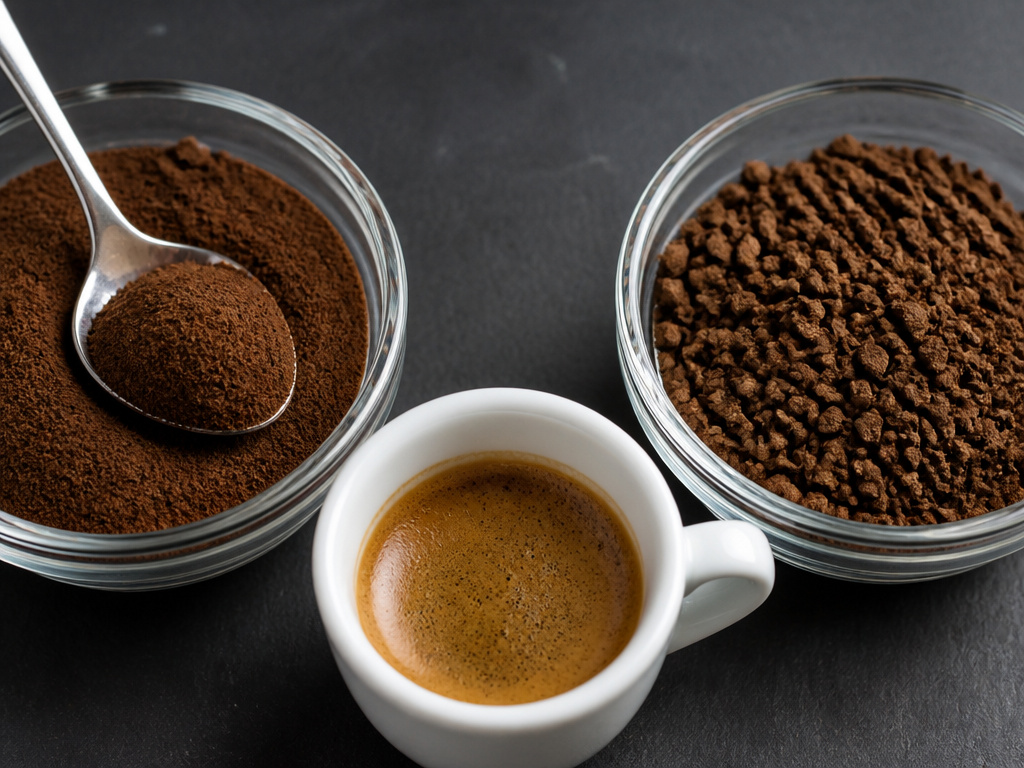
Not all instant coffee is the same for this job. The grind size and roast profile matter.
| Type | Best For | Why It Works | Watch Out For |
|---|---|---|---|
| Instant Espresso Powder (e.g., Nescafé Taster’s Choice, Medaglia d’Oro) | Straight shots, lattes, cappuccinos | Finer particle size dissolves faster and more completely in small water volume. Darker roast mimics espresso’s bitterness. | Can be harder to find in standard grocery stores. Often sold in small jars. |
| Dark Roast Instant Coffee Granules (e.g., Starbucks Via Dark Roast, Nescafé Gold) | Mochas, iced drinks, Americanos | Readily available. Granules provide a robust flavor base that stands up to milk and syrups. | Granules may not dissolve as fully in the small water amount, leaving a slight silt at the bottom of the cup. |
| Light Roast or Flavored Instant Coffee | Not recommended for espresso-style drinks | Lighter, fruitier notes get lost in the high concentration. Flavored varieties (vanilla, hazelnut) can taste artificial and overpowering. | The resulting shot often tastes sour or thin, lacking the roasted depth of espresso. |
Instant espresso powder is simply a more finely ground, darker roasted version of freeze-dried coffee. The smaller particle size creates more surface area, which is why it whips into a denser foam than chunky granules. If your local store doesn’t carry it, order it online or use the darkest roast instant granules you can find.
TL;DR: Grab instant espresso powder if you can. If you can’t, use the darkest roast instant coffee granules on the shelf. Avoid light roasts and flavored varieties.
The Two-Step Method That Actually Works

This method comes straight from a YouTube barista tutorial. It uses a cold-water start to lock in flavor before adding heat.
What you’ll need:
- 2 teaspoons instant espresso powder or dark roast instant coffee
- 1 tablespoon (15ml) cold water
- 2 tablespoons (30ml) hot water (195–205°F / 90–96°C)
- A small cup or glass
- A teaspoon for stirring
- A handheld milk frother, small whisk, or fork
Step 1: Make a cold paste.
Add your 2 teaspoons of instant coffee to the cup. Pour in the cold water and stir vigorously until it forms a smooth, thick paste with no dry clumps. This step hydrates the coffee without using heat, which prevents the volatile aromatic compounds from evaporating as steam. If you add hot water first, those top notes are gone before the drink even touches your lips.
Step 2: Dissolve with hot water.
Now, add the 2 tablespoons of hot water to the paste. Stir again until everything is fully dissolved. The water must be just off the boil—between 195°F and 205°F (90°C to 96°C). Water that’s not hot enough won’t fully dissolve the concentrate, leaving a grainy texture. Water that’s boiling can scald the coffee, adding a burnt note.
Step 3: Froth for crema.
This is the non-negotiable step. Insert your handheld frother or whisk into the cup. Froth for 15–20 seconds, moving the tool up and down to incorporate air. You’re not trying to make stiff peaks like whipped cream. You’re looking for a layer of dark, dense foam that sits on top of the liquid—this is your faux crema.
I tried skipping the frother and just shaking the shot in a sealed jar. The foam collapsed within 10 seconds. The whisking action of the frother stretches the proteins and solids in the instant coffee, creating a foam stable enough to last about a minute. That’s all you need.
Step 4: Serve immediately.
Pour the shot directly into a demitasse or over ice. Drink it quickly. The foam will start to dissipate after about 60 seconds. For milk drinks, pour your frothed milk directly through the foam layer.
Why Your Milk Won’t Froth (And How to Fix It)
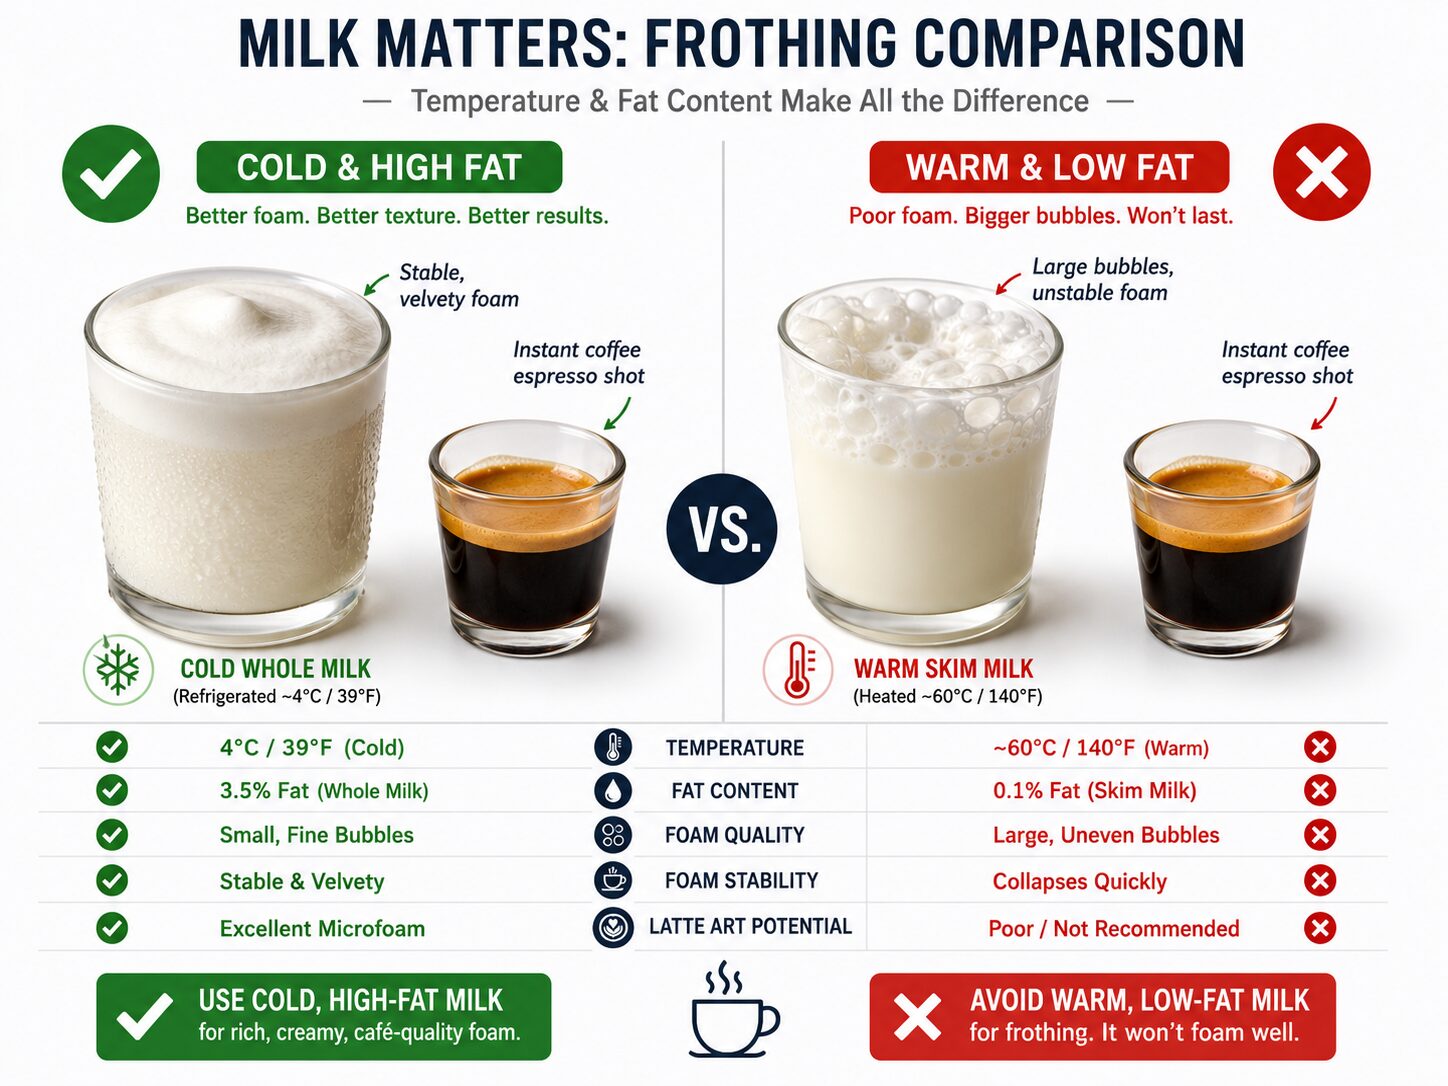
You followed the steps, made a decent shot, but your milk turned into a sad, bubbly puddle instead of silky microfoam. The problem is almost always fat content or temperature.
First, cold milk froths better than warm milk. The proteins that create foam are more stable when they’re cold. Take your milk straight from the fridge.
Second, whole milk (around 3.25% fat) creates the most stable, velvety foam. The fat molecules coat the air bubbles, making them smaller and more resilient. Skim milk froths quickly but produces large, unstable bubbles that pop almost instantly. For a non-dairy creamer, you need a barista-style almond milk or oat milk. These are formulated with added fats and stabilizers like gellan gum or sunflower lecithin specifically for frothing.
The technique matters too. If you’re using a handheld frother: 1. Submerge the whisk head just below the surface of the milk. 2. Turn it on and tilt the pitcher slightly to create a vortex. 3. Keep the frother head near the surface for the first 5 seconds to inject air (you’ll hear a slight ch-ch-ch sound). 4. Then, lower the frother deeper to circulate and break up the larger bubbles into microfoam. Stop when the milk feels warm to the touch, not hot. Overheating the milk (above 150°F / 65°C) breaks down the proteins and the foam collapses.
TL;DR: Use cold whole milk or a barista-style plant milk. Froth with a vortex motion, and stop before the milk gets hot.
Turning Your Shot Into a Real Drink
A straight instant espresso shot is bracing. Most people use it as a base for other espresso-based drinks.
For an Americano: Add 4–6 ounces of hot water to your frothed shot. The foam will sit on top, mimicking the crema layer of a true espresso dilution.
For a Latte or Cappuccino: Froth your milk as described above. Pour the milk slowly into the center of your frothed espresso shot. If you poured the milk correctly, the dark espresso caffeine content will rise through the white foam, creating a layered look. The high concentration of the shot means it will hold its own against 6–8 ounces of milk.
For a Mocha: Mix a tablespoon of chocolate syrup or powder into your hot shot before frothing. Stir until combined, then froth. The chocolate adds viscosity, which can actually help stabilize the foam.
For Iced Drinks: Pour your frothed shot directly over a full glass of ice. Add cold milk or water. The ice will melt and dilute the drink as you sip, so make your shot a touch stronger—try 2.5 teaspoons of powder.
Common mistake: Adding syrup or sugar to the cup after frothing the coffee. The granules or thick syrup will puncture the foam layer and sink straight to the bottom. Always dissolve your sweetener in the hot shot before you froth.
Frequently Asked Questions
Can I use regular instant coffee granules?
You can, but the result will be different. Regular instant coffee granules are often a medium roast and a larger particle size. They may not dissolve as completely in the small water volume, leaving sediment, and they won’t froth into as dense a foam. The flavor will be weaker and less roasty. For the best faux-espresso, seek out instant espresso powder.
Why do I need to froth it? Can’t I just drink it?
You can drink it without frothing, but you’ll miss the texture. The frothing step incorporates tiny air bubbles, creating a layer of foam that mimics the mouthfeel and visual crema of a real espresso shot. It adds a silky texture that makes the strong, concentrated coffee more palatable.
What’s the best instant coffee for this?
For authentic flavor, Nescafé Taster’s Choice House Blend instant espresso powder is a widely available benchmark. Starbucks Via Instant Italian Roast is a good granular alternative. Nescafé Gold is a step up in smoothness but is still granules. Avoid anything labeled “light roast” or with added flavors like vanilla.
My shot tastes bitter. How can I fix it?
Instant coffee, especially darker roasts, can amplify bitter notes when concentrated. Try a pinch of salt added to the dry powder before adding water. The sodium ions block some of the bitter receptors on your tongue. You can also experiment with a blonde roast instant coffee for a less intense, more acidic profile.
Can I make a decaf version?
Yes. Several brands make a decaffeinated instant espresso powder or dark roast instant. The process is identical. Just be aware that decaf instant coffee sometimes has a slightly different solubility, so you may need to stir a bit longer to get a fully dissolved paste.
Before You Go
Making an espresso shot with instant coffee isn’t about fooling yourself. It’s about using what you have to make a strong, small, foamy coffee drink when a machine isn’t an option. The 2-teaspoon-to-2-tablespoon ratio is the foundation. The cold-then-hot water method preserves flavor. The frother creates the texture.
Keep a jar of instant espresso powder in your pantry. It lasts for years and solves the problem of a sudden espresso craving at a cabin, in a hotel room, or before your morning machine warms up. It won’t replace a freshly pulled shot from a burr grinder, but it will get you 80% of the way there with 1% of the equipment.
