
How to Cold Press Coffee: The Fridge vs Counter Brew Debate
To cold press coffee, combine coarsely ground beans with cold water at a 1:4 ratio by weight, steep for 12-24 hours, then filter thoroughly. The resulting concentrate is strong, smooth, and low in acid, meant to be diluted before drinking.
Most people get this wrong by grinding too fine and steeping too long. They end up with a bitter, over-extracted sludge that tastes nothing like the bright, chocolatey cold brew from a good cafe. It’s a patience game, but the rules are simple.
Here’s how to do it right, why each step matters, and where you can safely cut corners without ruining a whole batch.
Key Takeaways
- Grind size is non-negotiable: a medium-coarse grind (like breadcrumbs) prevents over-extraction and silt. A blade grinder can’t get you there.
- Weight beats volume every time. A 1:4 coffee-to-water ratio by weight (e.g., 100g coffee to 400g water) is the standard for concentrate. Volume measurements introduce a 20% margin of error.
- Fridge vs counter changes the profile, not just the time. Countertop (12-14 hours) yields a fuller, more developed flavor. The fridge (18-24 hours) is cleaner and brighter, with less risk of off-notes.
- Double-filtering is the secret to clarity. A coarse sieve gets the grounds, but a final pass through a paper coffee filter or a nut milk bag removes the fine silt that makes cold brew taste muddy.
- Your concentrate is not your drink. Dilute it 1:1 with water or milk. Drinking it straight is like sipping espresso straight from the portafilter.
The Right Grind for Cold Press Coffee
The grind is your first and most important variable. Get it wrong, and everything after is salvage work.
You need a medium-coarse grind. Visualize fresh breadcrumbs, not sand. A blade grinder pulverizes beans unevenly, creating a mix of dust and boulders. That dust will over-extract in hours, turning your brew astringent and bitter. A consistent coarse grind from a burr coffee grinder is the only reliable path.
A 2023 study in the Scientific Reports journal, available on PubMed Central, found that grind size had a more significant impact on the final soluble solids and sensory profile of cold brew than steeping time or coffee type. Coarse grinds produced a more balanced extraction.
Fine grinds pack tightly, slowing water penetration and trapping gases. The outer layers of the coffee particle over-extract while the core stays under-extracted. You get the worst of both worlds: harsh acidity and weak body. The silt also clogs filters, making the final step a frustrating mess.
TL;DR: Use a burr grinder set to its coarsest setting. If it looks like table salt, it’s too fine. Aim for breadcrumbs.
Coffee, Water, Ratio: The Math That Actually Works
Forget the “scoop” method. A scoop of whole beans weighs differently than a scoop of ground coffee. Volumetric measuring introduces a swing of up to 20% in your coffee dose, which throws the entire extraction balance off.
Weigh everything.
The standard ratio for a ready-to-drink cold brew is 1:8. For a concentrate, which is what you’re making, it’s 1:4. That’s one part coffee to four parts water, by weight.
| Brew Type | Coffee:Water Ratio | Yield | Best For |
|---|---|---|---|
| Concentrate | 1:4 (e.g., 100g : 400g) | Strong, needs dilution | Batch prep, versatility |
| Ready-to-Drink | 1:8 (e.g., 100g : 800g) | Weaker, drink straight | Single-serving, simplicity |
I use 250 grams of coffee to 1 liter (1000 grams) of water. It fits a standard 1-liter French press and makes about 800ml of concentrate after grounds absorption. That’s four solid servings.
Use filtered water. Tap water minerals and chlorine will steep into your coffee for a day. You’ll taste it.
Common mistake: Measuring coffee by volume, a “cup” of whole beans weighs 20-30% more than a “cup” of ground coffee. Your ratio drifts, and the batch tastes weak or harsh.
Water temperature is simple: cold. Room temperature is fine. Some guides insist on chilled water from the fridge, but the difference is marginal. The key is that it’s not hot. Hot water extracts in minutes; cold water needs hours.
Fridge or Counter? The Steeping Time Debate
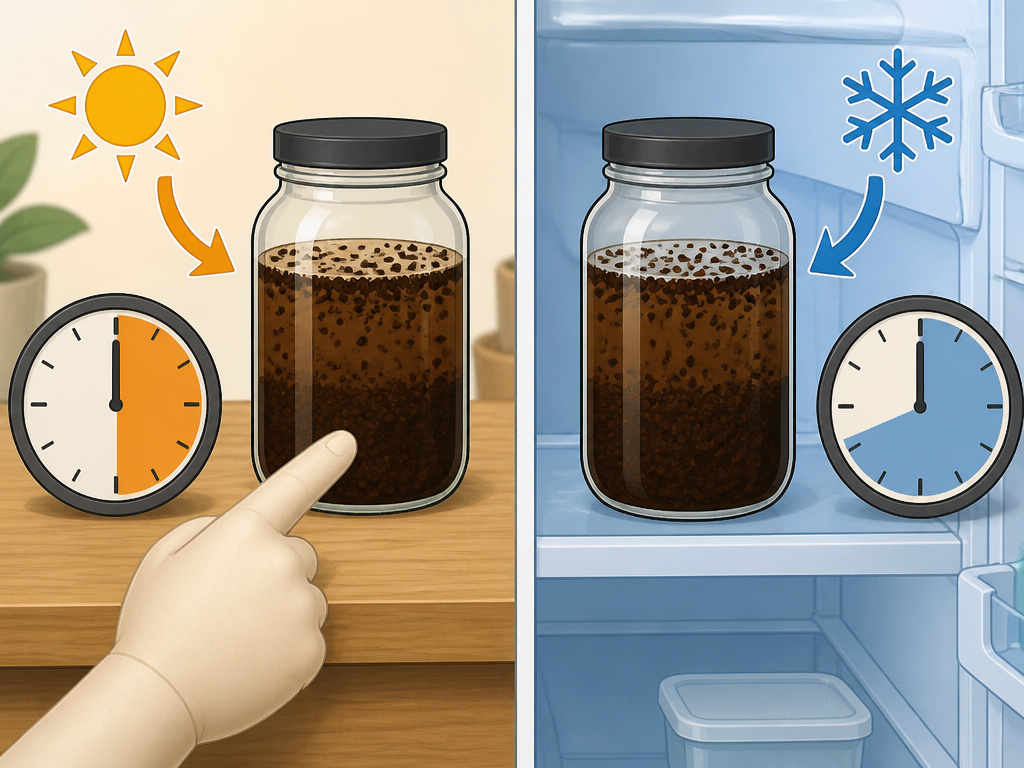
This is where most guides give you a range and leave you guessing. The truth is, location dictates time and taste.
Room temperature steeping runs faster. Aim for 12 to 14 hours. The warmer environment accelerates extraction, pulling more oils and soluble solids from the coffee. You get a fuller, more developed flavor with deeper chocolate and nutty notes. The risk is that if your kitchen is very warm or you go past 16 hours, it can start to taste woody or over-extracted.
I left a batch on the counter for 18 hours in a 75°F kitchen once. It tasted like I’d brewed it with a handful of pencil shavings. The line between done and overdone is about four hours.
Steeping in the refrigerator takes longer, 18 to 24 hours. The cold dramatically slows extraction. The result is a cleaner, brighter cup with more pronounced fruity or floral notes, especially if you’re using a single-origin coffee from Ethiopia or Kenya. It’s also more forgiving. Forget it for a few extra hours? Probably fine.
The National Coffee Association brewing guide recommends the refrigerator method for food safety, as it keeps the brew below the temperature danger zone during the long steep.
Here’s the simple decision matrix:
| Location | Time | Flavor Profile | Risk |
|---|---|---|---|
| Countertop | 12–14 hours | Richer, more chocolate/nutty | Over-extraction after 16 hrs |
| Refrigerator | 18–24 hours | Cleaner, brighter, more acidic | Under-extraction before 18 hrs |
Stir your mixture well at the start. All grounds need to be fully saturated. If you see dry clumps floating, you’ve wasted coffee.
Filtration: The Final, Critical Step

You’ve waited half a day. Now don’t rush the last five minutes. Filtration is where good cold brew becomes great.
Your first filter is coarse. If you used a French press, press the plunger down slowly and steadily. Don’t force it to the bottom and compress the grounds, that squeezes out bitter compounds. If you used a jar, pour the entire mixture through a fine-mesh sieve into another container.
This gets the big stuff. The liquid will still be cloudy with fine silt.
Your second filter is fine. This is the non-negotiable step for clarity. Line your sieve with a damp cheesecloth, a paper coffee filter, or use a nut milk bag. Pour the initially filtered brew through it. A paper filter will catch everything, yielding a crystal-clear concentrate. A cheesecloth or nut milk bag is faster but may let through the finest particles.
I use a paper filter inside a funnel for the final pass. It takes three minutes for a liter to drip through. The wait is worth it, zero sediment in the final bottle.
If you’re environmentally conscious, reusable options like a cloth filter or a metal mesh filter designed for cold brew (like the Hario Mizudashi filter basket) work well, though they might require more cleaning.
TL;DR: Filter twice. Once to remove grounds, once to remove silt. Your concentrate should be totally clear, like strong tea.
Dilution and Serving: Making It a Drink
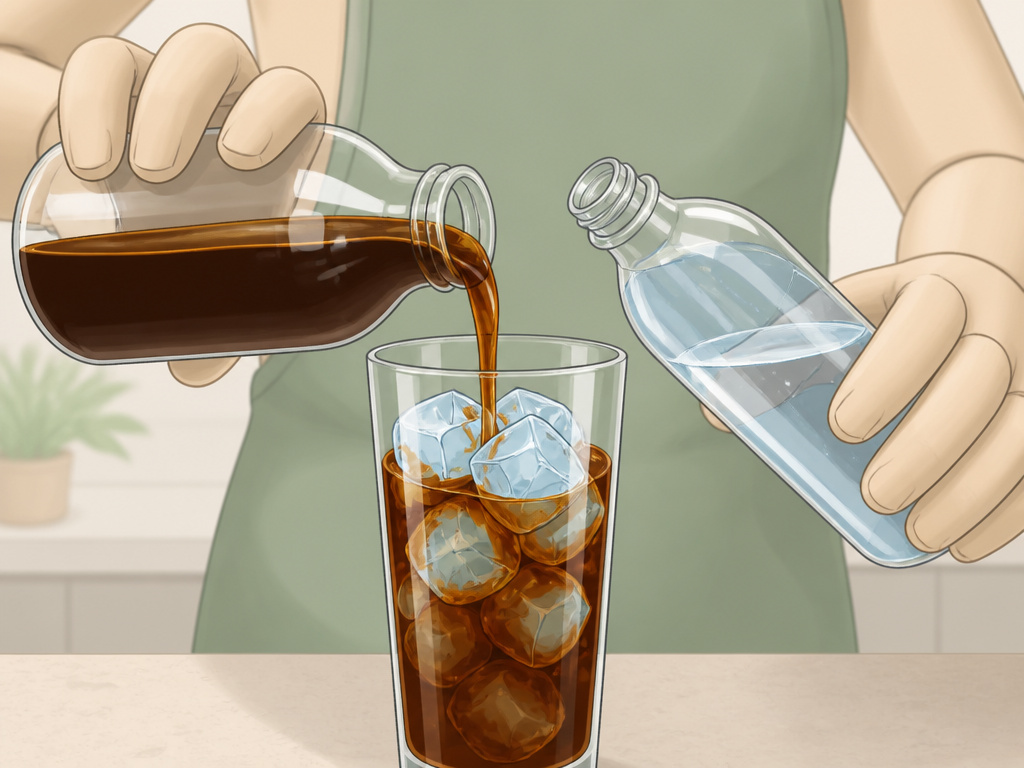
What’s in your bottle now is concentrate. It is not meant to be drunk straight. Its caffeine content is intense, and its flavor is overpoweringly strong.
The standard dilution is 1:1. One part concentrate to one part water, milk, oat milk, or whatever you prefer. This is your starting point. From there, adjust to taste. Some like it stronger (less water), some milder (more water).
For an iced coffee: Fill a glass with ice, pour in your diluted cold brew. The ice will melt and further dilute it slightly, account for that if you’re particular.
For a creamy treat: Mix concentrate with milk or a creamer. A splash of vanilla or a dash of cinnamon works. A little brown sugar dissolved in a tablespoon of hot water makes a great syrup that incorporates easily.
Store the undiluted concentrate in a sealed container in the refrigerator. It will keep for up to two weeks. After that, the flavors slowly flatten and it can develop off-notes.
Choosing Your Beans and Roast
Any coffee will work, but the result changes dramatically with your choice.
Dark roasts are the classic cold brew choice. Their bold, chocolatey, low-acid profile shines through the cold extraction. They’re forgiving and produce that familiar diner-style cold brew.
Medium roasts offer more complexity. You might get notes of caramel, nuts, or dark fruit. They’re a great middle ground.
Light roasts, or blonde roast coffee, are the adventurous pick. Cold water doesn’t extract the bright, acidic notes the same way hot water does. Instead, you get a tea-like, floral, and sometimes surprisingly sweet cup. It’s a different experience entirely.
Single-origin beans, like those from a specific region in Colombian coffee, can yield fascinatingly specific flavor notes, think berry, citrus, or wine, that are muted in hot brewing but preserved in cold.
Freshness matters less than with hot coffee. Since you’re not dealing with volatile aromatics released by heat, beans a few weeks past their roast date can still make a decent cold brew. Stale beans will just taste flat, not rancid.
Equipment: Fancy Brewer or Kitchen Jar?
You don’t need a dedicated cold brew system. A large mason jar or a French press you already own works perfectly.
The French press is ideal. It’s a brewer and a first-stage filter in one. Just steep, press, and pour through a paper filter for the final polish. The Toddy system is the commercial standard, it uses a thick felt filter and a decanter, and it’s brilliant at its job. The Hario Mizudashi is a compact, all-in-one pitcher with a fine metal mesh filter basket.
The dedicated systems are convenient and minimize mess. The jar-and-filter method is essentially free. The result, with proper double-filtering, is identical.
Common mistake: Using only the French press filter and skipping the paper filter, the result is a silty, gritty cup that feels unfinished. The press filter is too coarse.
Your money is better spent on a good burr coffee grinder and a kitchen scale than on a fancy cold brew gadget.
Frequently Asked Questions
Can I use pre-ground coffee for cold press?
You can, but you lose control. Pre-ground coffee is almost always ground for drip machines, which is too fine for a 12+ hour steep. It will over-extract, becoming bitter. If you must use it, shorten the steep time to 8-10 hours and expect a muddier result.
How long does cold brew concentrate last in the fridge?
Properly filtered and stored in a sealed container, it’s good for 10-14 days. After two weeks, the flavor begins to degrade noticeably. It won’t spoil like milk, but it will taste flat and stale.
Why is my cold brew weak or sour?
Weak brew usually means your ratio was off, too much water, not enough coffee. Weigh next time. A sour taste points to under-extraction, which happens if your grind was too coarse, your steep time was too short (especially in the fridge), or your water was too cold. Try a slightly finer grind or a longer steep.
Can I make cold brew with hot water first?
That’s a different method called “Japanese iced coffee” or “flash chill.” You brew hot coffee directly onto ice. It’s a faster method that captures more bright, acidic notes, but it’s not true cold press. The smooth, low-acid character of cold brew comes from the slow, room-temp or cold extraction.
Is cold brew stronger than regular coffee?
By volume, the concentrate is much stronger in caffeine and flavor than standard drip coffee method. Once diluted to a drinkable strength, the caffeine content is comparable to, or slightly higher than, a cup of hot coffee. It feels stronger because it’s served cold and is less acidic, so you can drink it more quickly.
Before You Go
Cold press coffee rewards a methodical approach. Weigh your coffee and water. Grind coarse. Steep based on location, not a random number. Filter twice. Dilute to taste.
The gear is secondary. A jar, a sieve, and a filter will get you 95% of the way to a pro result. The real upgrade is in the beans and the grind. Spend your budget there.
Once you dial in your ratio and time, the process becomes automatic. You’ll have a bottle of smooth, strong concentrate in the fridge all summer, ready to pour over ice in thirty seconds. It’s less a recipe and more a system. Set it up once, and it runs itself.
