
How to Clean & Descale Your Black & Decker Coffee Maker
To clean a Black & Decker coffee maker, wash the removable carafe, filter basket, and permanent filter with soapy water. For descaling, run a cycle with a 1:1 white vinegar and water solution, let it soak for 30 minutes mid-cycle, then flush with 2-3 cycles of fresh water. The official manual advises this every 80 brews.
People get this wrong by using straight vinegar, skipping the soak, or rinsing only once. The machine sputters, the coffee tastes off, and scale builds up in the heating element within months.
This guide walks through the official Black & Decker process, why each step matters, and what happens when you cut corners. It covers daily wipe-downs, deep monthly cleaning, and the exact vinegar ratio from the manufacturer’s manual.
Key Takeaways
- The official Black & Decker descaling solution is equal parts white vinegar and cold water — straight vinegar can damage seals.
- Always include a 30-minute soak during the descaling cycle; it’s the step that actually breaks down mineral clogs.
- Removable parts like the filter basket and permanent filter are top-rack dishwasher safe for the CM1100 and CM2035B models.
- Descaling frequency isn’t guesswork: the manual specifies every 80 brew cycles to prevent performance loss.
- Never use bleach, abrasive cleaners, or submerge the main unit in water.
What You’ll Need for the Job
You need three things: the right cleaner, a couple of basic tools, and about an hour of focused time. Skip the fancy descaler tablets. White vinegar is cheaper and exactly what Black & Decker specifies.
Gather white vinegar, fresh cold water, mild dish soap, a soft sponge or cloth, and a clean paper filter. A small brush helps scrub the permanent filter. That’s the entire kit.
Before you start: Unplug the coffee maker and let it cool completely. Vinegar and electricity are fine together during the programmed cycle, but you should never pour liquid into a plugged-in base. Water inside the housing can cause a short.
How to Clean the Removable Parts
Start with everything you can take apart by hand. This is the five-minute weekly clean that stops oils from going rancid.
Unplug the machine. Lift out the glass or thermal carafe, the filter basket, and the permanent mesh filter if your model has one. The Black & Decker CM1100 manual explicitly states the filter basket and permanent filter are top-rack dishwasher safe. The carafe is too. Run them through a cycle or wash by hand with warm, soapy water. A soft brush clears coffee grounds from the mesh.
Rinse everything thoroughly. Soap residue will make your next pot taste like detergent. Let the parts air-dry completely before reassembly.
TL;DR: Wash the carafe, basket, and permanent filter with soap. They’re dishwasher safe. Rinse until no suds remain.
Wiping Down the Exterior and Warming Plate
Coffee spills and steam leave a film on the machine’s housing. More importantly, drips bake onto the warming plate.
Use a damp cloth with a drop of dish soap to wipe the plastic exterior. Dry it immediately. For the warming plate, wait until it’s stone cold. Dab a cloth in plain white vinegar and scrub the ceramic surface. The mild acid cuts through the baked-on coffee residue without scratching it. Wipe with a clean, damp cloth to remove any vinegar.
A clean warming plate doesn’t just look better. It transfers heat more evenly to the carafe, so your last cup stays as hot as the first.
The Official Black & Decker Descaling Process (Step-by-Step)
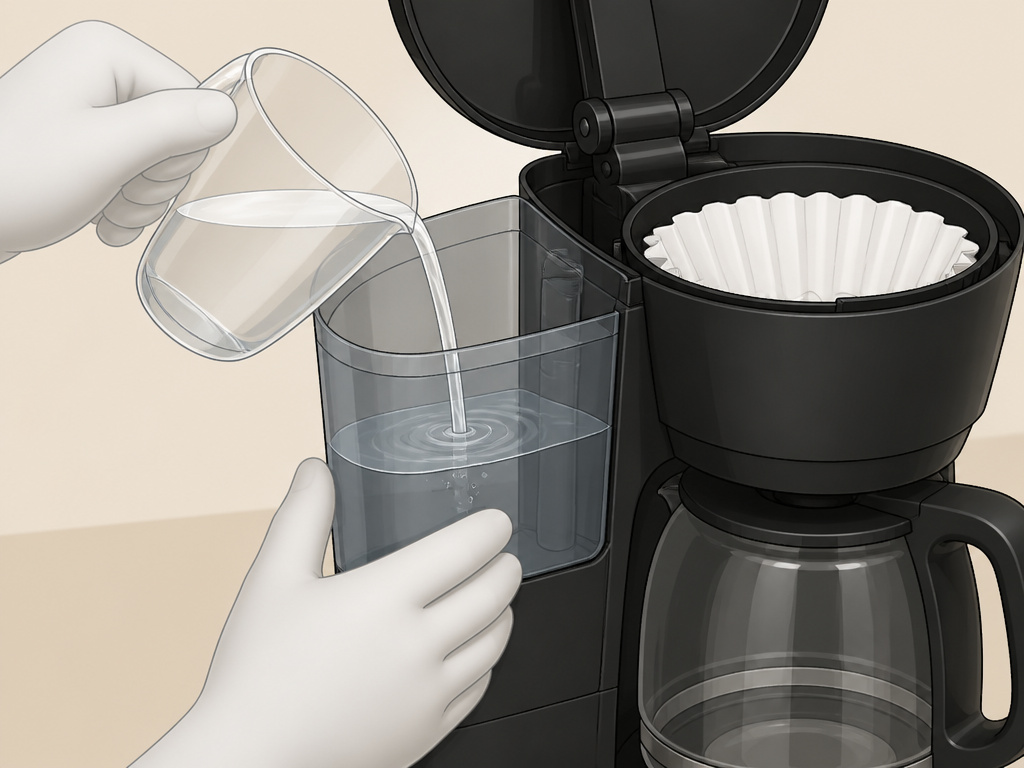
Descaling removes the mineral deposits from hard water that build up inside the tubes and heating element. Black & Decker’s official method uses a vinegar soak. The goal is contact time, not just flow-through.
Step 1: Mix the Solution
Fill the water reservoir with a solution of equal parts white vinegar and cold water. This 1:1 ratio comes directly from the CM1100 and CM2035B instruction manuals. Do not use straight vinegar. The higher acidity can degrade internal rubber seals over multiple cleanings.
Step 2: Start the Cycle with a Paper Filter
Place a clean paper filter in the empty filter basket. Close the lid. Position the empty carafe on the warming plate. Press the “Brew” button to start a normal cycle, just as if you were making coffee.
Step 3: The Critical 30-Minute Soak
Watch the carafe. When it is about half full, turn the coffee maker off. This is the key move most guides gloss over. Let the machine sit, full of vinegar solution, for 30 minutes. This soak is what dissolves the limescale. The vinegar needs time to work.
The 30-minute soak breaks the bond between calcium carbonate deposits and the metal heating element. Without it, you’re just rinsing the surface.
Step 4: Complete the Vinegar Cycle
After the soak, turn the coffee maker back on. Allow the rest of the vinegar solution to brew through into the carafe. Once the cycle finishes and the carafe is full, turn the machine off again. Discard the vinegar water.
Step 5: The Essential Rinse Cycles
Vinegar left inside will make your coffee taste sour. You must flush it out. Fill the reservoir with fresh, cold water only. Run a full brew cycle. Discard that water. Repeat this rinse process two to three more times. When the final cycle’s water in the carafe smells and tastes completely neutral, you’re done.
| Step | Action | Consequence If Skipped |
|---|---|---|
| 1. Mix Solution | 1:1 vinegar/water in reservoir | Straight vinegar damages seals; weak mix doesn’t descale. |
| 2. Start Cycle | Brew with empty paper filter | Vinegar bypasses basket, less effective. |
| 3. Soak | Turn off at half-full, wait 30 min | Scale doesn’t dissolve; process fails. |
| 4. Finish Cycle | Turn on, complete brew | Leaves dissolved scale in the system. |
| 5. Rinse | 2-3 water-only cycles | Vinegar taste ruins next pots of coffee. |
TL;DR: Half-brew, soak 30 minutes, finish, then rinse 3 times. The soak is non-negotiable.
How Often Should You Descale?

Don’t clean on a hunch. The Black & Decker manual gives a number: every 80 brew cycles. For most households brewing a pot a day, that’s about once every three months.
Your water hardness changes this schedule. If you see white flakes in the carafe or the brew time slows down, descale immediately. The machine will tell you when it’s struggling.
Common mistake: Waiting for obvious scale chunks — by the time you see them in the carafe, the heating element is already coated and less efficient. Your electricity bill creeps up.
What Not to Use on Your Coffee Maker

The wrong cleaner can ruin the appliance. This list is short but critical.
Never use bleach, chlorine-based cleaners, or abrasive scrubs. They can crack plastic, corrode metal, and leave toxic residues. Don’t use lemon juice as a vinegar substitute. Its sugars can caramelize on the heating element.
Avoid submerging the main unit in water or running it through a dishwasher. Wipe it down only. For detailed model-specific guidance, always check your Black & Decker coffee maker manual first.
| Cleaner/Method | Safe for Black & Decker? | Reason |
|---|---|---|
| White Vinegar (diluted) | Yes | Official recommendation; effective descaler. |
| Mild Dish Soap | Yes (exterior & removable parts) | Safe for plastics; rinses clean. |
| Bleach or Chlorine Cleaners | No | Corrodes metal, degrades plastics, toxic residue. |
| Abrasive Scrub Pads | No | Scratches plastic, harbors bacteria. |
| Dishwasher (main unit) | No | Water ruins electrical components. |
| Lemon Juice | Not Recommended | Sugars can burn onto heating element. |
Troubleshooting Common Cleaning Problems
Sometimes the standard process hits a snag. Here’s how to fix the usual suspects.
The coffee still tastes like vinegar after rinsing. You didn’t rinse enough. Run two more full water cycles. If the taste persists, the mineral scale was severe and trapped vinegar. Descale again in a week after the first cleaning loosened the deposits.
The machine won’t turn on after cleaning. You likely got water in the electronics. Unplug it, dry the exterior thoroughly, and leave it in a warm, dry place for 48 hours. If it still doesn’t work, the control board may be fried. Consult the manufacturer’s support resources for troubleshooting steps common to many drip machines.
Water drips from the bottom during the cycle. A seal or hose inside may have been degraded by using straight vinegar or a harsh chemical. The fix requires disassembly. This is a job for a technician or a replacement machine.
White flakes appear in the carafe immediately after descaling. This is normal. The descaling process broke up large scale deposits, and these fragments are now flushing out. Run several more plain water cycles until the water runs clear.
Connecting Clean Gear to Better Coffee
A clean machine is the foundation. What you put through it matters just as much.
The quality of your water affects taste and scale buildup. Using filtered water can extend the time between descaling sessions. Your choice of paper filter options also influences clarity and flavor. A clean machine paired with fresh, correctly ground beans makes all the difference. For the full picture on grind quality, understand the burr vs blade grinder debate.
Finally, know what you’re brewing. The clean, consistent output of a well-maintained drip machine is the hallmark of a classic brewed coffee vs Americano. It’s a distinct style worth perfecting.
Frequently Asked Questions
Can I use citric acid instead of vinegar to descale?
You can, but you must follow a specific ratio. Use one tablespoon of food-grade citric acid powder per quart of water. Do not use lemon juice. The problem with citric acid is that it’s easy to under-dose, making it ineffective. Vinegar’s 1:1 ratio is foolproof and officially endorsed.
Is the permanent filter dishwasher safe?
For Black & Decker models like the CM1100 and CM2035B, yes. The manual states the permanent filter and basket are top-rack dishwasher safe. Not all brands allow this, so always check your manufacturer’s cleaning instructions.
How do I clean the water reservoir if it has visible mold?
First, try the standard vinegar descaling process. The vinegar should kill surface mold. If stains or odor persist, make a paste of baking soda and water, scrub the reservoir with a soft brush, then rinse thoroughly. Never use bleach.
My machine has an “Auto Clean” button. How does that work?
Models with an Auto Clean function automate the soak step. You add the vinegar solution and press the button. The machine will brew half the solution, pause for 30 minutes automatically, then brew the second half. You still need to run the multiple rinse cycles yourself afterward.
Why does my coffee taste bad even after cleaning?
Old coffee oils can linger in parts you can’t see, like the showerhead. After descaling, run a cycle with a baking soda solution (2 tbsp baking soda per reservoir of water), then rinse with two water cycles. Baking soda neutralizes odors. Also, consider the age of your paper filter types and your coffee bean types.
Can I use this method on other drip coffee makers?
The vinegar soak method is universal for drip machines. However, the vinegar-to-water ratio and dishwasher safety differ by brand. Always consult the manual for your specific model, whether it’s a similar drip coffee maker manual or another brand.
Before You Go
Cleaning your Black & Decker coffee maker isn’t about making it look new. It’s about preserving the heating element’s efficiency and ensuring every pot tastes as good as the beans you bought. The official process—1:1 vinegar, a 30-minute soak, and thorough rinsing—works because it respects the mechanics.
Stick to the 80-brew schedule. Wash the removable parts weekly. Your machine will last for years, and your morning routine will never be derailed by a sour cup or a sputtering heater. That first clean, fragrant pot after a descale is its own reward.
