
The Correct Coffee Amount for Your Reusable K-Cup (In Grams)
Use between 10 and 14 grams of medium-ground coffee for a reusable K-cup. That amount typically reaches the MAX fill line molded into the Keurig My K-Cup Universal Reusable Coffee Filter. Going over 14 grams packs the grounds, restricts water flow, and almost guarantees a mess of wet grounds in your cup.
Most people grab a tablespoon, scoop twice, and call it done. The problem isn’t the scoop. It’s that a tablespoon of a dark, oily roast weighs less than a tablespoon of a light, fluffy roast. You’re measuring volume when the brewer cares about weight and density. Fill by volume alone and you’ll swing from weak, sour cups one morning to clogged, bitter sludge the next.
This guide translates the vague “MAX fill line” into a real gram target. We’ll cover why your coffee’s roast and grind size change that target, how to spot and fix a dose that’s causing leaks, and the one tool that makes this consistent.
Key Takeaways
- The MAX fill line is your physical limit, but 10–14 grams is your functional target for most coffees.
- A digital kitchen scale is non-negotiable for consistency. Tablespoons are useless across different roast levels.
- Grind size dictates dose. A fine grind requires less coffee (closer to 10g) to avoid clogging; a coarse grind can handle the full 14g.
- Overfilling past the line compresses the coffee bed, forcing grounds past the lid seal and into your brewer.
- Dark roasts are denser than light roasts. The same volume of dark roast weighs more, so you often need fewer grams by weight to hit the MAX line.
The Real Answer: Weight Over Volume
Keurig’s official instruction is a single sentence: fill to the MAX fill line. That line is a molded ridge about two-thirds up the side of the clear plastic My K-Cup filter. It’s a volumetric limit, not a weight specification. The company doesn’t publish a gram equivalent because it changes with every bag of coffee you open.
The MAX fill line on the Keurig My K-Cup Universal Reusable Coffee Filter is a physical stop to prevent overpacking the brew chamber. Exceeding it compromises the silicone lid seal, and the 15-psi pump pressure will force water and grounds around the edges, into the exit needle, and ultimately into your cup.
Home-barista forums from the last decade are filled with people trying to pin this down. The consensus that emerged, and the one I landed on after a month of stained mugs, is a 10 to 14 gram window. Start at 12 grams.
Why does the weight range matter? Water needs a specific path of resistance to extract flavor properly. Too little coffee (under 10g) and the water blasts through too fast, yielding a weak, under-extracted cup. Too much (over 14g) and it packs the grounds so tightly that water can’t flow evenly. It finds the path of least resistance, which is usually a channel up the side, carrying a slurry of grounds with it.
TL;DR: Ignore tablespoons. Use a scale. Start at 12 grams of coffee and adjust up or down based on your coffee’s roast and grind, using the MAX line as a visual check, not a goal.
Why Your Coffee’s Roast Changes the Math
Not all grams are created equal. A gram of densely packed, oily dark roast French coffee occupies less physical space than a gram of dry, chaffy light roast Ethiopian. If you aim for the MAX fill line by volume, you could be loading 16 grams of a dark roast or only 9 grams of a light roast.
| Roast Level | Physical Character | Typical Gram Target | Risk at MAX Line |
|---|---|---|---|
| Light Roast | Dry, fluffy, less dense | 13–14g | May be slightly below the line; risk of weak brew if under-dosed. |
| Medium Roast | Balanced density, slight oil | 11–13g | Usually sits right at the line. |
| Dark Roast | Oily, dense, compact | 10–11g | Easily exceeds the line by weight; high risk of overpacking and clogging. |
This is where the forum advice diverges from the manual. Keurig says “fill to the line.” Experienced users say “weigh your dose, then see where it lands relative to the line.” For a dark roast, 11 grams might brush the top of the line. For a light roast, 14 grams might still leave a millimeter of clearance.
Common mistake: Using the same scoop for a dark roast as you used for a light roast, the dark roast will overfill the filter by weight, the brew will choke, and you’ll get a cup half-full of coffee and half-full of mud.
Your first adjustment point is always the roast. If you’re brewing a single-origin coffee from Ethiopia (typically light), lean toward 14 grams. If it’s a French roast, start at 10. The line is a guide, but your scale and your taste buds are the judges.
Grind Size Changes Everything
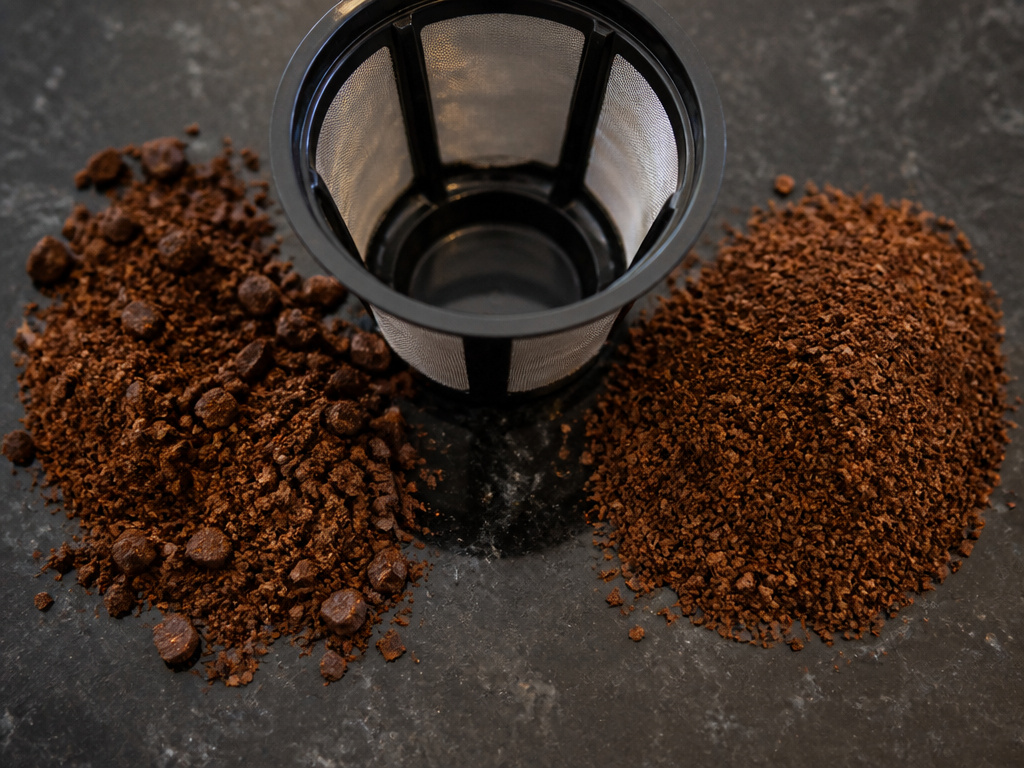
Keurig officially recommends a “medium grind.” What they don’t tell you is that a medium grind from a blade grinder is a wild mix of dust and boulders, while a medium grind from a quality burr grinder is uniform. Uniformity is the secret.
The Problem with Blade Grinders
A blade grinder pulverizes beans randomly. The resulting “grind” contains fine powder that acts like mud and large chunks that act like gravel. When you fill the K-cup, the fines settle and compact at the bottom. This creates a dense, impermeable layer that blocks water flow. The water pressure then forces the liquid up and around the edges, carrying loose grounds with it.
Common mistake: Using a blade-ground coffee and filling to the MAX line, the inconsistent particle size ensures clogging within 10 brews, and you’ll be cleaning grounds out of the exit needle with a paperclip.
If you must use a blade grinder, you have to dose lower. Aim for 10 grams maximum. The excess space in the filter actually helps by giving water more pathways, compensating for the terrible grind distribution. For a consistent, reliable dose, investing in a burr grinder is the single biggest upgrade you can make for reusable K-cup brewing.
Dialing In a Burr Grinder
A proper burr grinder gives you control. Set it to a true medium grind, think the texture of coarse sand, not powder, not pebbles. With a uniform grind, you can use the full 12-14 gram range confidently. The water will saturate the coffee bed evenly and flow through at a steady rate.
How to test your grind: Brew a cup at 12 grams. Watch the stream coming into your mug. It should be a steady, honey-colored flow, not a slow drip or a sudden burst. If it’s slow and the coffee tastes bitter, your grind is too fine, go a click coarser. If it’s a fast, pale gush and tastes sour, your grind is too coarse, go a click finer. The dose and grind work together.
The Step-by-Step Guide to a Perfect Dose
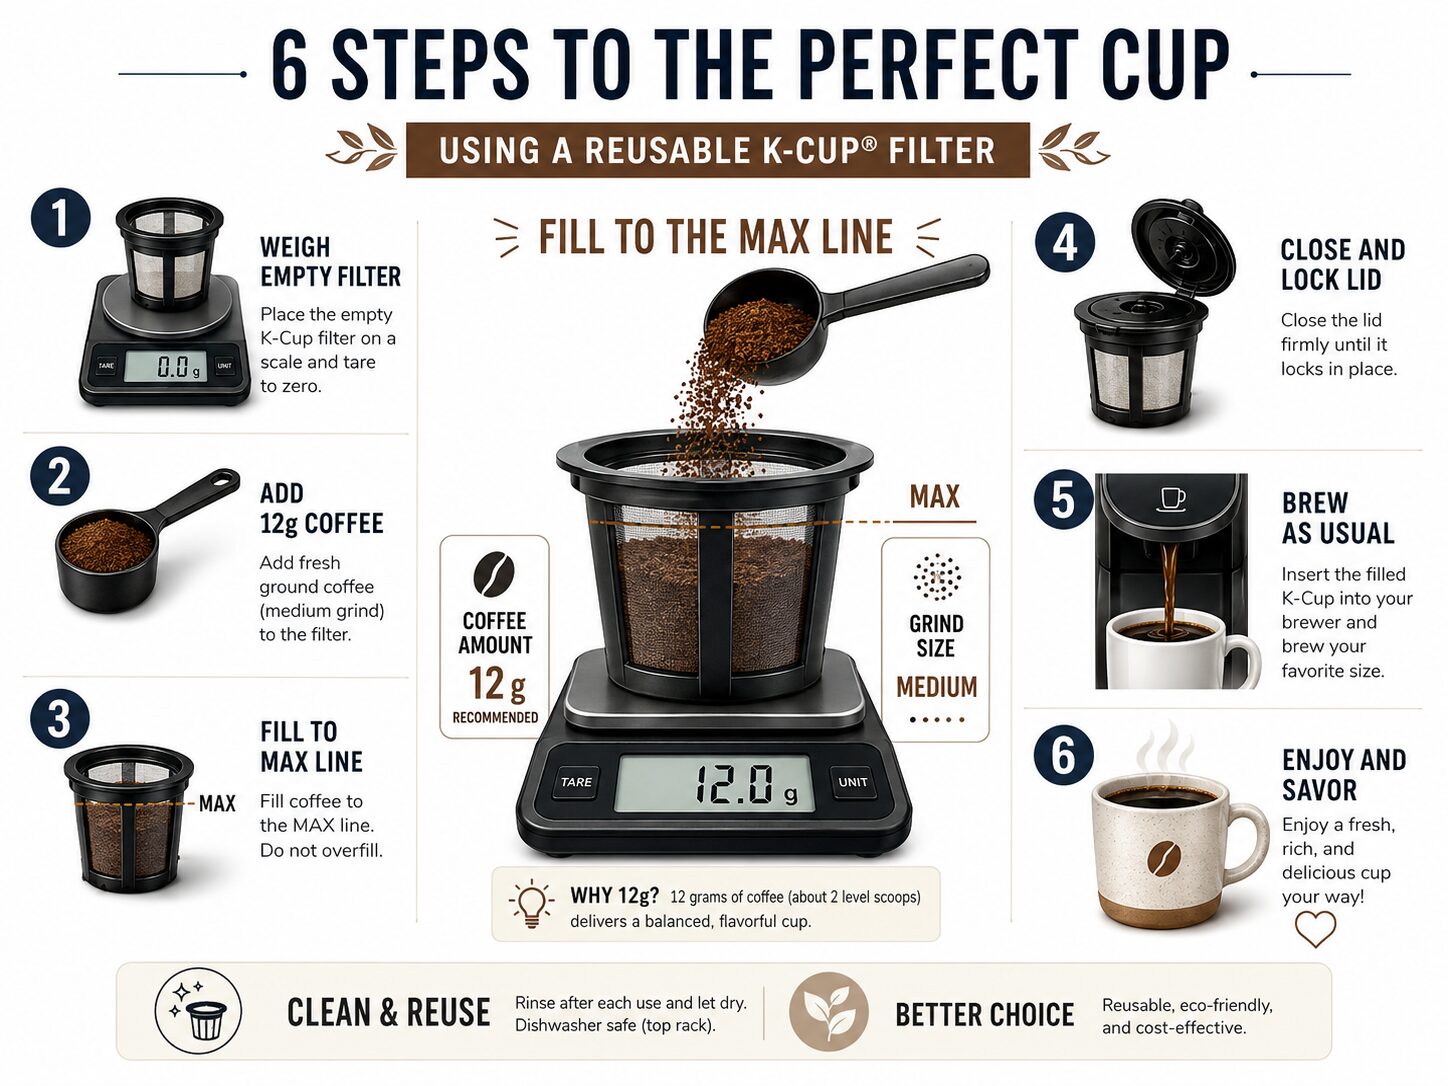
Follow this sequence every time. It takes an extra 60 seconds and eliminates guesswork.
- Weigh your empty filter. Place your clean, dry My K-Cup on a digital scale. Press tare. This ignores the weight of the plastic.
- Add 12 grams of coffee. Gently pour ground coffee into the filter until the scale reads 12.0g. Do not tap or shake the filter to settle it.
- Check the line. Look at the side of the filter. The coffee should be at or just below the MAX line. If it’s above, remove a gram. If it’s more than 3mm below, you could add a gram, but only if your coffee is a light roast.
- Secure the lid. Wipe the rim of the filter clean. Place the silicone lid on top and press firmly until you hear or feel all four locking tabs click into place. An uneven seal is the top cause of leaks.
- Brew and observe. Insert the filled filter and brew on your machine’s middle setting (like “8oz”). Watch the stream into your cup. Note the color and speed.
- Taste and adjust. Drink the coffee. If it’s weak or sour, increase the dose by 1 gram next time, or adjust your grind finer. If it’s bitter or you see grounds, decrease the dose by 1 gram or adjust your grind coarser.
What happens if you skip weighing? You become a variable. Your coffee will taste different every day. You’ll blame the beans or the machine when the problem was the dose. A $20 scale fixes this forever.
Troubleshooting: Grounds in Your Cup and Weak Coffee
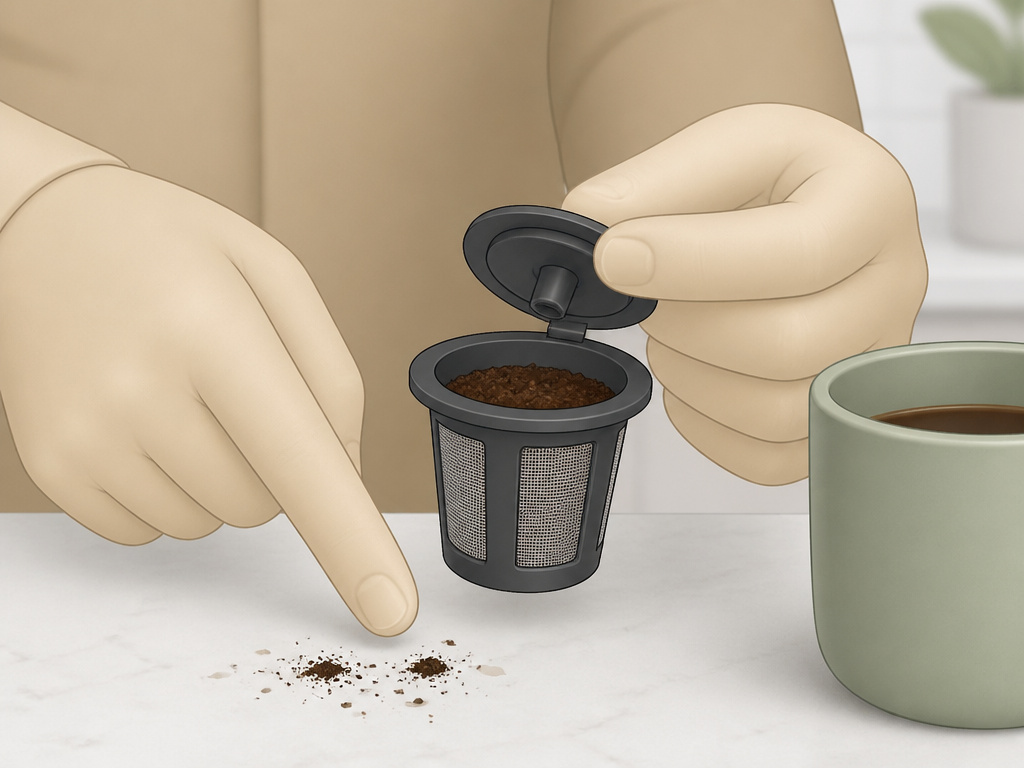
When your dose is off, the machine tells you. Here’s how to decode the messages.
| Symptom | Likely Cause | Immediate Fix | Long-Term Solution |
|---|---|---|---|
| Wet grounds in cup | Overfilled filter OR uneven lid seal. | Stop brewing, clean the exit needle with a paperclip. | Dose 1-2 grams lighter and ensure the lid clicks on all sides. |
| Very slow, dark drip | Grind too fine OR dose too high. | Abort the brew if possible to avoid overflow. | Use a coarser grind setting or reduce dose by 2 grams. |
| Fast, pale, weak stream | Grind too coarse OR dose too low. | Let it finish, but expect a sour cup. | Use a finer grind setting or increase dose by 2 grams. |
| Water bypasses filter, spills | Filter not fully seated in holder. | Open handle, reposition filter, close firmly. | Always check that the filter is flush in the holder before closing. |
If you see grounds, the first place to check is the lid. Pop it off and look for a stray coffee particle stuck on the sealing rim. One tiny piece can break the seal. The second is your dose. If you’re at 14 grams with a dark roast, you’re almost certainly overpacking it.
For weak coffee, the fix is often the opposite of what you think. Don’t just add more coffee. First, try a finer grind. If the coffee is already ground, then increase the dose by a single gram. The goal is strength through extraction, not just through mass.
Frequently Asked Questions
Can I use pre-ground coffee from the store?
Yes, but you’re locked into its grind size. Most supermarket pre-ground is fine to medium-fine, designed for drip machines. This is often finer than ideal for a Keurig. Start with a low dose of 10 grams to avoid clogging, and don’t expect to hit the MAX fill line.
Does the Keurig model affect the dose?
No. The MAX fill line on the universal reusable filter is the same whether you use a K-Mini, K-Classic, or K-Supreme. The dose is determined by the filter, not the machine. However, newer models with stronger pumps (like the K-Supreme) may handle a slightly tighter pack slightly better, but the 14-gram ceiling still applies.
How do I clean grounds out of the exit needle?
Unplug the machine. Lift the handle and remove the K-cup holder. You’ll see the exit needle in the center of the brewing head. Straighten a paperclip and gently insert it into the needle a few times to dislodge any packed grounds. Run a water-only brew cycle into a mug to flush it out.
Why does my coffee taste bitter even with the right dose?
Bitterness is a sign of over-extraction. If your dose is correct (12-13g), your grind is likely too fine. The water spends too much time in contact with the coffee, pulling out harsh compounds. Adjust your grinder one setting coarser. If you’re using pre-ground, you might be stuck, try lowering the dose to 10g to speed up the flow.
Is there an environmental benefit to reusable K-cups?
Yes, primarily in reducing plastic waste from single-use pods. However, the environmental impact depends on your coffee source and how you clean the filter (avoid running water). For a deeper look at filter materials, our article on paper coffee filters covers the trade-offs.
Before You Go
Dosing a reusable K-cup isn’t about finding one magic number. It’s about understanding the relationship between weight, volume, roast, and grind. The MAX fill line is a safety rail, not a finish line. Start with 12 grams on a scale. Let the taste of your coffee and the behavior of your brewer tell you whether to go up or down from there.
A weak cup means add a gram or grind finer. A bitter cup with grounds means subtract a gram or grind coarser. The process feels fiddly for the first week. Then it becomes automatic, and your morning coffee becomes reliably good instead of a daily gamble.
The goal is a clean, flavorful cup that doesn’t leave you cleaning up a mess. That happens at 10 to 14 grams, with a secure lid, and a grind that looks like sand. Everything else is just noise.
