
How Long to Perk Coffee: Timing, Altitude Effects & Fixes
Perk coffee for 8 to 10 minutes on a standard electric percolator like a Presto 02811, measured from when the perking action begins. The perking cycle is temperature-controlled and will stop automatically. At high altitudes, the cycle shortens due to a lower boiling point, so you must use more coffee to compensate for the weaker extraction.
Most people watch the clock and pull their percolator at the 10-minute mark. That’s the mistake. You’re listening for a sound, not a timer.
This guide walks you through the cues your percolator gives you, why altitude changes everything, and how to adjust your grind and dose to avoid a bitter or weak cup every time.
Key Takeaways
- Electric percolators like the Presto 02811 are designed for an 8–10 minute perking cycle that stops automatically.
- Altitude shortens the brew time. Water boils at a lower temperature up high, so the temperature-controlled cycle ends sooner, risking under-extraction.
- Use a coarse grind. A fine grind will over-extract and turn your coffee bitter before the cycle even finishes.
- The perking is done when the rhythmic “perk-perk-perk” sound slows to an occasional bubble. Don’t wait for it to stop completely.
- Remove the grounds basket immediately after brewing. Left in the hot water, it keeps steeping and turns your coffee acrid.
What Is the Standard Percolator Brew Time?
The official word comes straight from the manuals. For Presto’s popular stainless steel models, the 12-cup 02811, the 6-cup 02822, and the 12-cup 02816, the instruction is clear: “Perking begins in less than a minute. The coffee is ready to serve when the perking action stops, in approximately 8 to 10 minutes.”
That 8–10 minute window is the sweet spot. It’s not a suggestion; it’s the designed cycle time of the appliance. The mechanism works by heating water in the bottom chamber until it vaporizes, forcing it up the stem and over the grounds in the basket. This hot water drips back down, and the cycle repeats. The percolator has a built-in thermostat that slows and stops this cycle once the water reaches a specific temperature, signaling the brew is done.
The perking cycle is automatically controlled by the temperature of the water. When the water reaches the optimum perking temperature, the perking action slows down and then stops. – Presto 02811 Instruction Manual
TL;DR: Standard electric percolators are engineered for an 8–10 minute brew cycle. Start your timer when the perking begins, not when you turn on the heat.
Why Your Coffee Is Bitter (The Over-Perking Trap)
Over-perking is the classic percolator failure. It happens when you leave the coffee on the heat source after the active perking cycle has finished. The water is still hot, and it continues to drip slowly over the grounds, extracting harsh, bitter compounds. The result is a cup that tastes burnt and astringent.
The visual and audio cues are your best defense. A healthy perking cycle has a distinct, rhythmic bubbling sound, a steady “perk-perk-perk.” You’ll also see a steady stream of dark coffee bubbling into the clear top chamber. As the cycle nears completion, that sound becomes sporadic. The bubbles appear less frequently. That’s your signal.
Common mistake: Letting the percolator sit on the warm burner after perking stops – the grounds continue to steep in near-boiling water, extracting soluble bitterness within 90 seconds.
The moment that rhythmic perking slows to an occasional bloop, you need to act. Take the percolator off the stove or unplug it. Don’t wait for all action to cease. That last 30 seconds of fading perking is the line between a full-bodied brew and a bitter one.
| Symptom | Likely Cause | Timeline to Fix |
|---|---|---|
| Coffee tastes burnt, harsh | Over-perking (cycle went too long) | Irreversible for that batch. Next time, remove from heat as soon as perking slows. |
| Coffee tastes weak, sour | Under-perking (cycle too short, often at altitude) | Compensate with a coarser grind or more coffee grounds next brew. |
| Cloudy coffee with sediment | Grind is too fine, or no filter used | Use a coarser grind or add a paper coffee filter to the basket. |
| No perking action | Insufficient heat, clogged stem | Ensure heat is high enough. Check stem for old grounds blockage. |
TL;DR: Bitterness comes from over-extraction after the main perking cycle ends. Listen for the sound to slow down and pull the pot immediately.
The One Factor That Changes Everything: Altitude
Here’s the part most guides miss, but it’s printed right in the Presto manual: “When perking at high altitudes, the perking cycle may be shorter due to the lower boiling point of water. This may result in a weaker brew.”
The physics are simple. Water boils at a lower temperature when the air pressure is lower, like in Denver or Mexico City. Your percolator’s thermostat is calibrated for sea-level boiling. At 5,000 feet, water might boil at 203°F instead of 212°F. The thermostat thinks the brew is done sooner, cutting the perking cycle short. You get a weaker, under-extracted cup because the water hasn’t had enough contact time with the grounds.
You have two levers to pull: coffee quantity and grind size.
1. Use more coffee. The manual suggests this directly. If your 8–10 minute cycle becomes a 6–7 minute cycle, add an extra half-tablespoon of grounds per 6 ounces of water.
2. Grind slightly coarser. This seems counterintuitive, but a coarser grind at altitude allows for faster, more even water flow during the shortened cycle, reducing the risk of a sour, weak extraction. A burr coffee grinder set to a coarse setting is essential for consistency here.
If you live above 2,000 feet and your coffee consistently tastes weak, altitude is your culprit. Adjust your dose first.
How to Choose and Grind Your Coffee

Not all coffee is suited for the percolator’s robust, recirculating brew method. A dark roast can stand up to the longer heat exposure, but a blonde roast coffee might taste flat and baked. A blended coffee designed for drip or French press often provides a more balanced, forgiving flavor profile in a percolator than a finicky single-origin coffee.
The grind is non-negotiable. You need a coarse grind, similar to what you’d use for a French press. A fine grind, like for espresso, will clog the basket, slow the perking, and over-extract almost instantly. The table below shows what to look for.
| Grind Size | Best For | Risk in a Percolator |
|---|---|---|
| Coarse (Sea Salt) | French Press, Percolator | Ideal. Allows free water flow and even extraction. |
| Medium-Coarse (Sand) | Pour-Over, Drip Machine | Can work, but may slow perking and increase sediment. |
| Medium (Regular Sand) | Drip coffee method | Likely to over-extract and cause bitterness. |
| Fine (Powder) | Espresso | Will clog the basket, cause over-extraction, and make coffee muddy. |
Investing in a decent burr coffee grinder is the single biggest upgrade for percolator coffee. Blade grinders produce an inconsistent mix of dust and boulders, guaranteeing some grounds will over-extract and some will under-extract. A burr grinder gives you uniform particles, which is the foundation of a balanced cup, especially when you’re tweaking for altitude.
Step-by-Step: How to Perk Coffee Correctly
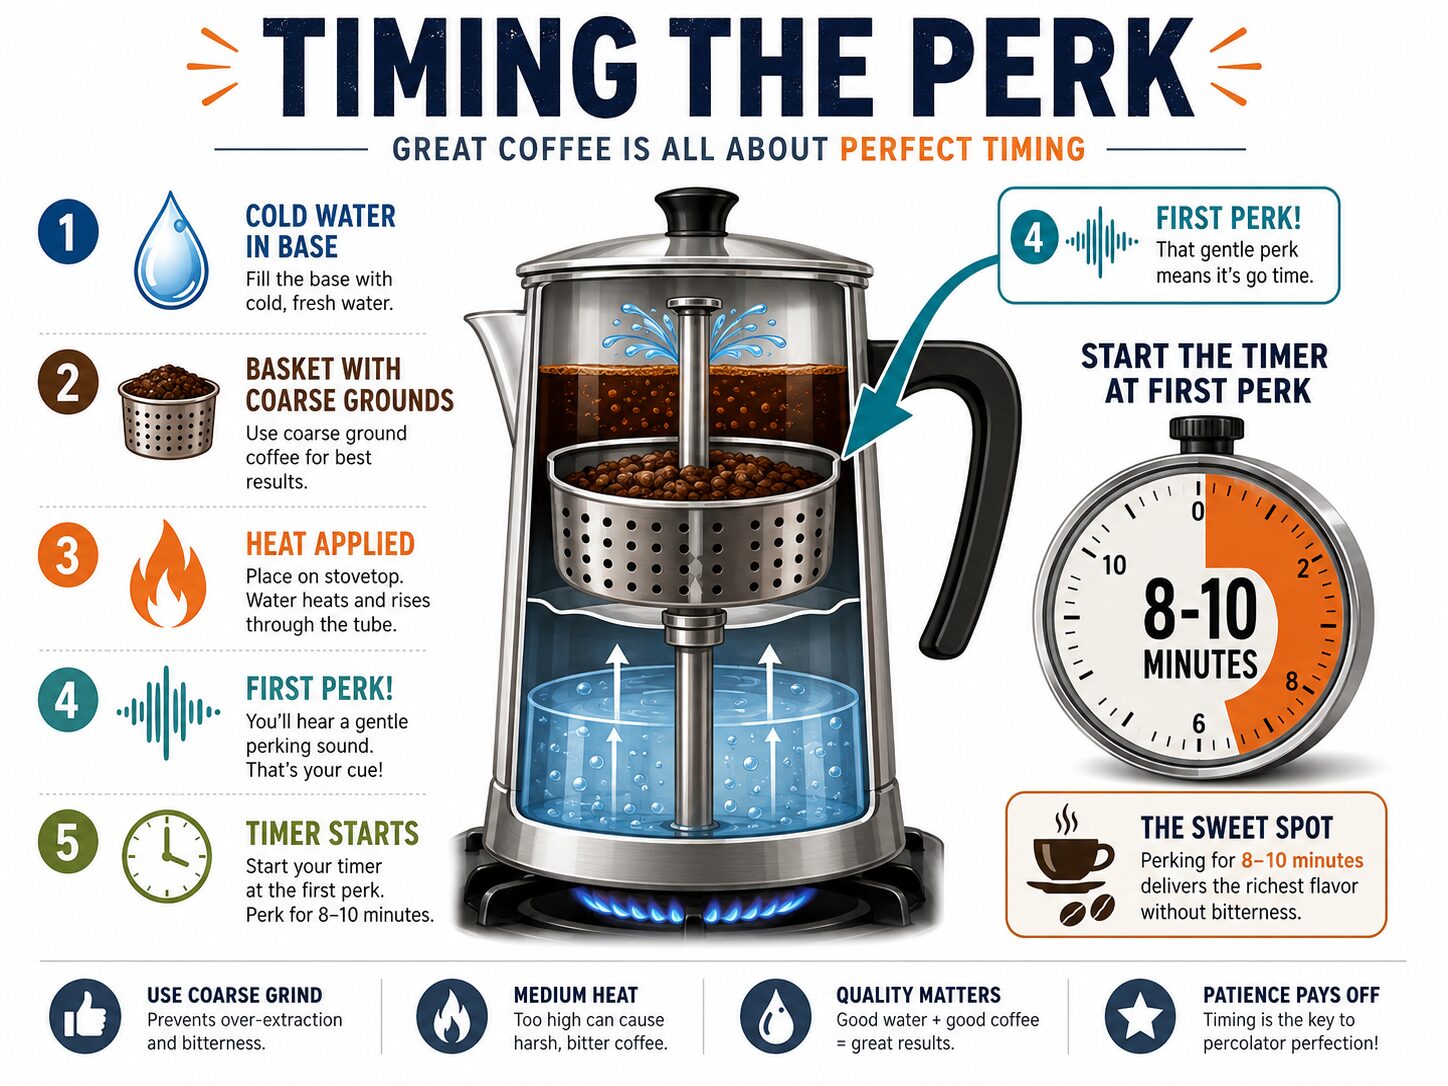
Follow this sequence to bypass the common pitfalls. The goal is to start the timer when perking begins, not when you assemble the pot.
- Measure cold water into the percolator base. Use the marked line if it has one. If not, fill just below the bottom of the central stem. Cold water ensures an accurate perking cycle start time.
- Assemble the basket and stem. Insert the stem into the base. Place the perforated coffee basket on top. For cleaner coffee, line the basket with a paper coffee filter. This catches fine sediment that a coarse grind might still release.
- Add the coffee. Use 1 tablespoon of coarse-ground coffee per 6 ounces of water. For a stronger cup at altitude, increase to 1.5 tablespoons. Distribute the grounds evenly in the basket.
- Assemble the top and apply heat. Put the lid on and place the percolator on your heat source. Turn the stove to medium-high or plug in the electric unit.
- Listen for the start, then start the timer. In under a minute, you should hear the first distinct “perk” and see coffee begin to bubble into the top chamber. This is when you start your 8–10 minute timer.
- Monitor the sound and sight. Maintain a steady, rhythmic perking. If it’s too violent, reduce the heat slightly. Watch the coffee in the top chamber darken.
- Remove from heat at the slowdown. When the “perk-perk-perk” becomes a slow “perk… perk…”, your 8–10 minutes are likely up. Take the percolator off the heat immediately.
- Remove the grounds basket. This is the step everyone forgets. Within 30 seconds of removing from heat, lift the basket out of the hot coffee. Leaving it in lets it continue to steep and turns the brew bitter.
Troubleshooting Your Percolator Problems
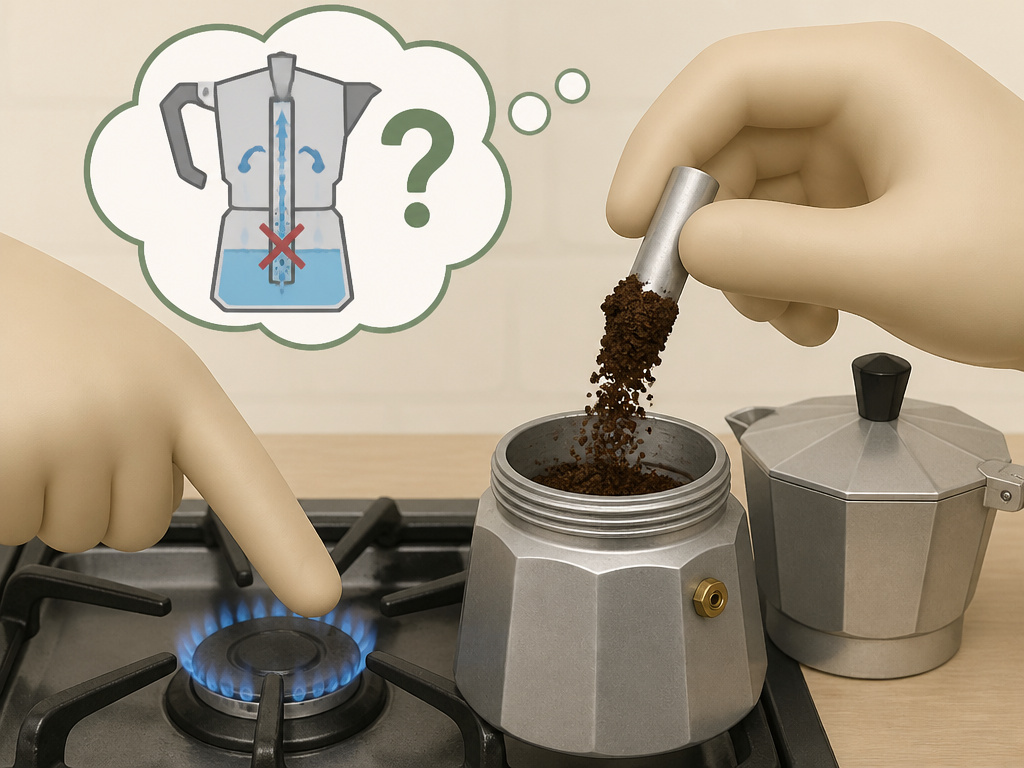
Sometimes the process doesn’t go as planned. Here’s how to diagnose the issue.
No perking action after several minutes: The heat is too low. The water needs to reach a full boil to create enough vapor pressure to push up the stem. Increase the heat. Also, check that the stem isn’t clogged with old grounds.
Coffee is cloudy or has grounds in it: Your grind is too fine, or you didn’t use a filter. Always use a coarse grind. If your percolator paper filters are the wrong size, they might not seat properly in the basket.
Coffee tastes weak, even with correct timing: You’re likely at altitude. The shorter cycle means you need to use more coffee grounds or a slightly coarser grind to increase extraction efficiency during the brief window.
Machine smells burnt or tastes metallic: This could be a sign of mineral buildup. Regular descaling your coffee maker is crucial. Check your coffee maker manual for specific descaling instructions, as harsh cleaners can damage some models. For electric percolators, using filtered water or a coffee machine water filter can prevent this.
Frequently Asked Questions
Can you over-perk coffee?
Yes, absolutely. Over-perking happens when you let the percolator sit on the heat after the active, rhythmic perking has slowed down. The hot water continues to trickle over the grounds, extracting bitter-tasting compounds. Your coffee will taste burnt and harsh.
Is 10 minutes long enough to perk coffee?
For a standard electric percolator at sea level, 10 minutes is the upper limit of the ideal range. The Presto manual states 8–10 minutes. At 10 minutes, you should be at the very end of the perking cycle. If it’s still perking strongly at 10 minutes, your heat might be too high.
Why is my percolator coffee always bitter?
Bitterness is a sign of over-extraction. The most common causes are: 1) using a grind that’s too fine, 2) leaving the percolator on the heat after perking slows, or 3) not removing the grounds basket after brewing. Fix your grind size and watch your timing.
How do I make percolator coffee stronger?
To make stronger coffee, increase the coffee-to-water ratio. Try 1.5 tablespoons of coffee per 6 ounces of water. Do not extend the brewing time, as that leads to bitterness. Choosing a darker roast or a blended coffee designed for strength can also help.
Before You Go
Percolator coffee has a distinct, robust character that other methods can’t match. Nailing it comes down to respecting the machine’s design, that 8–10 minute temperature-controlled cycle, and adapting when your environment fights back, like at high altitude. Listen for the slowdown, pull the basket promptly, and grind coarse. Your reward is a clean, full-bodied cup without the bitterness that gives percolators a bad name.
