
How to Make Coffee | Mastering Grind Size & Golden Ratio
To make coffee, match three things: a 1:18 coffee-to-water ratio (the SCA Golden Ratio), water heated to 93°C (200°F), and a grind size that matches your brewing method. Use a burr grinder for consistency and a scale for precision. This framework works for drip, pour-over, and French press, with adjustments for espresso and cold brew.
Most people get the first two right but miss the third entirely. They buy good beans and heat the water, then ruin it with a blade grinder that produces a mix of dust and boulders. That inconsistent particle size is why one sip is bitter and the next is sour in the same cup.
This guide walks through the non-negotiable specs, the step-by-step for three core methods, and the edge cases that break the standard rules. You’ll learn why the numbers matter and how to adjust them when your coffee tastes off.
Key Takeaways
- The Specialty Coffee Association’s Golden Ratio is 55g of coffee per liter of water, or 1:18. Measuring by weight with a scale is mandatory; volume is too variable.
- Water temperature is not a suggestion. Brew between 90°C and 96°C (195°F–205°F) for hot methods. Going outside this range by more than 3°C consistently produces a flat or harsh cup.
- Grind size dictates extraction speed. Too fine and the water stalls, over-extracting bitter compounds. Too coarse and the water runs through too fast, leaving sour acids behind.
- Espresso and cold brew are exceptions. Espresso needs a fine grind and high pressure (9 bar); cold brew needs a coarse grind and 12-24 hours of steeping in cold water.
- Your coffee maker’s manual is a starting point, not gospel. Many recommend a coarser grind than optimal to prevent clogging and customer complaints.
The Golden Ratio and Grind Size
Your coffee-to-water ratio is the foundation. The Specialty Coffee Association’s Brewing Control Chart specifies 55 grams of coffee per liter of water. That’s a 1:18 ratio. For a single 300ml mug, you need 16.7 grams of coffee.
The Specialty Coffee Association (SCA) recommends a brewing temperature range of 200°F ± 5°F (93.0°C ± 3.0°C) for optimal extraction and a coffee-to-water ratio of 1:18. This standard, detailed in the SCA Brewing Control Chart, provides the baseline for balanced flavor across filter brewing methods.
Use a digital scale. A “scoop” is worthless because bean density varies wildly. A scoop of a dense, dark roast might be 18 grams; the same scoop of a fluffy light roast might be 12 grams. That’s a 33% difference in strength before you even add water.
Grind size is the lever that controls extraction time. Water dissolves flavors from the surface of the coffee particles. Finer particles have more surface area, so water extracts flavors faster. If the grind is too fine for your method, the water takes too long to pass through, pulling out bitter, astringent compounds. If it’s too coarse, the water rushes through and only grabs the bright, sour acids.
The right grind size for a standard drip coffee method is medium, resembling coarse sand. For a French press, go medium-coarse. This is the first point where common advice fails.
Common mistake: Using a blade grinder for fresh beans, you get a mix of powder and whole chunks. The powder over-extracts into bitterness, the chunks under-extract into sourness, and the cup tastes confused. A decent burr grinder fixes this in one step.
TL;DR: Weigh 16.7g of coffee per 300ml mug, grind medium for drip, and use water at 93°C. The scale and grinder matter more than the coffee maker.
Why Water Quality and Temperature Aren’t Negotiable
Your water is 98% of the beverage. If it tastes like chlorine or minerals, your coffee will too. Use filtered water. The ideal brewing temperature is 93°C (200°F), with a tolerance of ±3°C.
Water that’s too hot, above 96°C, scalds the coffee grounds. This accelerates the extraction of bitter alkaloids and can give the cup a baked, flat flavor. Water that’s too cold, below 90°C, fails to properly extract the sugars and pleasant acids. The result is a weak, sour, and underwhelming cup.
This is why a variable-temperature kettle is a game-changer for pour-over. A standard drip machine heats water internally, but many cheaper models don’t reach a consistent 93°C. They might start at 92°C and drop to 85°C by the end of the brew cycle. That temperature drop is why the last half of the pot often tastes weaker and more acidic.
Check your coffee maker instructions for its stated temperature range. If it doesn’t specify, assume it’s on the cooler side and compensate with a slightly finer grind to increase extraction.
| Water Problem | Effect on Coffee | Timeline to Notice |
|---|---|---|
| Too hot (>96°C) | Bitter, harsh, flat notes | Immediate — first sip |
| Too cold (<90°C) | Weak, sour, thin body | Immediate — first sip |
| High chlorine/minerals | Chemical or metallic aftertaste | Aftertaste, 10–15 seconds post-sip |
| Very soft water | Lack of body, tastes hollow | Immediate — feels “empty” |
The fix is simple. Use a filter pitcher and a kettle that lets you set the temperature. It removes the biggest variable outside your control.
Step-by-Step for Three Core Methods
The principles are universal, but the mechanics change. Here’s how to apply the ratio, temperature, and grind to the most common brewers.
The Drip Machine Routine
Automatic machines are convenient but inflexible. You control the inputs, not the process.
- Use the right filters. For a Bunn coffee maker, you need #4 cone filters. For a Braun coffee maker, it’s usually a flat-bottom basket. The wrong filter causes water to channel down the sides.
- Grind medium. This is slightly finer than most machine manuals suggest. They recommend coarse to prevent clogging the basket, but that leads to under-extraction. A medium grind extracts fully before the water cools.
- Pre-wet the filter. Pour hot water over the empty paper filter and into the carafe, then discard that water. This removes the paper taste and pre-heats the brewing vessel.
- Add coffee, start the brew. Use your measured coffee. Start the machine.
- Serve within 30 minutes. Drip machines have a hot plate that continues cooking the coffee. Bitter compounds develop quickly. Pour what you’ll drink immediately and transfer the rest to a thermal carafe.
Skipping the pre-heat step means the first water hitting the grounds cools instantly, stalling extraction right from the start. Your first cup will be weak.
The Pour-Over Control
Pour-over gives you total command. You need a gooseneck kettle, a scale, and a pour-over dripper (Hario V60, Kalita Wave, or Chemex).
- Boil and set. Heat filtered water to 93°C. Let it sit off the boil for 15 seconds if your kettle doesn’t have temperature control.
- Prepare the dripper. Place the filter, pre-wet it thoroughly, and discard the water. Add your medium-fine ground coffee to the damp filter.
- Bloom. Start a timer. Pour just enough water (about twice the weight of the coffee) to saturate all the grounds. Swirl gently to ensure no dry pockets. Wait 30 seconds. This lets CO2 escape; if you skip it, the gas blocks water contact and creates uneven extraction.
- Pour in stages. After the bloom, pour the remaining water in slow, steady spirals, keeping the water level consistent. Avoid pouring directly onto the filter. Target a total brew time of 2:30 to 3:30 minutes for 300ml.
- Decant and serve. Once the water drains, remove the dripper and serve immediately.
The spiral pour is what matters. A straight central pour digs a channel, and water follows the path of least resistance. The coffee tastes both over- and under-extracted.
The French Press Immersion
Immersion brewing, like with a French press, is forgiving on technique but strict on timing and grind.
- Grind coarse, but not too coarse. Aim for a medium-coarse grind. The “coarse sea salt” advice is often too coarse. You want particles big enough to be held back by the mesh, but small enough to extract fully in four minutes.
- Pre-heat the press. Add hot water to the empty carafe, swirl, and dump it out.
- Add coffee and water. Add your grounds. Pour all 93°C water over them, ensuring all grounds are submerged.
- Steep for four minutes. Start the timer. Place the lid on top with the plunger pulled all the way up. Do not press yet.
- Break the crust and plunge. After four minutes, stir the top crust of grounds gently. This sinks the floating grounds. Then place the lid and press straight down slowly and evenly over about 20 seconds.
- Pour it all out. Decant the entire brew into a serving carafe immediately. Leaving it in the press with the grounds leads to over-extraction and silt in your cup.
I prefer the 1:15 ratio in a French press, not the standard 1:18. The immersion contact is total, so a slightly stronger ratio compensates for the coarser grind and gives a richer body without bitterness. Try both.
TL;DR: Drip needs a pre-heated filter. Pour-over needs a spiral pour. French press needs a full decant. Each method’ grind is different.
When the Standard Rules Don’t Apply: Espresso and Cold Brew
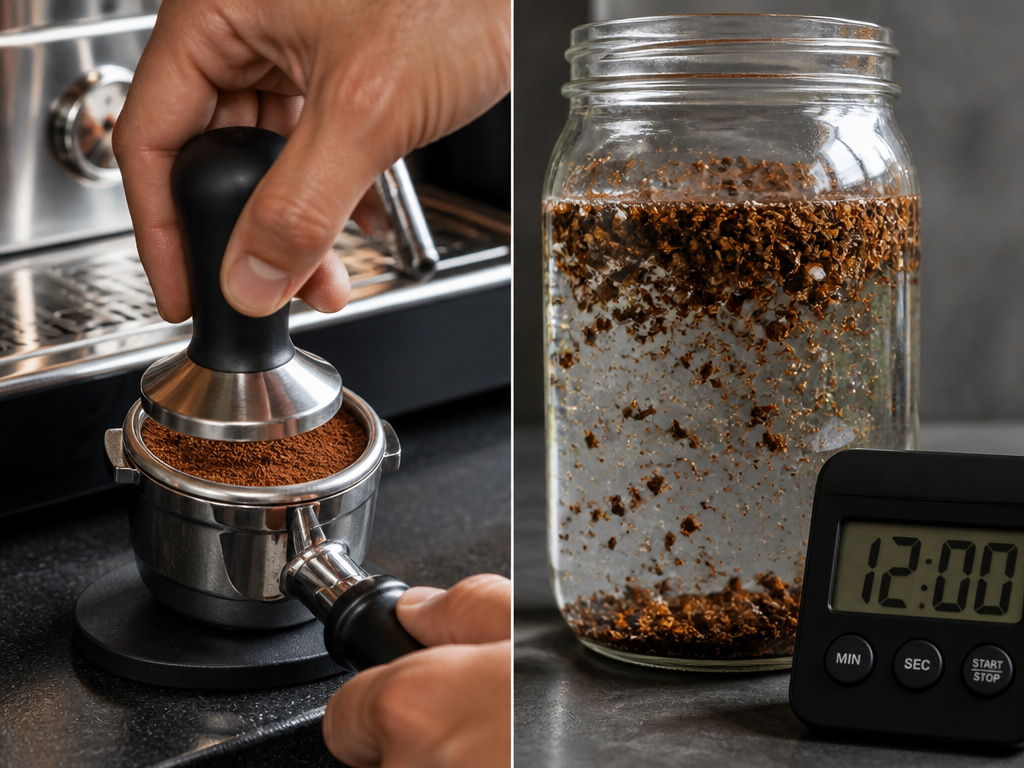
Espresso and cold brew operate on different physical principles. Treating them like filter coffee is the fastest way to waste good beans.
Espresso uses pressure, not gravity. The La Marzocco Linea Mini user manual specifies 9 bar of pressure forcing hot water through a finely ground, tamped puck of coffee. The ratio is much tighter, around 1:2 (18g of coffee yielding 36g of espresso in 25–30 seconds). The grind must be fine enough to create resistance. If the shot runs faster than 25 seconds, it’s under-extracted and sour. Slower than 35 seconds, it’s over-extracted and bitter.
The machine’s espresso machine filters (the portafilter basket) must be clean. A clogged basket creates uneven pressure and channeling.
Cold brew is the opposite. It uses time, not heat. A coarse grind steeps in cold or room-temperature water for 12–24 hours. The cold water doesn’t extract the bitter compounds or acidic oils that hot water grabs quickly. The result is a smooth, low-acidity concentrate. The standard ratio is 1:8 (coffee to water) for concentrate, which you then dilute with water or milk.
| Method | Coffee-to-Water Ratio | Grind Size | Brew Time | Key Variable |
|---|---|---|---|---|
| Drip / Pour-Over | 1:18 | Medium | 3–5 min | Water temperature (±3°C) |
| French Press | 1:15 to 1:18 | Medium-Coarse | 4 min | Plunge and decant timing |
| Espresso | 1:2 | Very Fine | 25–30 sec | Pressure (9 bar) and grind fineness |
| Cold Brew | 1:8 (concentrate) | Coarse | 12–24 hours | Steeping time and dilution ratio |
You cannot interchange these. Putting espresso-fine grind in a French press gives you a muddy, bitter sludge. Putting coarse cold-brew grind in an espresso machine yields sour water in three seconds.
The Tools That Actually Matter (And One That Doesn’t)

You can spend a little or a lot. Focus on the tools that affect the variables.
The Scale. A $20 digital kitchen scale with 0.1g precision is non-negotiable. Brewing by weight is the single biggest improvement you can make.
The Grinder. A burr grinder is mandatory. Blade grinders smash beans randomly. A burr grinder crushes them between two surfaces for a consistent particle size. This consistency is what allows even extraction. The difference between a $100 Baratza Encore and a $20 blade model is not incremental, it’s the difference between coffee and a random mix of bitter and sour liquids.
The Kettle. For pour-over, a gooseneck kettle with temperature control is essential. The narrow spout gives you precision. For drip or French press, any kettle that can boil water is fine, but a thermometer helps.
The Brewer. This matters least, assuming it functions. A clean, simple drip machine with a standard drip coffee basket will make great coffee if you feed it the right grind, ratio, and water. A fancy machine with dirty internals or a broken thermostat will not.
The tool that doesn’t matter as much as marketing claims? The ultra-expensive “artisan” dripper. A $40 V60 and a $5 plastic Melitta will produce identical coffee if you use the same technique, grind, and ratio. The material (glass, ceramic, plastic) affects heat retention slightly, but not enough to change the flavor profile meaningfully.
Common mistake: Prioritizing a new coffee maker over a new grinder, the machine just delivers water. The grinder prepares the coffee for extraction. A great grinder with a basic machine beats a basic grinder with a premium machine every time.
Invest in the grinder first, then the scale, then the kettle. The brewer comes last.
Troubleshooting Your Cup

Your coffee tells you what’s wrong. Here’s how to listen.
If it’s sour (sharp, lemon-like): The coffee is under-extracted. Water didn’t pull out enough sugars. Fixes: Use a finer grind to increase surface area and slow the water. Increase water temperature if possible. Extend brew time (e.g., a slower pour).
If it’s bitter (harsh, drying): The coffee is over-extracted. Water pulled out too many bitter compounds. Fixes: Use a coarser grind to let water flow faster. Slightly lower water temperature. Shorten brew time.
If it’s weak (watery, thin): The coffee is under-extracted and diluted. Fixes: First, ensure your ratio is correct, you may simply not be using enough coffee. If the ratio is right, then apply the fixes for sourness (finer grind, hotter water).
If it’s muddy (silty, gritty): This is specific to French press or percolators. The grind is too fine for the filter. Fixes: Use a coarser grind. For French press, don’t plunge all the way to the bottom; stop an inch above. Decant the coffee completely after pressing.
These adjustments are sequential. Change only one variable at a time, starting with grind size. Write down what you change. After two or three attempts, you’ll dial it in.
Frequently Asked Questions
Can I make good coffee without a scale?
You can make okay coffee. You cannot make consistently excellent coffee. A “scoop” varies by bean density, roast, and even how you pack it. The difference between 15g and 18g of coffee in the same mug is the difference between weak and balanced. A scale removes this guesswork for about $20.
How important is the freshness of the beans?
Critically important. Roasted coffee beans release CO2 and oxidize. Peak flavor is typically 7–14 days post-roast for filter coffee. After three weeks, even stored in a sealed bag, the aromatic compounds have degraded noticeably. The cup tastes flat, like cardboard. Buy smaller amounts more frequently from a local roaster, and look for a roast date on the bag.
What’s the best coffee bean roasts for beginners?
Start with a medium roast. Light roasts retain more of the bean’s origin character (fruit, floral notes) but are also more acidic and harder to extract evenly. Dark roasts have bold, bitter-chocolate notes but can taste ashy if over-extracted. A medium roast from a reputable roaster is the most forgiving and showcases both bean origin and roast development.
Does the type of coffee filter types change the flavor?
Yes. Paper filters (especially bleached white ones) trap oils and microscopic sediment, yielding a very clean, crisp cup. Unbleached paper filters can impart a slight papery taste if not pre-rinsed thoroughly. Metal mesh filters (like in a French press or some permanent drippers) allow oils and fine particles through, resulting in a heavier body and more sediment. Cloth filters fall in between. The choice is about texture preference.
Why does my coffee taste great at the cafe but not at home?
They control the variables you’re likely missing: a high-quality burr grinder, a precise scale, water filtration, and a consistent recipe. They also use beans at peak freshness. The barista’s skill in pour-over is a factor, but 80% of the difference is the grinder and the scale. Replicate their recipe (ask for their coffee-to-water ratio and brew time) before upgrading equipment.
Is there a difference between coffee blends and single-origin beans?
Blends are crafted for consistency and balance, often mixing beans for a reliable flavor profile (like “balanced with chocolate notes”). Single-origin beans showcase the unique characteristics of one farm or region (like “Ethiopian Yirgacheffe with jasmine and lemon”). For learning, single-origins are more educational. For a daily, dependable cup, a well-crafted blend is often preferable.
The Bottom Line
Making coffee is a simple process complicated by inconsistent inputs. Lock down the three fundamentals: weigh your coffee and water to a 1:18 ratio, grind fresh beans to a size that matches your brewer, and use water at 93°C.
The grinder and scale are not optional for quality; they are the foundation. Your choice of brewing methods, drip, pour-over, or French press, dictates the technique, not the core principles. When you get a sour or bitter cup, adjust the grind size first. Everything else is fine-tuning.
Start with those controls. Your machine just follows your lead.
