
Master Espresso Coffee with Milk, The Drink-Defining Standard
To make espresso coffee with milk, you combine a shot of espresso, coffee extracted under pressure, with steamed, textured milk. The drink is defined by the ratio of espresso to milk and the texture of that milk, ranging from a thin layer of foam in a latte to a thick, dry foam in a cappuccino. The Barista Hustle Milk Steaming Guide specifies a core temperature range of 55-65°C (130-150°F) for optimal sweetness and texture; straying outside this range scorches flavors or produces a flat, cold drink.
Most guides stop at “espresso plus steamed milk.” They list the drinks but skip the mechanics. They don’t explain why your home latte never tastes like the cafe’s, or why that oat milk turns to soup instead of foam.
This guide covers the definitions, the precise technique for steaming milk, and how to choose the right milk for your preferred drink. We’ll look at the science behind the texture and why professional baristas often steam cooler than machine manuals suggest.
Key Takeaways
- The official ISO 3509:2020 standard defines espresso as a beverage “prepared by forcing hot water under pressure through finely ground roasted coffee,” providing the non-negotiable base for all milk drinks.
- Steam milk to 55-65°C (130-150°F). Exceeding 70°C (160°F) denatures proteins, killing sweetness and creating a scalded flavor that no amount of syrup can mask.
- Whole milk (around 3.5% fat) is the industry standard for its balanced proteins and fats that create stable, glossy microfoam, the foundation of latte art.
- Non-dairy milks with at least 3g of protein per 100ml, like certain barista-formula oat milks, can mimic dairy foam; low-protein options like some almond milks will always struggle.
- Your espresso must be dialed-in correctly first. A sour or bitter shot will make a sour or bitter latte, no matter how good your milk texture is.
What “Espresso Coffee with Milk” Actually Means
The phrase is a category, not a single drink. According to the international ISO 3509:2020 vocabulary standard, espresso is the base: “beverage prepared by forcing hot water under pressure through finely ground roasted coffee.” Adding milk creates a family of drinks differentiated by the milk’s texture and the final ratio.
The texture comes from steaming, which injects air (aeration) and heats the milk. The proteins in milk, casein and whey, unfold and wrap around the air bubbles, creating foam. The fat globules stabilize everything. Get this process wrong and you get large, unstable bubbles or, worse, scalded milk with a burnt taste.
According to the ISO 3509:2020 standard, ‘espresso’ is formally defined as a “beverage prepared by forcing hot water under pressure through finely ground roasted coffee.” This pressurized extraction is what creates the concentrated flavor and creamy crema that forms the foundation of all milk-based espresso drinks.
The ratio is what gives each drink its identity. A cappuccino isn’t just a small latte. It’s a specific balance of espresso, steamed milk, and foam.
| Drink | Espresso | Milk Texture | Final Ratio (Espresso:Milk) | Serving Vessel |
|---|---|---|---|---|
| Macchiato | 1 shot (30-40g) | A small “stain” (1-2 tsp) of foam | ~1:0.5 | 3 oz Demitasse |
| Cappuccino | 1-2 shots (30-60g) | Equal parts steamed milk & thick, dry foam | ~1:1:1 (espresso:milk:foam) | 5-6 oz Cup |
| Caffe Latte | 1-2 shots (30-60g) | Steamed milk with a thin layer (~1cm) of microfoam | ~1:3 to 1:5 | 8-12 oz Glass/Cup |
| Flat White | 1-2 shots (30-60g) | Steamed milk with very little, velvety microfoam | ~1:2 to 1:3 | 5-6 oz Cup |
TL;DR: “Espresso with milk” is a spectrum from a strong, foam-topped macchiato to a mild, milk-forward latte, all built on a correctly extracted shot of espresso.
The Non-Negotiable First Step: Your Espresso Shot
You cannot build a great milk drink on a bad shot. A sour under-extraction or a bitter over-extraction will translate directly into your cup. The milk dilutes but does not correct.
Start with a burr coffee grinder set to a fine espresso grind. Consistency is non-negotiable. A blade grinder produces uneven particles that channel and extract poorly. Dose 18-20 grams of coffee into your portafilter. Tamp evenly with about 30 pounds of pressure, just enough to create a flat, resistant puck.
Your target is a 1:2 brew ratio. That means for 18 grams of coffee in, you want 36 grams of liquid espresso out. Time this extraction. It should take 25 to 30 seconds from the moment you start the pump. If it runs faster (e.g., 20 seconds), your grind is too coarse. If it drips past 35 seconds, your grind is too fine.
Common mistake: Pulling the shot into a cold cup, the espresso begins cooling the instant it leaves the portafilter, and a cold cup can drop the temperature 5-10°C by the time you add milk, muting the flavors. Warm your cup first.
Modern machines like the La Marzocco Linea PB ABR have auto-brew ratio functions that handle this math for you. The principle remains the same. This precision ensures your espresso has the correct concentration to stand up to milk without being drowned or overwhelming.
Once your shot is pulling consistently within that 25-30 second window for a 1:2 ratio, you have a stable foundation. Now you can focus on the milk.
The Core Temperature for Perfect Steamed Milk
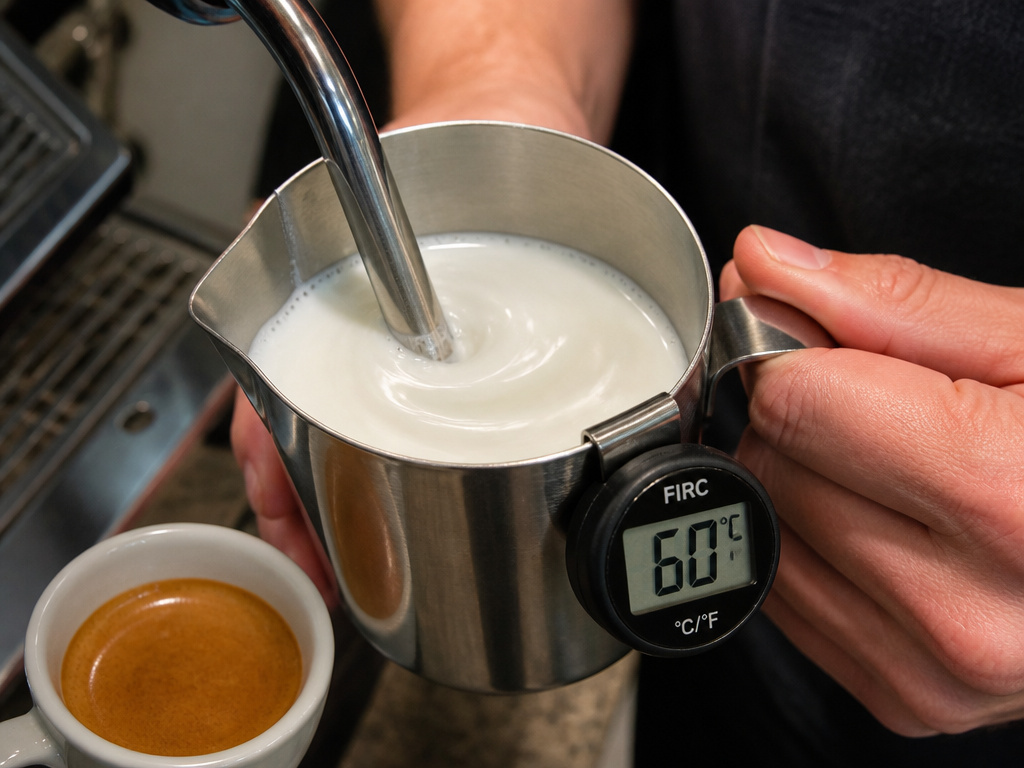
This is where most home setups fail. The ideal temperature window is narrow and critical. The Barista Hustle Milk Steaming Guide explicitly recommends a target of 55-65°C (130-150°F).
Here’s why that range matters. Milk contains sugars (lactose) that taste perceptibly sweeter when heated to around 60°C. The proteins are denaturing just enough to create a stable foam. Go hotter, and you cross a threshold.
Steam your milk above 70°C (160°F) and the proteins break down completely. The foam collapses into large, soapy bubbles within a minute, and a distinct scalded, almost burnt flavor overpowers the milk’s natural sweetness. You’ve essentially cooked it.
To hit this range, use a thermometer for your first hundred attempts. Start with milk straight from the refrigerator, this gives you more time to texture it before it gets too hot. Purge your steam wand for a second to clear condensation, then submerge the tip just below the milk’s surface. Open the valve fully.
- Aerate (Stretching): Keep the tip near the surface for 2-3 seconds. You should hear a consistent, paper-tearing sound. This incorporates air and begins building foam. Do this for too long and you’ll make a stiff, dry foam good only for a cappuccino.
- Texture (Rolling): Sink the tip deeper into the milk. Position the pitcher so the milk spins in a vigorous vortex. This whirlpool wraps the tiny air bubbles into the milk, creating a smooth, glossy microfoam, not foam on milk, but foam in milk. Heat until the pitcher feels hot to the touch but not unbearable (or 60°C on your thermometer).
- Tap and Swirl: Tap the pitcher firmly on the counter to pop any large bubbles. Swirl the milk to keep it integrated. The final texture should look like wet paint or melted ice cream.
TL;DR: Heat your milk to 60°C, not 70°C. The 10-degree difference is the gap between a sweet, silky latte and a flat, scorched one.
Choosing Your Milk: Dairy and Beyond
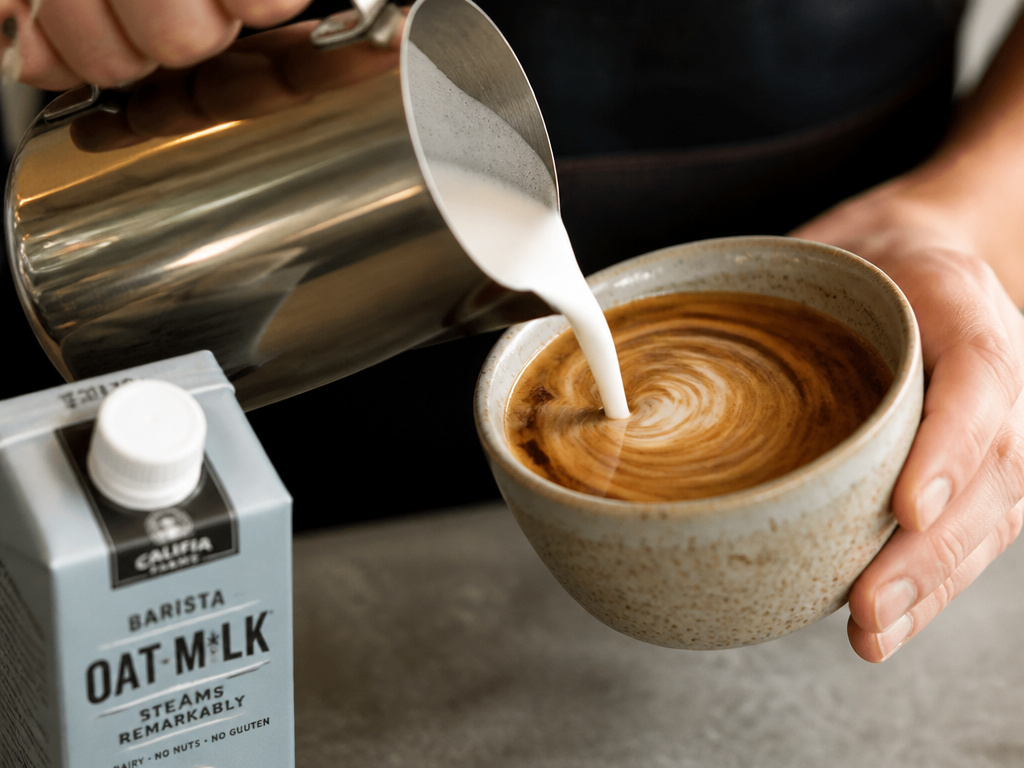
Your milk choice dictates your technique and your results. Whole dairy milk, with its 3.5% fat and 3.2% protein, is the gold standard for a reason. The fat carries flavor and creates a rich mouthfeel, while the proteins are perfectly structured for creating stable microfoam.
If you’re managing your intake, the calorie content of milk changes with fat percentage. Skim milk (0% fat) froths easily into stiff foam because it’s all protein, but it tastes thin. Whole milk offers the best balance of taste and texture.
The landscape shifts completely with non-dairy options. They are not 1:1 substitutes.
| Milk Type | Key Characteristic | Steaming Behavior | Best For |
|---|---|---|---|
| Whole Dairy (3.5% fat) | Balanced fat & protein (3.2g/100ml) | Creates stable, glossy microfoam easily. | All drinks, especially latte art. |
| Skim Dairy | High protein, no fat. | Froths very high, dry foam quickly. Can over-aerate. | Cappuccinos where dry foam is desired. |
| Barista Oat Milk | Added fats & stabilizers (e.g., 3g protein). | Steams well, creates decent foam. Sweeter flavor. | Lattes, flat whites. Most reliable alternative. |
| Almond Milk (typical) | Very low protein (1g/100ml). | Struggles to foam. Often separates or becomes watery. | Iced drinks or adding to coffee without foam. |
| Soy Milk | High protein, but can curdle with acidic espresso. | Can create good foam if brand is stable. Heat gently. | Experienced users only; risk of splitting. |
Plant-based milk for espresso requires a learning curve. You often need to aerate for less time, sometimes just 1 second, because the proteins behave differently. Always use the coldest milk possible and a clean, cold pitcher. The brand matters enormously; a barista-formula oat milk is engineered to perform.
I steamed a popular brand of almond milk for a customer who was lactose-intolerant. No matter what I did, different pitchers, shorter aerations, it produced a thin, bubbly layer that vanished before I could even pour. Switching them to a barista oat milk changed their entire experience. The drink had body and a foam that lasted.
Building the Classic Drinks
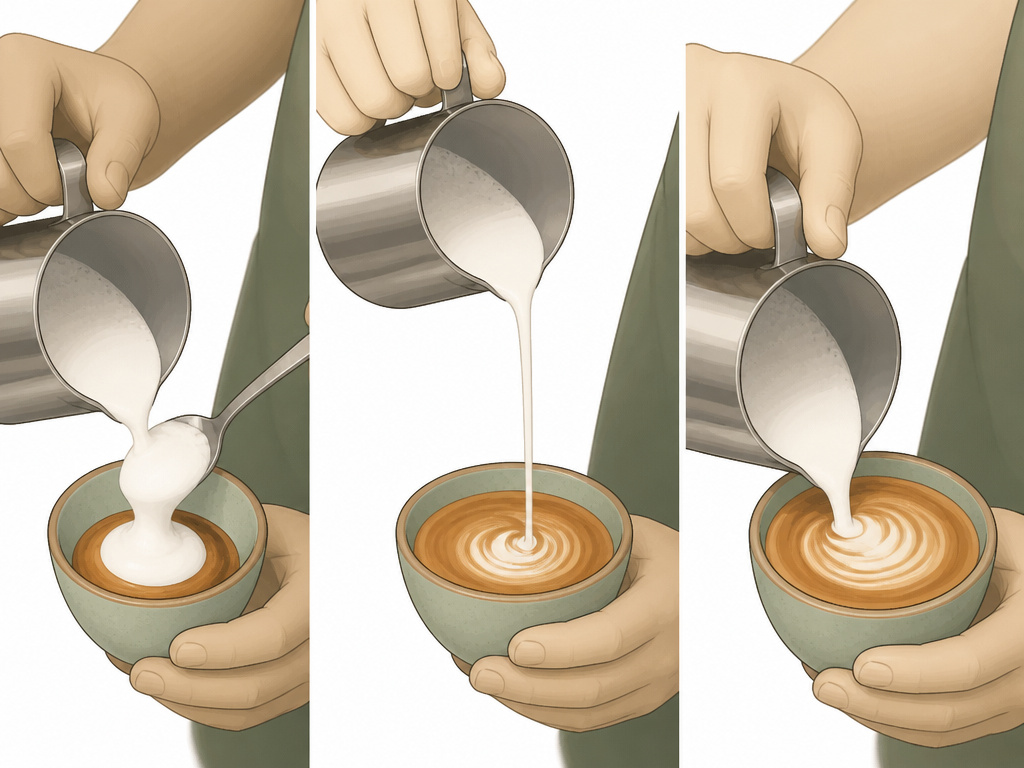
With a good shot and textured milk, assembly is straightforward. The difference between drinks is in the pour.
- Cappuccino: Your milk should have a thicker, more voluminous foam. Pour the steamed milk over the espresso, but stop before the thinner liquid at the bottom of the pitcher. Use a spoon to top up with the densest foam from the pitcher to achieve the classic equal-third structure.
- Caffe Latte: Your milk should have velvety microfoam. Pour from a higher distance initially to sink the milk beneath the espresso, then lower the pitcher and pour faster through the center to create a defined contrast if doing art. The goal is a uniform, light brown color with a thin foam layer.
- Flat White: The milk is textured to be almost entirely microfoam with almost no visible foam layer. Pour aggressively from the start, integrating the milk and espresso completely. The result is a stronger, silkier drink in a smaller cup than a latte.
Serve immediately. The clock starts the moment you stop steaming. The foam begins separating from the liquid milk, and the drink cools, losing its integrated harmony. A perfect latte is often past its prime after two minutes.
Frequently Asked Questions
Does espresso with milk have less caffeine?
No, the caffeine stays the same. A single espresso shot caffeine content is roughly 63mg, whether you drink it alone or in a 16-ounce latte. The milk dilutes the concentration per sip, but the total caffeine from the espresso shot is unchanged.
What’s the difference between a latte and a cappuccino?
It’s a ratio of espresso to milk to foam. A latte is mostly steamed milk with a thin layer of microfoam (roughly 1:4 espresso to milk). A traditional cappuccino has equal parts espresso, steamed milk, and thick foam (a 1:1:1 ratio). The cappuccino caffeine content can be higher if it’s made with a double shot, but the defining characteristic is the foam volume.
Can I make these drinks without an espresso machine?
You can make a coffee drink with milk, but it won’t be an authentic espresso-based beverage. You can use strongly brewed coffee or cafe americano (espresso diluted with hot water) as a base, and heat or froth milk separately. The flavor profile and mouthfeel will be different due to the lack of pressure-created crema and the different coffee concentration.
How do I sweeten espresso milk drinks?
Add sweetener to the espresso shot before adding milk, so it dissolves fully. Brown sugar sweetener is a popular choice as its molasses notes complement the caramel flavors in medium-roast espresso. Syrups should also be added to the hot espresso first.
Does the type of coffee bean matter?
Absolutely. Most cafes use a dedicated espresso blend, a mix of beans from different origins roasted to create a balanced, chocolatey, and nutty profile that cuts through milk. You can use single-origin espresso, but brighter, fruitier beans (like some African Arabica coffee beans) might taste tart or sharp when combined with milk.
Before You Go
Making great espresso coffee with milk hinges on two technical skills: pulling a balanced shot and steaming milk to the correct temperature and texture. The 55-65°C window is your most important tool. Respect it with a thermometer until your hand learns the feel of the pitcher.
Whole milk is the forgiving teacher. Master it before moving to the variables of non-dairy options. Remember that your espresso bean roast levels matter, a darker roast will give more chocolate notes, while a blonde roast espresso will be brighter and more delicate with milk.
Finally, this is a drink of immediacy. Pull your shot, steam your milk, combine, and drink. The craft is in that fleeting, perfect moment where everything is in balance.
