
How to Use a Black & Decker Coffee Maker | Tips & Tricks
This post contains affiliate links. As an Amazon Associate, we earn from qualifying purchases.
To use a Black & Decker coffee maker, place the carafe, insert a filter, add grounds, fill the reservoir, and press brew. The critical steps most manuals skip are the 30-second Sneak-A-Cup trick for even saturation and the strict monthly descale with a 1:2 vinegar-water mix to prevent mineral buildup that ruins taste.
People assume these machines are simple plug-and-play appliances. They fill, they press, they get coffee. The problem isn’t making coffee. It’s making good coffee consistently, and keeping the machine from developing that sour, bitter tang after six months.
This guide covers the setup you already know, then dives into the techniques and maintenance that actually matter. We’ll break down the Sneak-A-Cup feature, explain why your carafe type changes everything, and give you the cleaning schedule straight from the official Black & Decker manual.
Key Takeaways
- Execute the Sneak-A-Cup trick by removing the water reservoir for the first 30 seconds of brewing to pre-saturate the grounds, which drastically improves extraction and flavor.
- Never place a thermal carafe on a warming plate. Models like the CM2035B are double-walled and vacuum-sealed; the heat plate can damage the carafe and is unnecessary.
- Descale monthly or bi-monthly with a 1:2 white vinegar to water solution. This frequency comes directly from the CM1100 series manual to prevent calcium scaling that chokes water flow.
- Always use the 5-ounce cup markings on the reservoir, not a standard mug. A “12-cup” pot holds 60 ounces of water, requiring 12 tablespoons of ground coffee.
- The included permanent filter basket alters your grind size. Use a slightly coarser grind than you would for paper filters to prevent slow drainage and overflow.
Your First Brew: The Non-Negotiable Setup
Open the lid and locate the brew basket. This is where your filter sits. The machine likely came with a reusable permanent filter basket. If you use it, you must adjust your coffee grind.
Paper filters are forgiving. The permanent basket has wider holes. A fine grind will slip through and leave silt in your cup, or worse, clog the basket and cause the brew to back up. Use a medium-coarse grind, similar to what you’d use for a pour-over. It’s the first variable people miss.
Now, place your empty carafe on the circular warming plate at the center of the base. This seems obvious. The mistake is assuming all carafes work the same way.
If you have a classic glass carafe, it belongs on that plate. The plate keeps the coffee warm. If you have a stainless steel thermal carafe like the one that comes with the Black & Decker CM2035B, the rule flips. The manual for that model states clearly: “There is no heating plate on this appliance.” The thermal carafe is vacuum-sealed. Putting it on a hot plate does nothing but risk damaging the carafe’s base. You take it off after brewing and it insulates the coffee for hours.
For models with a thermal carafe, the warming plate is absent. Placing the thermal carafe on a hot surface from another model can melt the plastic base or compromise the vacuum seal, rendering the insulation useless within a few weeks.
TL;DR: Identify your carafe type first. Glass stays on the warmer, thermal comes off. Your grind size depends on your filter choice.
Water and Coffee: Getting the Ratio Right
The reservoir has lines numbered for cups. This is the most misunderstood measurement in home brewing. A “cup” on a Black & Decker coffee maker is five fluid ounces. It is not your eight-ounce mug. It is not a grande size.
A full 12-cup pot requires 60 ounces of water. Fill the reservoir with cold, filtered water to your desired line. The internal heating element brings it to the optimal brewing temperature, which the manual doesn’t specify but industry standards place between 195°F and 205°F.
Now, measure your coffee. The standard ratio is one tablespoon of ground coffee per five-ounce cup of water. For a full pot, that’s 12 tablespoons. That’s three-quarters of a standard measuring cup. Most people under-dose by half.
| Pot Size (Cups) | Water (fl. oz.) | Coffee (Tbsp) | Risk of Under-dosing |
|---|---|---|---|
| 4 | 20 | 4 | Weak, sour, watery taste |
| 8 | 40 | 8 | Lacks body, tastes thin |
| 12 | 60 | 12 | Bitter acids dominate, no balance |
Under-dosing is the primary reason home coffee tastes weak or imbalanced. The machine extracts what little flavor exists quickly, then over-extracts bitter compounds from the grounds as the water passes through. You get a hollow, acidic cup.
Common mistake: Using an eight-ounce mug to measure reservoir water — this overfills the system by 60% for a “12-cup” brew, drowning the grounds and producing a pale, underwhelming pot.
Add the grounds to the filter in the brew basket. Level them gently with your finger. Do not tamp or pack them. Close the lid. You are now ready for the step that changes everything.
The Sneak-A-Cup Trick for Better Flavor
Many Black & Decker models, like the CM1160B, feature something called Sneak-A-Cup technology. The marketing term sounds gimmicky. The technique is not.
Here is the manual’s missing page. Start the brew cycle as normal. Water will begin to flow from the reservoir into the heating tube. As soon as you see the first drops of coffee hit the grounds in the basket—this takes about 30 seconds—lift the entire water reservoir out of the machine.
You are not stopping the brew. You are intercepting it. The pump continues to run, pulling the water that’s already in the system through the grounds. This small volume saturates all the coffee evenly. It’s a forced pre-infusion, like in espresso.
Hold the reservoir aside for those 30 seconds. Watch the brew basket. The grounds will swell and darken uniformly. No dry patches. Now, place the reservoir back. The brew continues normally.
This single move solves channeling. Without it, water finds the path of least resistance through the dry bed, leading to uneven extraction. Parts over-extract and taste bitter. Parts under-extract and taste sour. Sneak-A-Cup ensures every particle gets wet at the same time, leading to a balanced, sweeter pot. It’s the difference between coffee and good coffee.
TL;DR: Remove the water reservoir 30 seconds into the brew cycle to pre-wet all grounds, then replace it. This mimics a pre-infusion for dramatically more even extraction.
Operating Controls and Programming
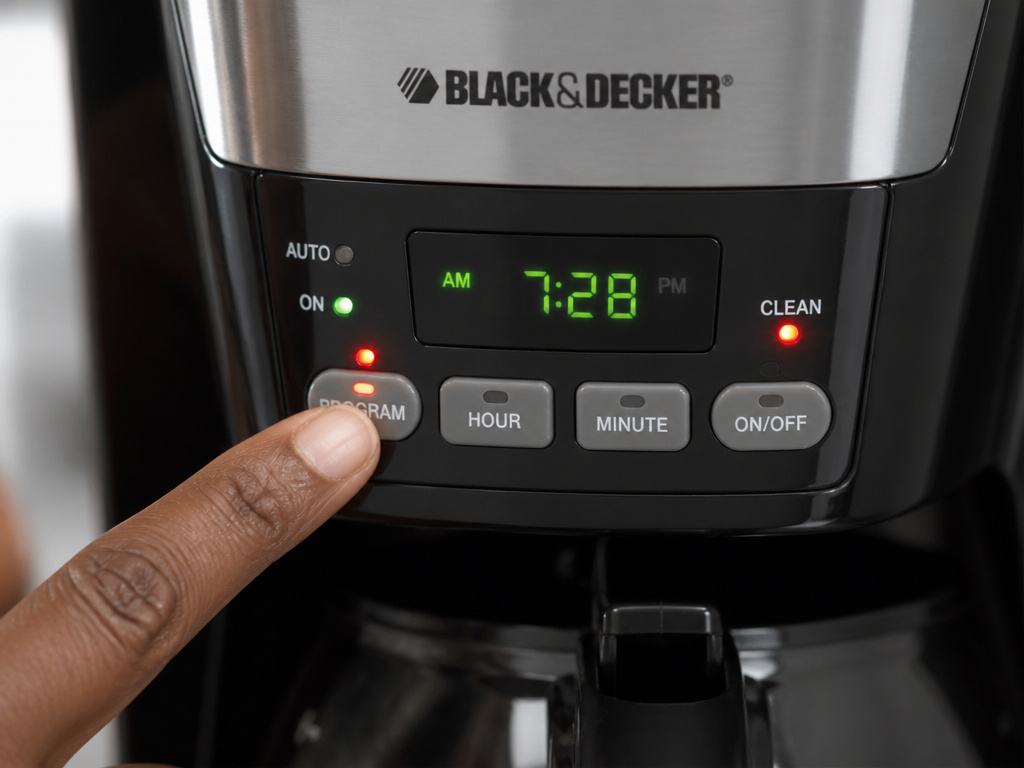
Your model likely has one of two control panels: simple on/off buttons or a full digital programmer. The basic operation is the same. Press the “Brew” button. A light will illuminate. The machine will heat, then pump water through the grounds. The entire cycle for a full pot takes about 10 minutes.
For programmable models, setting the clock is your first task. Hold the “Clock” or “Set” button and use the “Hour” and “Minute” buttons to adjust. Once the clock is set, you can program an auto-brew.
- Press the “Program” or “Auto” button. The “Program” light will blink.
- Use the “Hour” and “Minute” buttons to set the time you want the brew to finish, not start. The machine calculates the brew cycle backward.
- Press “Program” again to lock in the time.
- Ensure the machine is loaded with water and grounds, and that it is switched to the “On” or “Auto” position.
The machine will now brew at that time every day until you change it. A frequent point of confusion is the “Clean” or “Descale” indicator light. This light illuminates based on a simple timer inside the machine, not a sensor. It turns on after a set number of brewing cycles, reminding you to perform maintenance. Ignoring it doesn’t hurt the machine immediately, but it’s a ticking clock on your coffee’s taste.
Monthly Cleaning is Not Optional
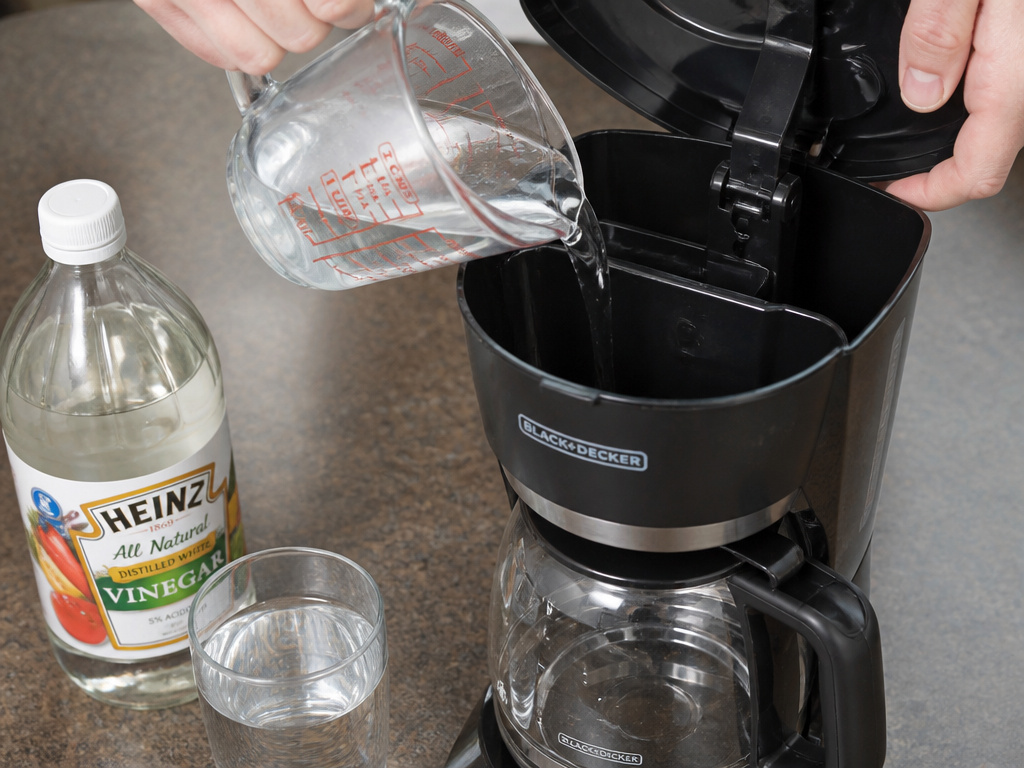
Coffee oils and mineral scale from water are the twin enemies of your machine. Oils coat the inside of the brew basket and carafe, turning rancid. Minerals, primarily calcium, build up in the heating tube and waterways, restricting flow and causing the machine to run hotter. This leads to burned, bitter coffee.
The official Black & Decker manual for the CM1100 series prescribes a cleaning cycle “monthly or bi-monthly.” The formula is specific: one part white vinegar to two parts water.
Common mistake: Using undiluted vinegar or lemon juice — the high acidity can damage internal rubber seals and gaskets over time, leading to leaks around the brew basket within six months.
Here is the full, safe procedure:
- Ensure the carafe is empty and in place. Pour the vinegar solution into the water reservoir until it reaches the 4-cup line.
- Press the “Brew” button. Let the machine run until about half the solution has dripped into the carafe.
- Turn the machine off. Let it sit for 30 minutes. This soak dissolves the mineral scale.
- Turn the machine back on and let it finish cycling the solution into the carafe.
- Dump the vinegar water from the carafe. Rinse the carafe thoroughly.
- Fill the reservoir with fresh, cold water. Run two complete brew cycles with only water to flush all vinegar residue from the system.
The carafe itself, especially a glass Duralife carafe, should be washed with warm, soapy water after each use. Avoid abrasive scrubbers. For the permanent filter basket, a quick rinse removes grounds, but a weekly soak in a vinegar-water solution will dissolve the invisible oil film.
This maintenance is non-negotiable if you want the machine to last more than a year. A 2012 CPSC recall of 160,000 Black & Decker coffeemakers cited overheating due to component failure as a fire hazard. While that was a specific manufacturing issue, blocked water flow from extreme scale buildup can cause similar overheating stresses on modern heating elements. Keeping the waterways clear is a basic safety practice.
Troubleshooting Common Issues
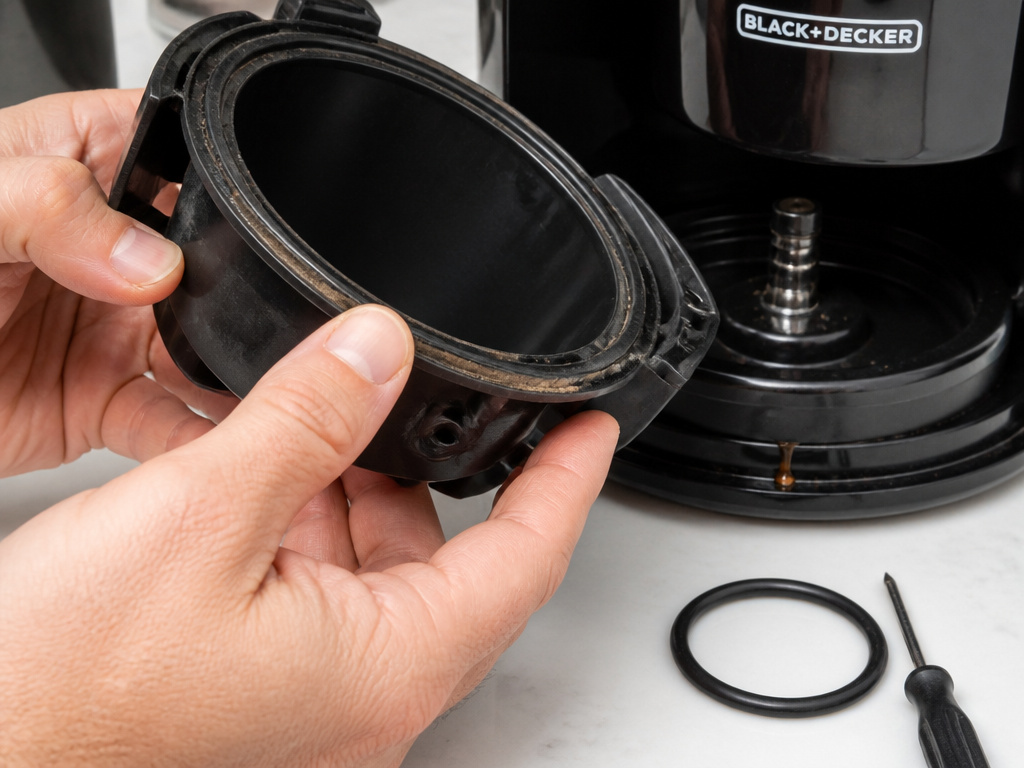
Your machine will eventually protest. Here is how to decode it.
Coffee is weak or cold: This is almost always a scaling issue. The heating tube is coated in mineral deposits, insulating the water from the heat. Perform the vinegar descale immediately. If that doesn’t work, the thermostat may be failing—a sign the machine is near end-of-life.
Machine drips or leaks from the basket: The seal between the brew basket and the heating tube has failed. This is a rubber gasket. First, check that the basket is seated perfectly flat and that the permanent filter isn’t warped. If the leak continues, the gasket needs replacement. This is a common fix outlined in any detailed troubleshooting guide.
“Clean” light won’t turn off: After completing a descale cycle, you often need to reset the reminder light. Unplug the machine for 60 seconds, then plug it back in. Hold the “Brew” button for 5-10 seconds until the light extinguishes. Consult your official Black & Decker manual for model-specific reset procedures.
Coffee tastes bitter or burned: This is typically over-extraction. Your grind is too fine for your filter, or you are using too little coffee, causing the water to over-extract the grounds. Check your ratio and grind size. Also, ensure you are not leaving the glass carafe on the warming plate for more than two hours, which is the auto-shutoff window. Stewed coffee develops a harsh flavor.
| Symptom | Most Likely Cause | Immediate Fix |
|---|---|---|
| Weak, cold coffee | Mineral scale in heater | Run vinegar descale cycle |
| Leak from brew basket | Worn or misaligned basket gasket | Reseat basket; replace gasket if damaged |
| Bitter, burned taste | Over-extraction or stale grounds | Coarsen grind, increase dose, use fresher beans |
| Machine won’t turn on | Power issue or dead thermal fuse | Check outlet; unplug for 1 min then retry |
Understanding these fixes can save a service call. For more complex issues, the process is similar to diagnosing any similar appliance instructions.
Frequently Asked Questions
Can I use pre-ground coffee from the store?
Yes, but understand its limitations. Pre-ground is designed for a generic drip machine and is typically a medium grind. It will work fine with paper filters. If you use the permanent filter basket, expect some silt at the bottom of your cup. For the best results with any setup, investing in a burr coffee grinder for consistent fresh grounds is the single biggest upgrade you can make.
What’s the difference between a permanent filter and paper filters?
The permanent filter basket (usually gold-toned mesh) allows more coffee oils and fine particles to pass through, which can result in a fuller-bodied but slightly murkier cup. Paper filters, especially bleached coffee filters, trap oils and fines, yielding a cleaner, brighter taste. Paper filters also make cleanup easier and are biodegradable coffee filters in many cases.
How long does the coffee stay hot?
For models with a glass carafe and warming plate, coffee will stay at a drinkable temperature for about 2 hours, after which the auto-shutoff engages. For thermal carafe models like the CM2035B, coffee can stay hot for 4-6 hours without any applied heat due to vacuum insulation.
Why does my coffee maker make a loud gurgling sound?
This is normal at the end of the brew cycle. It’s the sound of the last water being pulled from the heating tube and air entering the system. A loud gurgling or sputtering during the brew usually indicates a clog, likely from scale or a too-fine grind, and signals it’s time to descale.
Can I brew less than 4 cups?
Technically yes, but performance suffers. These machines are designed to heat a minimum volume of water effectively. Brewing just one or two cups often results in under-extracted, weak coffee because the water passes through the small bed of grounds too quickly. For single servings, consider a different brewing technique like a pour-over.
The Bottom Line
Using a Black & Decker coffee maker correctly hinges on three things beyond the basic buttons. Master the 30-second Sneak-A-Cup trick to pre-infuse your grounds. Know your carafe—glass on the warmer, thermal off it. And commit to the monthly vinegar descale. This routine prevents the slow decline into bitter, underwhelming coffee that makes people blame their beans or their machine.
The machine is a tool. The quality of the output depends on the precision of your inputs: water ratio, grind size, and maintenance. Start with a good coffee blend or a bright blonde roast, treat your water, and keep the pathways clean. Your morning routine deserves that much.
{
“@context”: “https://schema.org”,
“@type”: “HowTo”,
“name”: “How to Use a Black & Decker Coffee Maker Correctly”,
“totalTime”: “PT10M”,
“tool”: [
{
“@type”: “HowToTool”,
“name”: “Black & Decker coffee maker”
},
{
“@type”: “HowToTool”,
“name”: “Paper or permanent filter”
},
{
“@type”: “HowToTool”,
“name”: “Measuring cup”
},
{
“@type”: “HowToTool”,
“name”: “White vinegar”
}
],
“step”: [
{
“@type”: “HowToStep”,
“name”: “Prepare the carafe and filter”,
“text”: “Place the empty carafe on the warming plate. Insert a paper filter or the included permanent filter basket into the brew basket.”
},
{
“@type”: “HowToStep”,
“name”: “Add water and grounds”,
“text”: “Fill the reservoir with cold water to your desired cup line. Add one tablespoon of ground coffee per five-ounce cup of water into the filter.”
},
{
“@type”: “HowToStep”,
“name”: “Execute the Sneak-A-Cup trick”,
“text”: “Start the brew cycle. After 30 seconds, briefly remove the water reservoir to saturate the grounds, then replace it to continue brewing.”
},
{
“@type”: “HowToStep”,
“name”: “Handle the carafe correctly”,
“text”: “For glass carafes, keep it on the warming plate. For thermal carafes, remove it immediately after brewing—never place it on a hot plate.”
},
{
“@type”: “HowToStep”,
“name”: “Clean monthly”,
“text”: “Run a cleaning cycle monthly with a solution of one part white vinegar to two parts water, then run two cycles with fresh water to rinse.”
}
]
}
{
“@context”: “https://schema.org”,
“@type”: “FAQPage”,
“mainEntity”: [
{
“@type”: “Question”,
“name”: “Can I use pre-ground coffee from the store?”,
“acceptedAnswer”: {
“@type”: “Answer”,
“text”: “Yes, but understand its limitations. Pre-ground is designed for a generic drip machine and is typically a medium grind. It will work fine with paper filters. If you use the permanent filter basket, expect some silt at the bottom of your cup. For the best results with any setup, investing in a burr coffee grinder for consistent fresh grounds is the single biggest upgrade you can make.”
}
},
{
“@type”: “Question”,
“name”: “What’s the difference between a permanent filter and paper filters?”,
“acceptedAnswer”: {
“@type”: “Answer”,
“text”: “The permanent filter basket (usually gold-toned mesh) allows more coffee oils and fine particles to pass through, which can result in a fuller-bodied but slightly murkier cup. Paper filters, especially bleached coffee filters, trap oils and fines, yielding a cleaner, brighter taste. Paper filters also make cleanup easier and are biodegradable coffee filters in many cases.”
}
},
{
“@type”: “Question”,
“name”: “How long does the coffee stay hot?”,
“acceptedAnswer”: {
“@type”: “Answer”,
“text”: “For models with a glass carafe and warming plate, coffee will stay at a drinkable temperature for about 2 hours, after which the auto-shutoff engages. For thermal carafe models like the CM2035B, coffee can stay hot for 4-6 hours without any applied heat due to vacuum insulation.”
}
},
{
“@type”: “Question”,
“name”: “Why does my coffee maker make a loud gurgling sound?”,
“acceptedAnswer”: {
“@type”: “Answer”,
“text”: “This is normal at the end of the brew cycle. It’s the sound of the last water being pulled from the heating tube and air entering the system. A loud gurgling or sputtering during the brew usually indicates a clog, likely from scale or a too-fine grind, and signals it’s time to descale.”
}
},
{
“@type”: “Question”,
“name”: “Can I brew less than 4 cups?”,
“acceptedAnswer”: {
“@type”: “Answer”,
“text”: “Technically yes, but performance suffers. These machines are designed to heat a minimum volume of water effectively. Brewing just one or two cups often results in under-extracted, weak coffee because the water passes through the small bed of grounds too quickly. For single servings, consider a different brewing technique like a pour-over.”
}
}
]
}
