
Make Cold Coffee in a Keurig: Master the Over-Ice Setting
To make cold coffee in a Keurig, use the dedicated Over-Ice button on models like the K-Iced, K-Supreme, or K-Slim + ICED. This setting brews a smaller, stronger volume of hot coffee directly onto a full cup of ice, melting it to create a properly concentrated and chilled drink without dilution. For older models without this button, you must manually brew a strong, small cup and then pour it over ice, accepting some watering-down.
Most people see the “12 oz” setting on their Keurig, fill a glass with a handful of ice, and hit brew. The result is a weak, lukewarm mess that tastes like brown water. The machine brewed 12 ounces of hot liquid, but half of that volume was just melted ice you didn’t account for.
This guide walks through the two distinct methods: the right way with a modern Over-Ice machine, and the workaround for older models. We’ll cover the exact ice measurement, why the button changes everything, and how to avoid the single mistake that ruins the drink.
Key Takeaways
- The Over-Ice button on Keurig K-Iced, K-Supreme, and K-Slim + ICED models is not a gimmick. It programs the machine to brew a smaller, hotter shot of coffee specifically calculated to melt a precise amount of ice.
- Without that button, you are brewing standard hot coffee over ice. This always dilutes the drink. Your only lever is to brew the strongest, smallest cup possible first.
- The golden ratio for Over-Ice brewing is one measured cup of ice (8 fluid ounces by volume) for every drink, regardless of whether you select 8, 10, or 12 ounces on the display.
- Using a My K-Cup reusable filter in an Over-Ice machine requires the red silicone plug to be left in. Removing it causes a watery, under-extracted brew because water bypasses the grounds.
- For the best flavor from any method, choose a K-Cup rated for bold or dark roast. Light roasts brewed over ice often taste sour and thin once chilled.
The First Question: Does Your Keurig Have the Button?
Look at the control panel. Do you see a button labeled “Over Ice,” “Iced,” or “Brew Over Ice”? This is the single most important feature. It’s present on the Keurig K-Iced, K-Supreme, and K-Slim + ICED models.
If you have that button, your machine has a dedicated program. The method in the next section is for you. If your machine is older, a K-Classic, K-Select, K-Duo, or any model without that specific button, you are working with a different, more manual process. Skip to the section on methods for older machines.
Common mistake: Assuming all Keurigs work the same for iced coffee, the Over-Ice button changes the brew temperature and volume algorithms. Using a standard brew setting over ice guarantees a watery drink.
How the Over-Ice Setting Actually Works
This is where most online guides get vague. The Over-Ice setting isn’t magic. It’s a simple, smart calculation.
When you press “Over Ice” and select, say, 12 oz, the machine isn’t about to brew 12 fluid ounces of hot coffee. It’s going to brew a concentrated amount, roughly 6 to 7 ounces, of hotter coffee. This hot coffee is designed to melt exactly one cup of ice (8 ounces by volume). The melted ice combines with the brewed coffee to create your final 12-ounce drink. The higher brew temperature ensures extraction isn’t compromised by the immediate cooling.
The Over-Ice function on a Keurig K-Iced or K-Supreme brews a reduced volume of hotter coffee intended to melt a specific quantity of ice. Selecting a 12 oz drink may result in only 7 oz of liquid coffee output, with the remaining volume created by the melted ice to achieve the correct strength and chill.
If you brew a 12 oz Over-Ice drink into an empty mug, you’ll be shocked by how little coffee comes out. That’s not a machine error. It’s working as designed, waiting for you to provide the ice.
TL;DR: The size you select (8, 10, 12 oz) is your final drink size, not your brew size. The machine brews less to account for the ice melting.
The Tools You’ll Need (Beyond the Machine)
You don’t need much, but the right tools prevent guesswork.
– A Tall Glass or Travel Mug: The brew head needs clearance. For large glasses, you’ll need to temporarily remove the drip tray.
– A Liquid Measuring Cup: Not for liquid, for ice. Use it to measure one level cup of ice. Eyeballing leads to weak coffee.
– The Right K-Cup: Go bold. A dark roast or an “iced coffee” labeled K-Cup holds up better to dilution. A light roast or a blonde roast can taste unpleasantly acidic when chilled.
– Optional: A My K-Cup Reusable Filter: If you use your own grounds, you need the official Keurig My K-Cup Reusable Filter. The generic ones often leak.
The Step-by-Step for Brew-Over-Ice Models
Follow this sequence exactly. The timing matters.
- Measure one cup of ice into your glass. This is the non-negotiable first step. Use your measuring cup. One level cup, which is 8 fluid ounces by volume. This is the “ingredient” the machine’s program expects.
- Place the glass under the brew spout. You may need to remove the drip tray for clearance. Just slide it out.
- Press the “Over Ice” button. The button will light up. Then, select your desired final drink size, 8, 10, or 12 ounces.
- Insert your K-Cup and close the lid. Use any K-Cup, but for best results, pick one marketed for iced coffee or a dark roast.
- Press the brew button. The machine will start. You’ll see a smaller, darker stream of coffee hit the ice.
- Let the cycle finish, then stir immediately. The coffee will pool at the bottom. Stirring incorporates the melted ice and chills the entire drink faster.
- Customize. Now add your almond milk, brown sugar, or a pinch of salt to cut bitterness.
The whole process takes about three minutes from grabbing the glass to taking a sip.
| Step | Action | Why It Matters |
|---|---|---|
| 1 | Measure 1 cup (8 oz volume) of ice. | The machine’s programming is calibrated for this exact mass to melt into the target volume. |
| 2 | Select “Over Ice” then your size (8,10,12 oz). | Reversing the order often starts a standard hot brew, ruining the ratio. |
| 3 | Brew directly onto the ice. | Immediate melting and cooling preserves aroma and prevents a “cooked” taste. |
| 4 | Stir vigorously after brewing. | Equalizes temperature and concentration, preventing a strong, hot layer at the bottom. |
Navigating the Pitfalls and Edge Cases
The system works perfectly when followed. People run into trouble when they improvise.
The My K-Cup Reusable Filter Quirk:
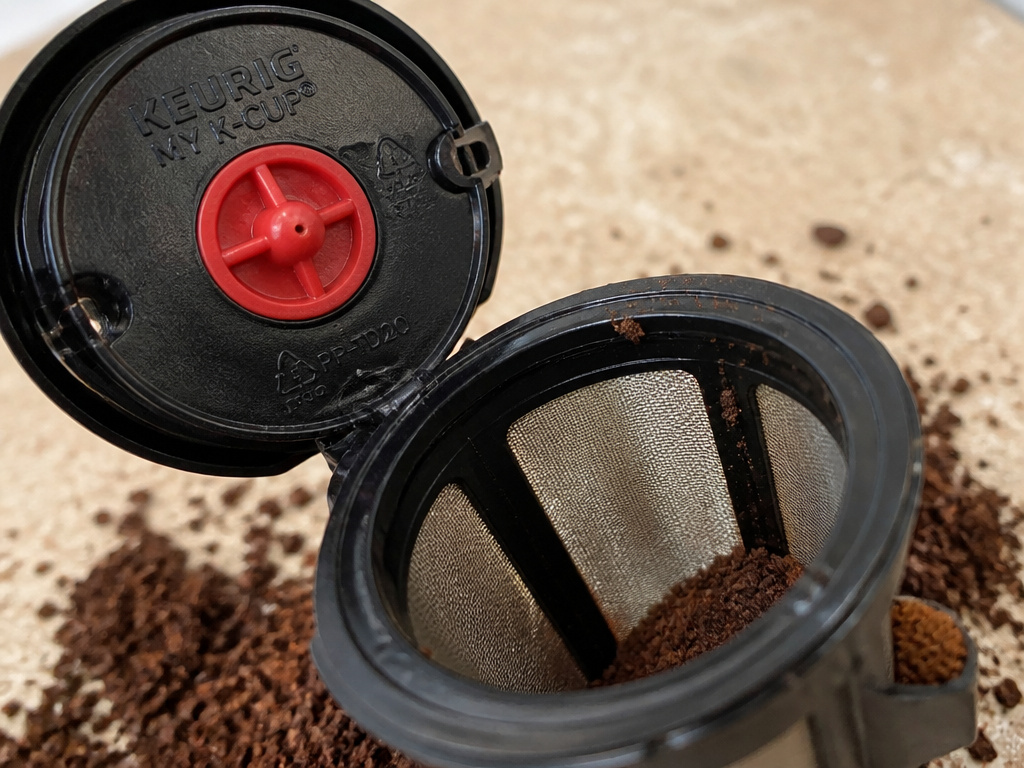
If you use the My K-Cup filter for fresh grounds, you must leave the red silicone plug inside the lid. This plug blocks the outer ring of holes, forcing all water through the single center needle and your coffee grounds. Models with Over-Ice settings, like the K-Iced, only have a center needle. Removing the plug causes most of the water to bypass the grounds entirely, giving you a cup of hot, weak, dirty water.
What if my ice doesn’t all melt?
That’s fine. In fact, it’s ideal. You should have some ice leftover after stirring. That ice will continue to keep your drink cold without further dilution. If all the ice melts instantly, you likely didn’t use enough ice, and your drink will be lukewarm and too strong.
Can I add more ice after brewing?
Yes, but do it after you stir. Adding a few fresh cubes on top restores the visual appeal and extends the chill. Don’t expect them to melt much, the coffee is already cold.
The Workaround for Keurigs Without an Over-Ice Button

This is the older, more hands-on method. The goal is to minimize dilution, but some is inevitable.
The Strong Brew Method:
- Take your glass and fill it to the brim with ice. Pack it in.
- Set your machine to brew the smallest, strongest cup possible. That usually means the 6 oz or 8 oz setting, using a “bold” or “extra bold” K-Cup.
- Brew this strong coffee into a separate, heat-safe cup or pitcher. Do not brew it directly onto your ice yet.
- Let the hot coffee sit for 60-90 seconds. This allows it to cool slightly, so it won’t vaporize your ice on contact.
- Slowly pour the coffee over your packed glass of ice. Stir immediately.
You will lose some ice to melting, and the drink will be diluted. To compensate, you started with a stronger, smaller brew. It’s a workaround, not a perfect solution. The result is closer to a traditional drip coffee poured over ice than the engineered Keurig iced drink.
I used this method for years with a K-Classic. The first sip was always okay, but by the time I was halfway through, it tasted like stale, watery coffee. It’s what pushed me to upgrade to a model with the dedicated button.
Choosing Your Coffee: Pods vs. Grounds
Your coffee choice changes the game more than you think.
K-Cup Recommendations:
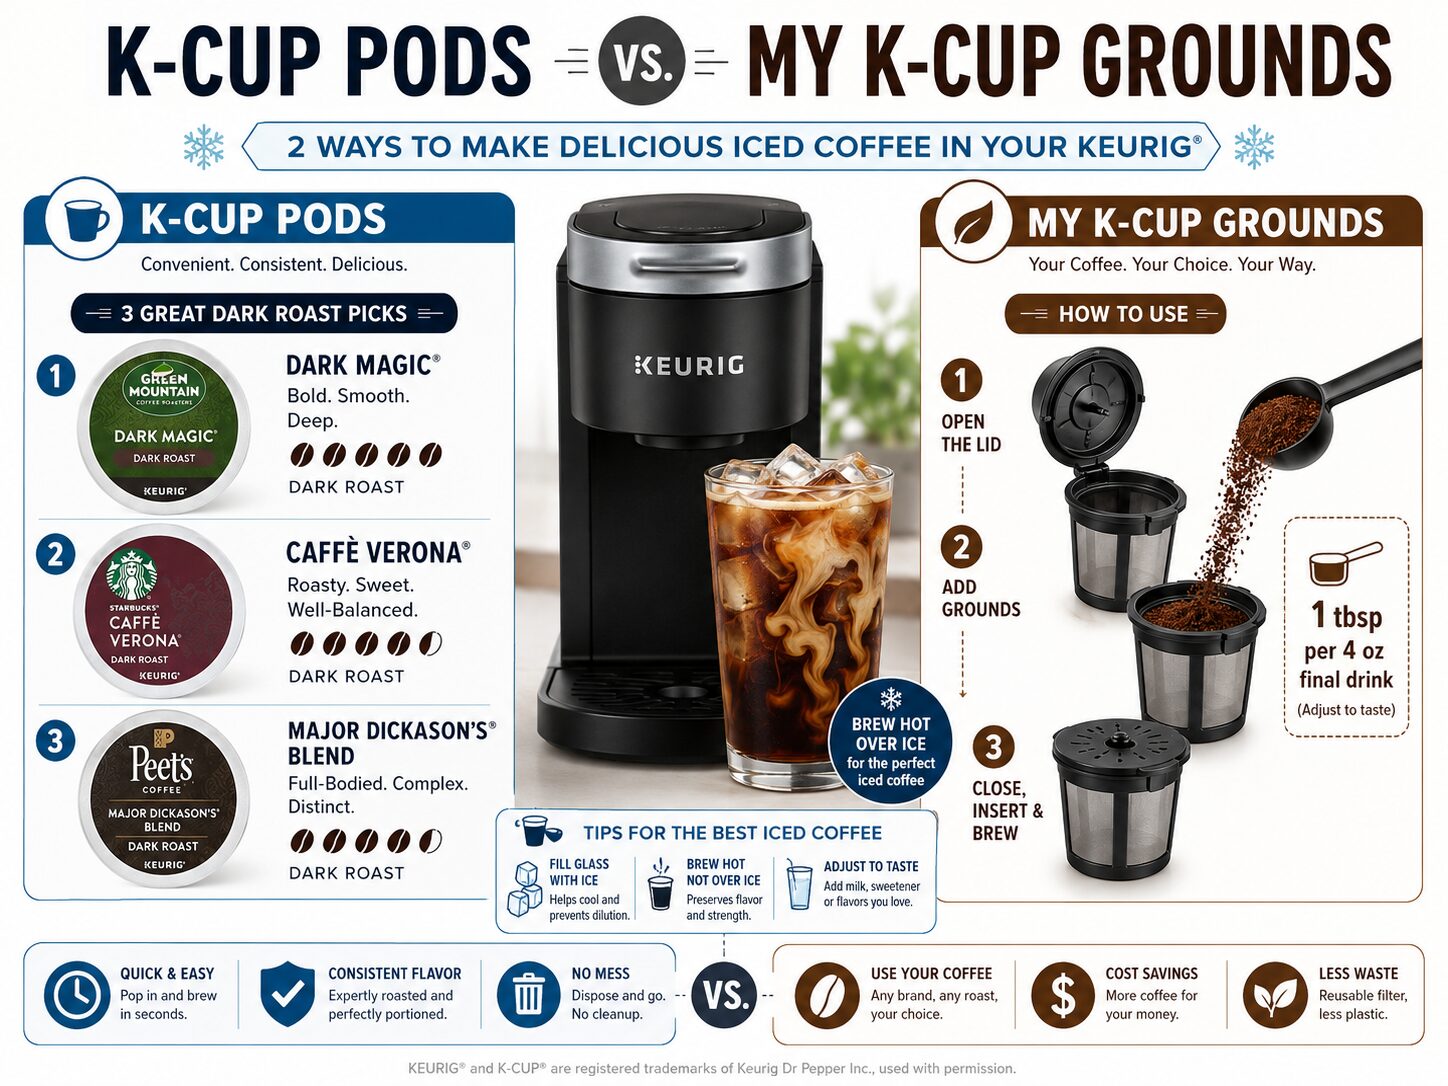
- Green Mountain Coffee Nantucket Blend (Dark): Holds its chocolatey notes well when chilled.
- Starbucks Sumatra (Dark): The earthy, low-acid profile stands up to ice.
- Any “Iced” or “Over Ice” branded K-Cup: These are often roasted and ground specifically for this brewing method.
Using Your Own Grounds (My K-Cup):
If you want to use a burr grinder for fresh beans, grind them slightly finer than you would for a standard Keurig brew. The hotter, faster Over-Ice cycle needs a finer grind for full extraction. Use a dark or medium-dark roast. A light roast will likely taste sour.
One tablespoon of grounds per 4 ounces of final drink is a good start. So for a 12 oz iced coffee, use about 3 tablespoons. Do not fill past the “max” line in the reusable filter.
Why Your Iced Coffee Might Taste Bitter or Sour
Chilling coffee amplifies certain flavors. Bitterness from over-extraction becomes harsh. Acidity from under-extraction becomes sharp and sour.
- Bitter? You might be using a pod that’s too dark or an Over-Ice setting on a machine that’s due for descaling. Old mineral buildup causes uneven, overheated water. Try the salt trick, a tiny pinch in the finished drink neutralizes bitterness.
- Sour? You’re likely under-extracting. This happens with light roast pods, a too-coarse grind in a My K-Cup, or a machine brewing too cool. Stick to medium or dark roasts for iced.
Also, remember that the caffeine content in your iced drink might feel different. A 12 oz iced coffee from a K-Cup has roughly the same caffeine as a hot 12 oz brew, but drinking it faster on a hot day can make the stimulant effect more noticeable.
Frequently Asked Questions
Can you make cold brew in a Keurig?
No. Keurigs brew with hot water under pressure, by definition. You cannot make true cold brew, which requires 12-24 hours of steeping in cold water. The “Keurig Cold” (or K-Brew + Chill) is a separate, rare machine that has a cold-brew function, but it is not a standard Keurig.
Does the Over-Ice setting use more coffee?
No, it uses the same K-Cup. The difference is in the water volume and temperature. The machine pulls less water through the same pod, creating a stronger concentrate.
My Over-Ice coffee is always weak. What am I doing wrong?
You are almost certainly not using enough ice. The machine brews a concentrate expecting to melt a full cup of ice. If you only put in a handful, the concentrate gets overdiluted by the extra liquid volume from the brew water. Measure your ice.
Can I use the Over-Ice setting for tea or hot chocolate?
Technically yes, but it’s not designed for it. The higher temperature might scorch delicate tea leaves or make hot chocolate powder clump. It’s best for coffee pods only.
How do I clean my Keurig for the best iced coffee?
Scale is the enemy of temperature control. Descale your machine every 3-6 months with Keurig’s official descaling solution or white vinegar. A scaled machine cannot heat water to the proper Over-Ice temperature, leading to sour, under-extracted coffee.
Before You Go
Making true iced coffee in a Keurig is a matter of matching the method to your machine. If you have the button, trust it and measure your ice. If you don’t, accept the limits of the strong-brew workaround.
The upgrade from a standard model to one with an Over-Ice button is worth it if you drink iced coffee regularly. The difference isn’t subtle, it’s the gap between a compromised workaround and a drink that’s genuinely designed to be served cold. Grab a dark roast pod, fill that cup to the brim with ice, and let the machine do the math for you.
