
Learn How to Make Cold Brew Coffee Concentrate the Right Way
To make cold brew coffee, steep coarsely ground coffee in cold water for 12-24 hours, then filter it to produce a smooth, low-acidity concentrate. The standard ratio is 1 part coffee to 8 parts water by weight.
Most people get the timeline wrong. They follow the generic “12-24 hours” advice and end up with a brew that’s either sour from under-extraction or harsh from over-extraction. The difference between those two outcomes isn’t just time, it’s the interaction of grind size, water quality, and temperature.
This guide walks through the exact steps, tools, and ratios that work, grounded in both science and a lot of messy kitchen counters. We’ll cover the simple mason jar method, the benefits of dedicated brewers, and how to tailor the process for the flavor you actually want.
Key Takeaways
- Use a 1:8 coffee-to-water ratio by weight (e.g., 100g coffee to 800ml water) for a standard concentrate. Lighter roasts often need a slightly finer grind or longer steep.
- Steep for 18 hours at room temperature for balanced extraction. Twelve hours often leaves lighter roasts sour; 24+ hours can pull out bitter compounds.
- Grind coarse, like breadcrumbs. A fine grind from a blade coffee grinder will over-extract and clog your filter, resulting in a muddy, bitter concentrate.
- Filter twice, once through a metal strainer to catch grounds, then through a paper or cloth filter for clarity. Skipping the second pass leaves silt in your cup.
- Store the concentrate in a sealed container in the refrigerator for up to two weeks. After 14 days, it begins to oxidize and taste flat, regardless of the beans you used.
The Core Cold Brew Ratio and Method
Head design changes the entire process. Look at the business end of your trimmer.
Cold brew coffee is made by steeping coarsely ground coffee in cold or room-temperature water for an extended period, typically 12-24 hours. This slow, low-temperature extraction minimizes the dissolution of acidic and bitter compounds like chlorogenic acids, resulting in a smoother, less acidic beverage compared to hot brewing methods.
The foundational recipe is simple. Combine coffee and water, wait, then separate them. The precision lies in the numbers you pick before the wait begins.
TL;DR: Weigh your coffee and water. A 1:8 ratio (coffee to water) steeped for 18 hours at room temperature produces a versatile, balanced concentrate ready for dilution.
Why the 1:8 Coffee-to-Water Ratio Works
This ratio is the starting point for a concentrate, not a ready-to-drink cup. It creates a strong base you can dilute. By weight, it means for every gram of coffee, you use eight grams of water.
A weaker ratio, like 1:12, brews a drinkable strength directly but lacks the flexibility and shelf life of a true concentrate. A stronger ratio, like 1:4, risks under-extraction unless you dramatically extend the steep time or use a finer grind. The 1:8 balance reliably extracts enough soluble material for a rich flavor without demanding extreme variables.
Common mistake: Measuring coffee by volume instead of weight, a “cup” of whole beans and a “cup” of ground coffee have vastly different masses. This throws the ratio off by 20% or more, making your brew unpredictably weak or strong.
If your brew consistently tastes weak even at 18 hours, your ratio is likely off. Weigh your coffee.
The 18-Hour Steep: A Balanced Timeline
Manufacturers like Toddy recommend 12 hours. Many online guides say 12-24. Through trial, 18 hours at room temperature (about 70°F or 21°C) consistently hits the sweet spot for a medium-dark roast.
The Scientific Reports study on caffeine concentration found that extraction of various compounds plateaus at different times. The 18-hour mark captures most of the desirable sugars and aromatics before the slower-extracting, more bitter tannins become prominent. For a light roast, which is denser and extracts slower, you might push to 20 or even 22 hours. For a very dark roast, 16 hours can be enough.
| Roast Level | Suggested Steep Time | Risk If Shorter | Risk If Longer |
|---|---|---|---|
| Light Roast | 18–22 hours | Sour, tea-like taste | Increased bitterness, muted brightness |
| Medium Roast | 16–18 hours | Weak, underdeveloped flavor | Overly heavy, chocolaty notes dominate |
| Dark Roast | 14–16 hours | Thin, ashy flavor | Harsh, burnt bitterness |
Brewing entirely in the refrigerator, as done in the PMC study on cold brew extraction variables, is a valid alternative. It takes longer, closer to 24 hours, because the cold water further slows molecular movement. The result is often described as even smoother, with almost no perceived acidity.
Tools and Equipment: From Mason Jar to Toddy
You need a vessel, a filter, and a grinder. The grinder is non-negotiable.
The first time I used a blade grinder for cold brew, the result was a catastrophe. The inconsistent powder-and-boulder mix over-extracted in some places and under-extracted in others. The concentrate was simultaneously bitter and sour, with a gritty silt that settled at the bottom of every glass. I now use a Baratza Encore set to its coarsest setting. The difference is night and day, clean flavor, no sludge, and a filter that doesn’t clog.
The Grinder: Burr vs. Blade
Your grind consistency is the single biggest lever for quality after the beans themselves.
- Burr coffee grinders crush beans between two surfaces, producing uniform particles. This is essential. Uniform coarse grounds extract evenly. The Baratza Encore, Fellow Ode, and even the budget-friendly Oxo Brew Conical Burr are reliable choices.
- Blade coffee grinders chop beans randomly. You get dust, chunks, and everything in between. The dust over-extracts and turns bitter immediately, while the chunks barely contribute flavor. It’s the main reason homemade cold brew tastes muddy.
If you only have a blade grinder, pulse in very short bursts and shake the grinder between pulses to try and redistribute the beans. It’s not perfect, but it’s better than holding the button down.
Brewing Vessels Compared
| Vessel Type | Best For | Key Consideration |
|---|---|---|
| 1-Quart Mason Jar | Beginners, small batches | Requires separate filtering setup; easy to clean. |
| Toddy Cold Brew System (T2N) | Dedicated enthusiasts, clarity | Uses a proprietary felt filter and rubber stopper; yields very clean concentrate. |
| OXO Brew Compact | Countertop convenience | Has a built-in “rainmaker” lid and stainless steel mesh filter; integrates brewing and filtering. |
| Large Pitcher with Lid | Big batches for events | You’ll need a large fine-mesh strainer and lots of paper coffee filters or cheesecloth. |
The Toddy system’s felt filter is brilliant. It traps even the finest silt, producing a crystal-clear concentrate. The trade-off is that the felt requires thorough rinsing and must air-dry completely to prevent mildew. The OXO’s metal mesh is easier to maintain but often benefits from a final pour through a paper coffee filter for ultimate clarity.
Choosing and Preparing Your Coffee Beans
The bean decides the final character. You can’t fix bland or stale coffee with any brewing method.
Roast Profile: Light, Medium, or Dark?
- Light roast beans retain more of the bean’s origin characteristics, fruit, floral, tea notes. They are denser and extract slower. For cold brew, they can produce a wonderfully complex and bright cup, but they demand a longer steep time (18-22 hours) or a slightly finer grind to avoid a sour, weak result.
- Medium roast beans are the most forgiving. They offer a balance of origin flavor and roast-developed sweetness (chocolate, caramel). They perform reliably at the standard 18-hour steep.
- Dark roast beans are less dense and extract quickly. They impart bold, chocolaty, and smoky flavors. They risk becoming ashy or bitter if steeped too long; 14-16 hours is often sufficient.
A common coffee blend designed for espresso can make an outstanding cold brew. Blends are crafted for balance, which translates well to the long steep. A single-origin coffee like a Kenyan or Ethiopian can be spectacular, highlighting a specific fruity or floral note in a new, mellow way.
The Water Factor
Cold brew is 98% water. If your tap water tastes like chlorine or minerals, your coffee will too.
Use filtered or bottled water with a neutral pH. Very hard water (high in calcium and magnesium) can actually inhibit extraction, potentially requiring a longer steep. Very soft water might lead to a slightly flatter taste. When in doubt, a standard carbon-filtered pitcher water works perfectly.
The Step-by-Step Process (Mason Jar Method)
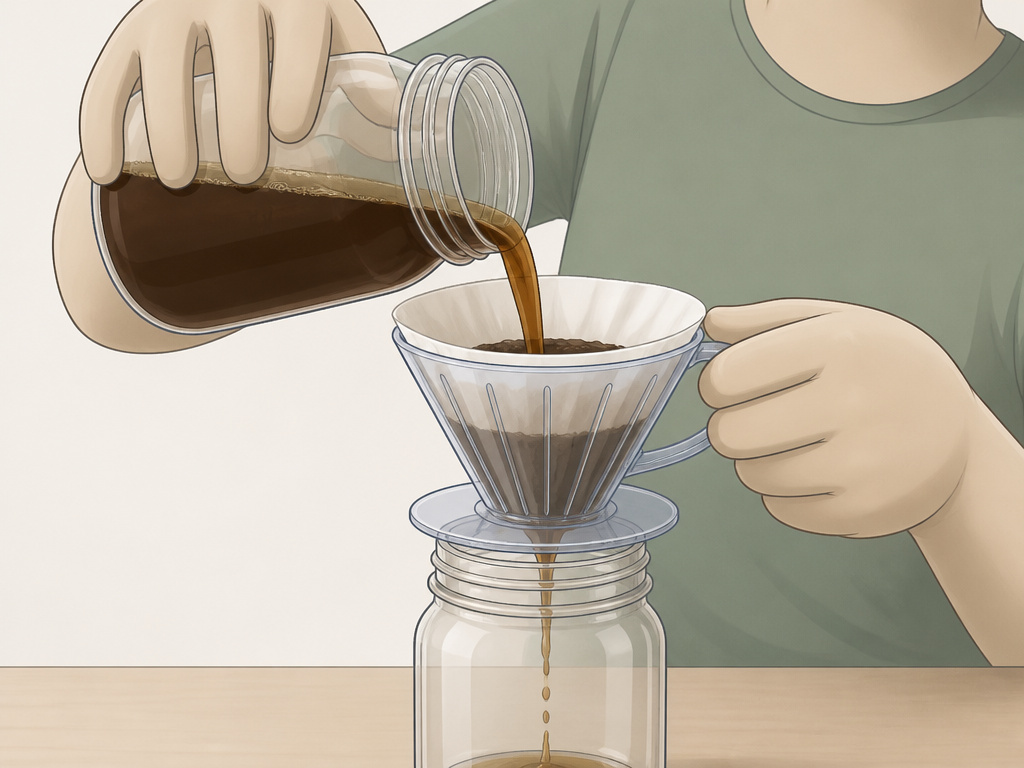
This is the full DIY process. It works.
Before you start: Ensure all equipment is clean. Any oil or old coffee residue will spoil your fresh batch. Use soap and water, and rinse thoroughly.
- Grind 100g of coffee beans on the coarsest setting of your burr grinder. The grounds should look like rough breadcrumbs or coarse sea salt. Place them in a clean 1-quart mason jar.
- Add 800ml of cold, filtered water. Pour it slowly over the grounds, ensuring all are saturated. Gently stir with a long spoon to eliminate any dry clumps.
- Seal the jar with its lid. Let it sit at room temperature, out of direct sunlight, for 18 hours. You can give it a gentle swirl once or twice during the steep if you remember.
- Strain the mixture. Set a fine-mesh strainer over a large bowl or pitcher. Line it with a double layer of damp cheesecloth or a bleached coffee filter. Slowly pour the jar’s contents through. This catches the bulk of the grounds.
- Filter again for clarity. For a silt-free concentrate, pour the initially strained liquid through a paper coffee filter set in a drip cone or a second strainer. This second pass is slow but crucial.
- Transfer and store. Pour the finished concentrate into a sealed bottle or jar. Label it with the date. Refrigerate immediately.
I won’t recommend skipping the second filtration. The visual payoff is a brilliantly clear concentrate, but the real reason is mouthfeel. That fine silt makes the drink taste gritty and unfinished, even if you can’t see it. Found that out after serving a batch to friends who are professional roasters.
TL;DR: Grind coarse, use a 1:8 ratio, steep 18 hours, and filter twice, once through mesh, once through paper. The second filter is the step nobody should skip.
Troubleshooting Your Cold Brew
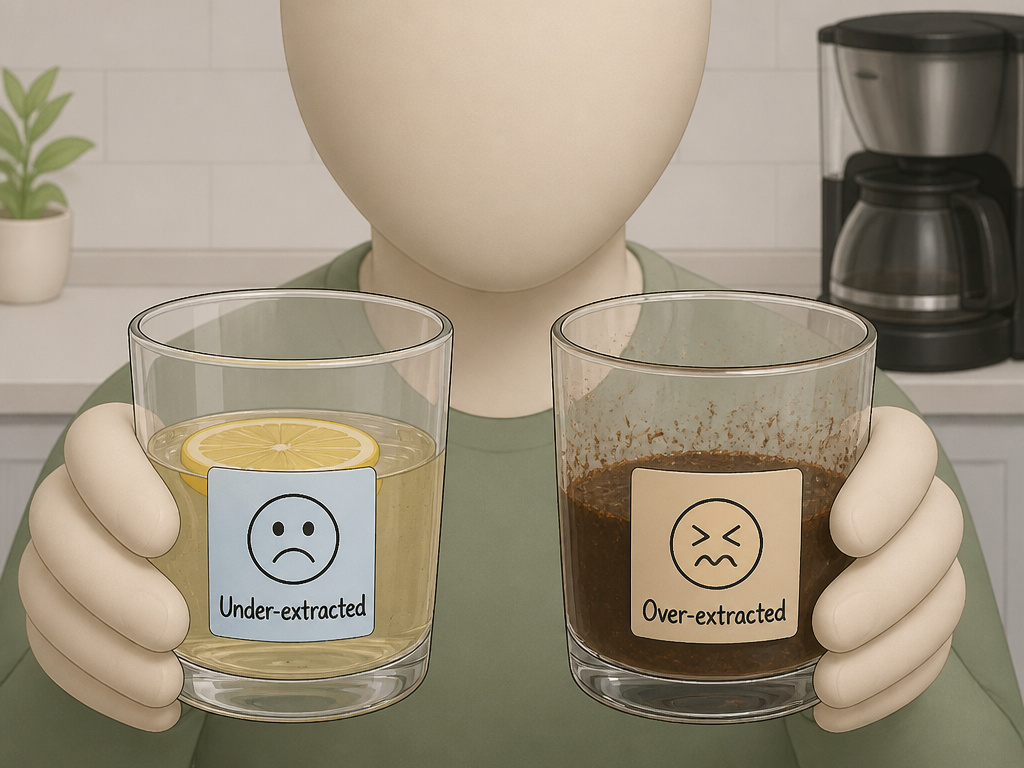
Your senses are the best diagnostic tools. Smell and taste the concentrate before you dilute it.
“My Cold Brew Tastes Sour or Weak”
This is classic under-extraction. The water hasn’t pulled enough sugars and soluble solids from the coffee.
* Cause: Steep time too short, grind too coarse, water too cold (if refrigerated), or roast too light.
* Fix: Increase your steep time by 2-4 hours. Next time, use a slightly finer grind or stick with room temperature water for brewing.
“My Cold Brew Tastes Bitter or Harsh”
This is over-extraction. You’ve pulled out too many of the bitter, astringent compounds.
* Cause: Steep time too long, grind too fine, or using a very dark roast.
* Fix: Shorten your steep time. For your next batch, ensure your grind is consistently coarse. If using a dark roast, don’t exceed 16 hours.
“There’s Grit/Silt at the Bottom of My Glass”
Your filtration wasn’t fine enough. The PMC optimization study for cold brew notes that particle size distribution directly impacts sediment.
* Cause: Using only a metal mesh strainer, which can’t catch microscopic fines.
* Fix: Always perform a second filtration through a paper coffee filter or a dedicated cloth coffee filter. It’s non-negotiable for a clean cup.
Storing, Serving, and Enjoying
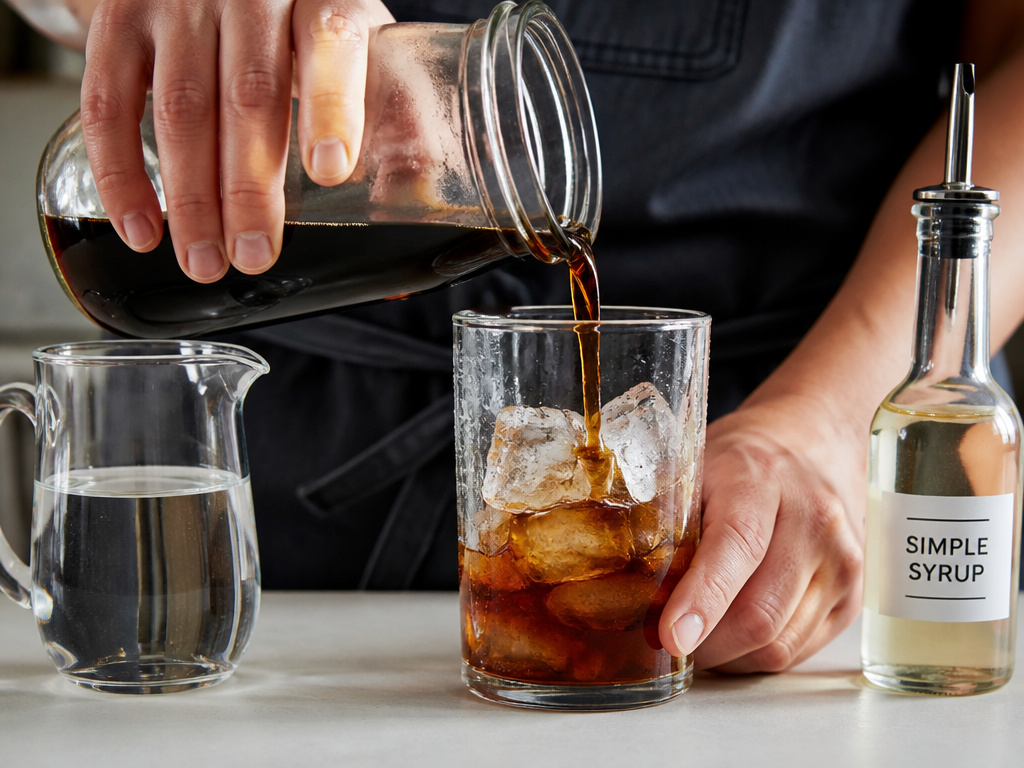
Your concentrate is a blank canvas. Treat it right.
Storage and Shelf Life
Transfer the concentrate to an airtight container. Glass is ideal. Refrigerate it.
According to general USDA food safety guidelines applied by analogy, a properly filtered and refrigerated concentrate is safe for 1-2 weeks. The flavor peak is in the first 5-7 days. After two weeks, it begins to oxidize and taste stale, losing its vibrant notes. You can freeze concentrate in ice cube trays for longer storage, but expect some flavor degradation upon thawing.
How to Serve Cold Brew
Cold brew concentrate is meant to be diluted. The standard starting point is a 1:1 ratio of concentrate to water or milk. Adjust to your taste.
* Over Ice: Fill a glass with ice, pour in your desired amount of concentrate, then top with cold water, milk, or a milk alternative.
* As a Base: Use it in coffee cocktails, smoothies, or for baking.
* “Hot” Cold Brew: Want a hot drink? Dilute the concentrate with hot water. You’ll get a smooth, low-acidity cup of hot coffee. Don’t microwave the concentrate directly, it can develop off-flavors.
For sweetening, simple syrup integrates best. Brown sugar sweetener made into a syrup adds nice caramel notes. Regular granulated sugar won’t dissolve well in the cold liquid.
Frequently Asked Questions
Can I use pre-ground coffee for cold brew?
You can, but you sacrifice control and freshness. Store-bought pre-ground coffee is almost always ground for drip machines, which is finer than ideal for cold brew. It will work, but it may extract faster and lead to a slightly more bitter profile or a siltier result. If you do use it, lean toward the shorter end of the steep time range (12-14 hours).
How much caffeine is in cold brew?
Cold brew caffeine content is typically higher than hot brewed coffee by volume of concentrate because you use a higher coffee-to-water ratio. However, since you dilute it, your final serving’s caffeine level is comparable to a regular cup of coffee. The exact amount depends on your bean, roast, and dilution.
Is cold brew less acidic than hot coffee?
Yes, significantly. The Scientific Reports study on roasting temperature effects confirms that cold water extracts far fewer chlorogenic acids, the primary compounds responsible for perceived acidity and bitterness in hot coffee. This makes it a great option for people with sensitive stomachs.
What are the best beans for cold brew?
You can use almost any coffee. For a classic, smooth, and chocolaty profile, a medium or dark roast coffee blend works wonderfully. For more unique, fruity, or complex flavors, try a light or medium single-origin coffee like an Ethiopian Yirgacheffe or a Colombian Huila. Experimentation is part of the fun.
Do I need a special cold brew maker?
No. A mason jar, a strainer, and a filter are all you truly need. Dedicated makers like the Toddy or OXO simply consolidate the process and can improve filtration convenience. They are helpful but not essential for great results.
Before You Go
Cold brew’s magic is in its simplicity and its patience. Weigh your coffee and water. Grind coarse. Steep for 18 hours at room temperature. Filter it twice. The result is a versatile, smooth concentrate that turns into a refreshing drink for the next two weeks.
The variables are few but powerful: time, grind size, and ratio. Change one and note the difference. A light roast might need those extra two hours. Hard water might demand them, too. Your palate is the final judge. Start with the 1:8 ratio and 18-hour steep, then tweak from there. The goal is a cup you look forward to, not just a recipe you follow.
