
Master the Coffee to Water Ratio: SCA Standard & Better Brews
The coffee to water ratio is the weight of your ground coffee compared to the weight of your brew water, expressed as a proportion like 1:16 or 1:18. The Specialty Coffee Association’s Golden Cup Standard is 1:18 (55g coffee per liter), but most home brewers find their sweet spot between 1:15 and 1:17 for drip, pour-over, and immersion methods.
Most people get this wrong because they measure by volume. A “tablespoon” of a light roast is denser than a tablespoon of a dark roast. You can have two visually identical scoops that differ by three or four grams of coffee. That throws your ratio off before you even heat the water. The result is a guessing game where your coffee tastes different every morning.
This guide breaks down the professional standard, explains why you might want to ignore it, and gives you method-specific starting points. You’ll learn how bean density and roast level secretly change the rules, and how to use a simple adjustment process to find your personal perfect cup.
Key Takeaways
- Always measure by weight, not volume. A $20 digital scale is the single most important tool for consistent brewed coffee.
- The SCA’s 1:18 “Golden Cup” ratio is a laboratory benchmark for balanced extraction, not a commandment. Your taste buds are the final judge.
- Different brewing methods for coffee demand different ratios. A French press at 1:15 tastes radically different from a Chemex at 1:18.
- Light roast, dense beans often need a slightly finer grind and a slightly stronger ratio (like 1:16) to extract fully without turning bitter.
- Your adjustment path is simple: if sour/weak, increase coffee (strengthen ratio); if bitter/harsh, decrease coffee (weaken ratio) or grind coarser.
The Golden Cup Standard (And Why It’s a Starting Point)
The Specialty Coffee Association defines the ideal extraction with a specific number. Their Golden Cup Standard calls for 55 grams of coffee per liter of water. That’s a 1:18.18 coffee to water ratio. This standard exists to give professionals a reproducible baseline for evaluating coffee quality in controlled settings.
The Specialty Coffee Association’s Golden Cup Standard specifies 55 grams of coffee per liter of water, equating to a brew ratio of approximately 1:18. This standard is designed to produce a balanced extraction in a controlled environment, targeting specific soluble concentration and strength metrics.
It is not a universal law for your kitchen. Think of it as the center line on a highway. You can drive on it, but you’ll probably spend most of your time slightly to the left or right depending on conditions. The SCA standard assumes optimal water chemistry, perfect grind distribution, and an ideal brew temperature. Your home setup likely varies in at least one of those areas.
TL;DR: The SCA’s 1:18 ratio is your neutral starting point. Dial from there based on your brewer, your beans, and your mouth.
Weight vs. Volume: The $20 Fix for Inconsistent Coffee
This is the non-negotiable part. A “scoop” is useless for precision. Coffee grounds have different densities. A tablespoon of a dense Ethiopian light roast can weigh 7 grams. A tablespoon of a fluffy Italian dark roast might weigh only 4 grams. That’s a 75% difference in coffee mass for the same volume.
You cannot control a ratio you cannot measure. A basic digital scale with 0.1-gram precision costs less than a bag of good beans. It eliminates the variable.
The volume-based “two tablespoons per six ounces” rule from the National Coffee Association works as a rough guide for standard drip coffee. It gets you in the ballpark. But if you want to hit the same spot in the strike zone every day, you need the scale. The first time you weigh what you’ve been scooping, you’ll be surprised.
Common mistake: Measuring coffee by volume with a scoop — the dose weight fluctuates with bean density and roast level, making your brew strength unpredictable from one bag to the next.
How to Find Your Personal Ratio (The Adjustment Grid)
Stop looking for one perfect number. Your perfect ratio is a small range that moves with your coffee. Use this diagnostic table to find it.
| Taste / Symptom | Likely Cause | Immediate Adjustment |
|---|---|---|
| Sour, sharp, salty, weak | Under-extraction (not enough dissolved solids) | Increase coffee dose. Strengthen your ratio (e.g., go from 1:18 to 1:16). |
| Bitter, harsh, drying, hollow | Over-extraction (too many dissolved solids) | Decrease coffee dose. Weaken your ratio (e.g., go from 1:15 to 1:17). Or, grind slightly coarser. |
| Balanced but too strong/weak | Correct extraction, wrong strength | Change the ratio without changing extraction. For stronger, use more coffee (1:15). For weaker, use less coffee (1:19). |
| Flat, bland, muted | Stale beans, bad water, or very uneven grind | Check bean freshness, use filtered water, and ensure your grind consistency is even. |
The process is iterative. Brew a cup at 1:18. Taste it. Use the grid. Adjust. Write down what you did. Your second cup will be closer. This is how you build a personal recipe that works for your specific coffee bean types.
The Step-by-Step Dial-In
- Choose a baseline. Start with 20g of coffee and 360g of water (1:18) for a medium-sized brew.
- Grind correctly. Use a medium grind for pour-over, coarse for French press. Inconsistent grind from a blade grinder will muddy your results; a burr grinder is preferred.
- Brew normally. Execute your standard method with your now-measured coffee and water.
- Taste and diagnose. Sip the coffee while it’s still warm. Note the dominant flavors against the grid.
- Adjust one variable. Only change your coffee dose (the ratio) for the next brew. Keep grind size, water temp, and brew time identical.
- Repeat. It usually takes two or three cycles to land in your preferred zone.
Changing only the ratio first isolates the variable. If you change the grind and the dose at the same time, you won’t know which fix worked.
Method-Specific Ratios: From Aeropress to Cold Brew
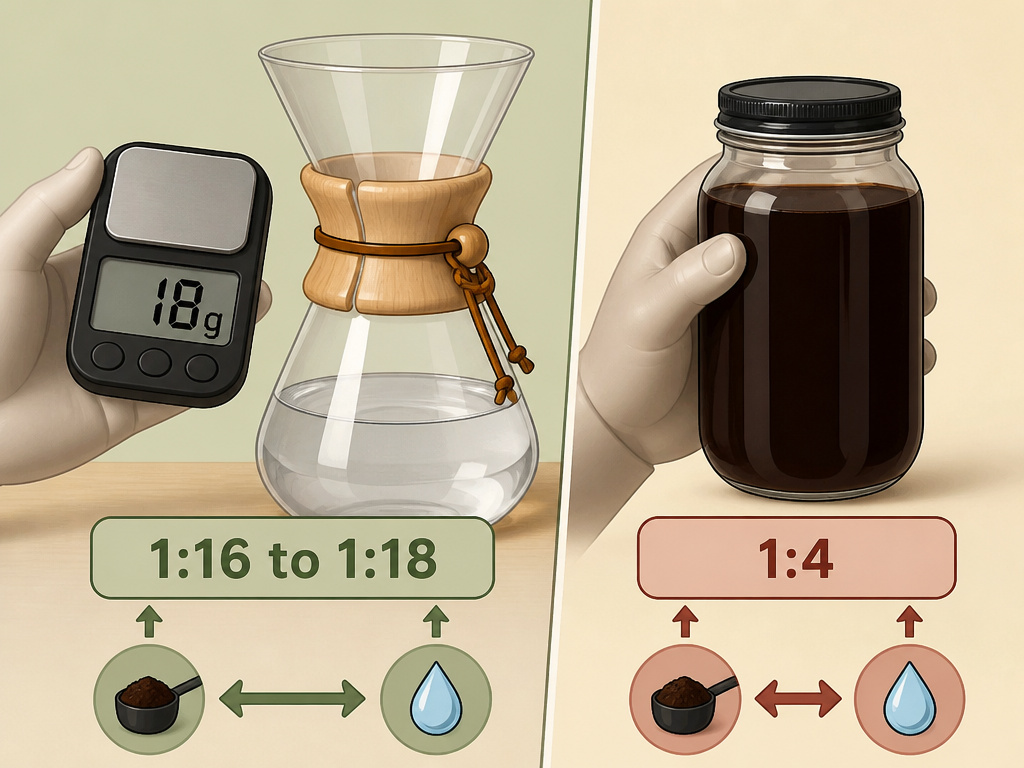
The 1:18 standard is built for a specific drip or pour-over profile. Other brewers extract differently, so their starting ratios shift. This table gives you the proven ranges.
| Brewing Method | Typical Ratio Range (Coffee:Water) | Notes & Flavor Goal |
|---|---|---|
| Pour-Over (V60, Chemex) | 1:16 – 1:18 | Chemex with its thick paper coffee filters often tastes better at the stronger end (1:16) to compensate for oil absorption. |
| French Press / Immersion | 1:15 – 1:17 | Full immersion extracts efficiently. A stronger ratio (1:15) produces a robust, full-bodied cup without bitterness. |
| Aeropress (Standard) | 1:10 – 1:12 | Designed for a concentrated, espresso-like shot. Many official Aeropress recipes use a strong ratio for a potent brew that can be diluted. |
| Cold Brew (Concentrate) | 1:4 – 1:8 | Cold water extracts slowly. A very strong ratio creates a concentrate meant to be diluted with water or milk after steeping. |
| Espresso | 1:2 – 1:3 | A completely different process using pressure. 18g of coffee yielding 36g of liquid is a standard 1:2 ratio. |
| Auto-Drip Machine | 1:16 – 1:18 | Follows the SCA standard most closely. Use the higher end (1:18) if your machine tends to over-extract or runs hot. |
I prefer a 1:16.5 ratio on my Chemex for most single-origin coffee. The official 1:18 standard always tasted a bit thin and tealike to me, like the flavors were stretched too far. Adding those two extra grams of coffee per liter gave the cup a backbone it was missing.
Notice the massive jump for cold brew. This is the prime edge case. You are not brewing a drink; you are making a coffee extract. Trying to use a 1:18 ratio for cold brew results in a sad, watery infusion that lacks any punch. Embrace the high concentration.
The Hidden Variables: Bean Density and Roast Level
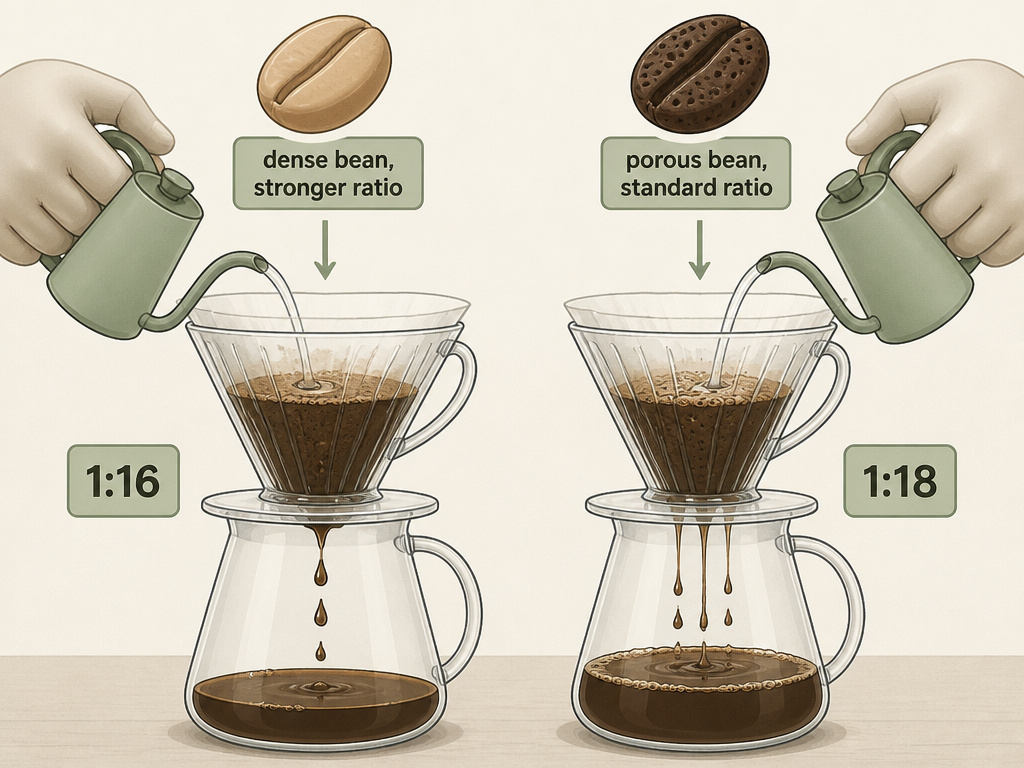
Your ratio is a lever that interacts with your coffee’s physical properties. A dense, hard blonde roast bean from a high altitude is more resistant to water. A less dense, porous dark roast bean gives up its solubles easily.
This means the same 1:18 ratio can produce two different extractions. The light roast might under-extract (sour), while the dark roast over-extracts (bitter) with the same grind and time.
You have two tools to compensate: 1. Adjust the ratio. Give dense light roasts a stronger ratio (1:16) to put more coffee material in the path of the water. 2. Adjust the grind. Finer grind increases surface area for extraction, coarser grind decreases it. Often, a combination of a slightly finer grind and a slightly stronger ratio unlocks a difficult light roast.
Common mistake: Using the same ratio for a light roast and a dark roast — the light roast will taste sour and underwhelming because its denser structure requires more aggressive extraction parameters.
This is where recipe logging matters. Note the roast level and origin next to your successful ratio. You’ll start to see patterns. Your Kenyan light roast might always sing at 1:16, while your Brazilian dark roast is perfect at 1:18.
Essential Tools (Beyond the Scale)
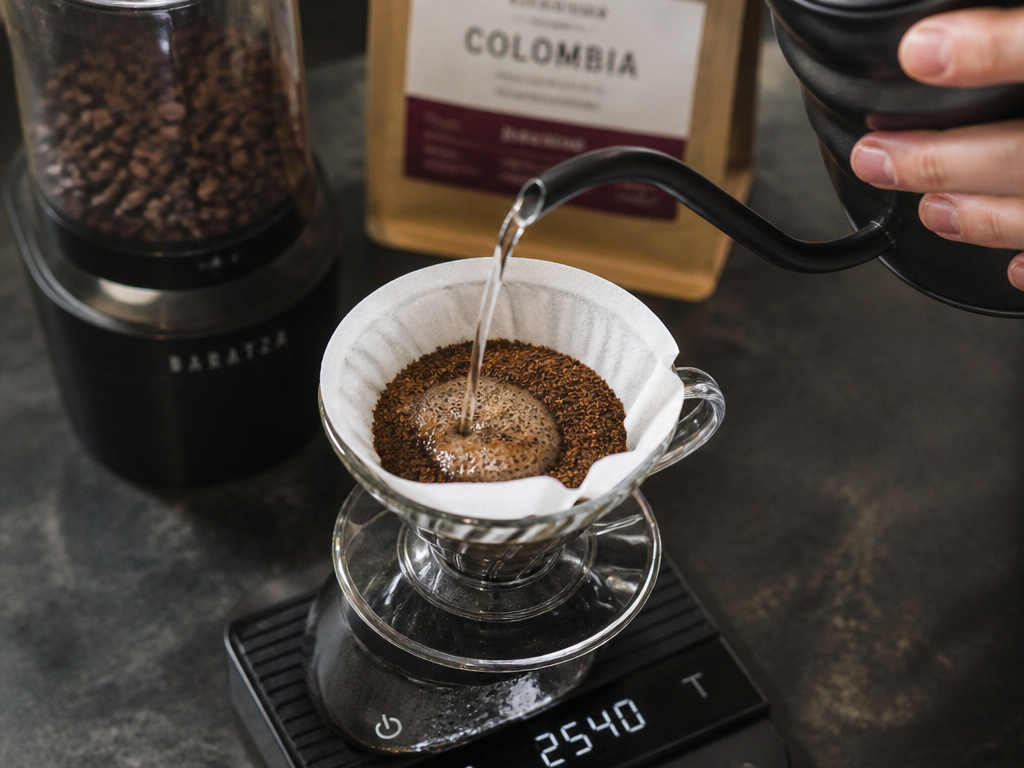
While the scale is paramount, these tools define your ceiling. – Burr Grinder: Consistency is everything. A blade grinder smashes beans into a mix of dust and boulders. The dust over-extracts (bitter), the boulders under-extract (sour). A uniform grind from a burr grinder ensures all particles extract at roughly the same rate, making your ratio adjustments meaningful. – Gooseneck Kettle (for pour-over): Control over water flow is control over extraction. A gooseneck lets you pour slowly and evenly, saturating all the grounds without channeling. – Filtered Water: Tap water heavy with minerals or chlorine will distort flavor. Simple carbon-filtered water removes off-flavors and provides a clean canvas. This is especially critical for the longevity of machines like Breville coffee machines. – Appropriate Filters: Don’t sabotage your Chemex with a cheap, thin filter. Use the correct, thick Bunn coffee filters for your machine or the branded ones for your pour-over brewer. The paper’s flow rate and absorption affect extraction.
Can you use a Ninja blender to grind? In an absolute pinch, with short pulses, you can get a coarse grind for cold brew. For any hot brew method, the inconsistency will make dialing in a precise ratio nearly impossible. The grinder is not the place to compromise.
Frequently Asked Questions
What is the best coffee to water ratio for beginners?
Start with 1:17. Weigh 20 grams of coffee and 340 grams of water. This is slightly stronger than the SCA’s 1:18 standard, giving you more flavor cushion. It’s a forgiving middle ground for most brewing coffee methods while you learn.
How many tablespoons of coffee per cup?
For a 6-ounce “cup,” the volume guideline is 2 tablespoons of ground coffee. This approximates a ratio between 1:15 and 1:18, depending on your scoop and coffee density. It’s an inconsistent shortcut. A scale is better.
Does the coffee to water ratio change with brew time?
Absolutely. Methods with longer contact time, like French press (4 minutes) or cold brew (18 hours), use stronger ratios (more coffee) because extraction happens more slowly or in cold water. Faster methods, like espresso (30 seconds), use very strong ratios because pressure forces extraction quickly.
Why does my coffee taste bitter even with the “correct” ratio?
Bitterness from over-extraction is often a grind problem, not a ratio problem. If your ratio is in the 1:16-1:18 range and the coffee is bitter, your grind is almost certainly too fine. Try a significantly coarser grind setting on your next brew before you change your coffee weight.
Before You Go
The coffee to water ratio is your primary control for strength, but it works in concert with grind size, water temperature, and brew time. The SCA’s 1:18 Golden Cup Standard is your reference point, not your destination. Your destination is the cup you want to drink every morning.
Grab a scale. Start with 1:17. Taste. Adjust toward 1:16 if it’s weak, toward 1:18 if it’s harsh. Write down what works for the coffee bean roasts you buy. That recorded recipe, grounded in weight, is what ends the daily guesswork. It turns brewing from a chore into a craft.
