
How to Roast Coffee Beans | What Broke on Our Third Batch
To roast coffee beans, you apply controlled heat to green coffee beans, listening for the distinct “first crack” and watching for color changes to determine your roast level, from light to dark. The process is more about timing and temperature than complex gear.
Most beginners think a dark roast means leaving the beans in longer. They crank the heat and wait for a dark color. That approach scorches the outside and leaves the inside underdeveloped. The result is a cup that’s simultaneously bitter and grassy.
This guide walks through the tools, the sensory cues, and the specific adjustments for altitude or frozen beans that most tutorials skip. You’ll learn to roast on a stovetop, in an oven, or with a dedicated machine.
Key Takeaways
- The sound of first crack is your non-negotiable starting point for timing any roast level; everything before it is just drying.
- Agitation is everything on stovetop methods. Stop stirring, and you’ll get a scorched, uneven batch.
- New electric drum roasters like the Aillio Bullet R1 V2 need 5-10 seasoning roasts to perform consistently, not the 2-3 the manual suggests.
- Roasting at altitudes above 5,000 feet requires more heat and longer times because first crack occurs at a lower bean temperature.
- You must let roasted beans rest for at least 12 hours before grinding. Grinding too early releases carbon dioxide that pushes water away from the grounds, creating a weak, sour shot.
The Tools of the Trade
You do not need a $3,000 roaster. Your kitchen already holds capable tools. The method you pick dictates your control level and batch size.
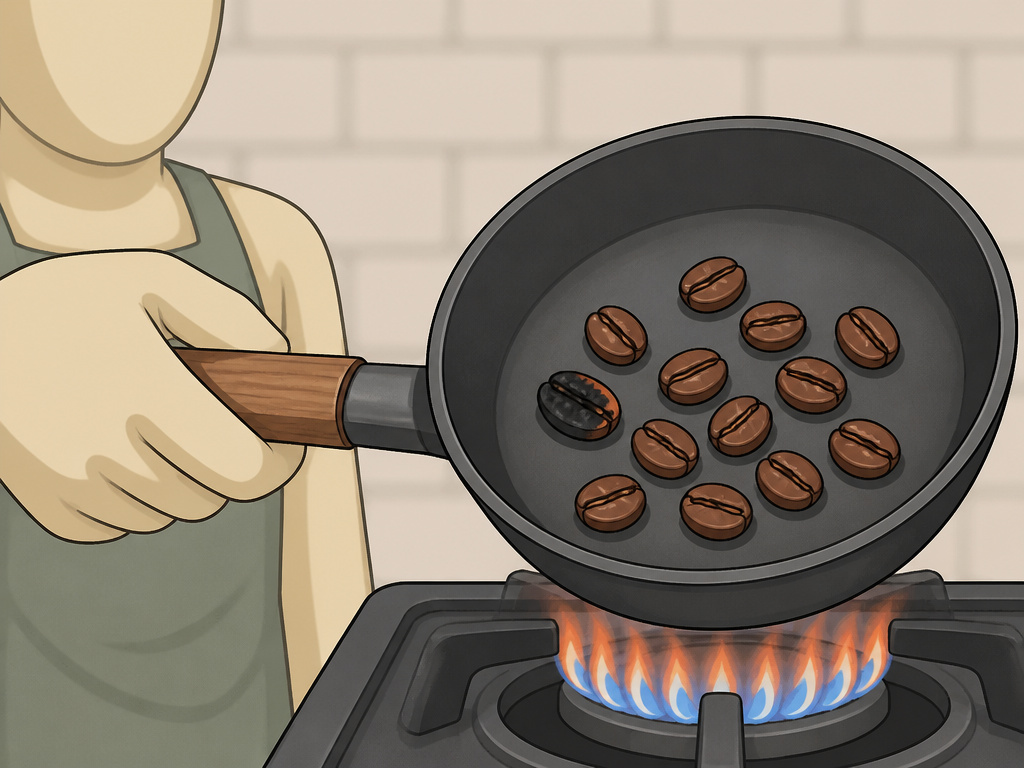
A heavy cast iron skillet is the most accessible tool. It retains heat well. The challenge is manual agitation. You must stir the beans with a whisk or wooden spoon from the moment they hit the pan until you dump them out. Stop for 15 seconds, and the beans touching the metal will scorch. This method works for 100-200 gram batches.
A dedicated home roaster like the Aillio Bullet R1 V2 uses a 1500W induction heater and two temperature probes for bean and environment. It logs data to software, turning guesswork into repeatable profiles.
A hot air popcorn popper is the classic hacker’s entry. It uses convective heat and agitates the beans automatically. The drawbacks are tiny batch sizes (often 60-80 grams) and limited control. The heating element is either on or off. For a burr coffee grinder to work effectively later, you need a consistent roast, which is harder with this on/off approach.
| Roasting Tool | Best For | Batch Size | Key Limitation |
|---|---|---|---|
| Cast Iron Skillet | Beginners, low cost | 100–200g | Requires constant manual agitation |
| Hot Air Popper | Fast, experimental roasts | 60–80g | No heat control, small batches |
| Oven & Baking Sheet | Larger batches | 200–500g | Very uneven heat, poor airflow |
| Dedicated Roaster (Aillio, Ikawa) | Consistency, data, repeatability | 50g–1kg | High initial cost |
TL;DR: Start with a skillet if you’re curious; invest in a roaster if you’re committed. The popper is a fun middle ground that often leads to upgrading.
The 5-Step Roasting Roadmap
The physics are the same whether you use a pan or a machine. Heat drives moisture out, then triggers pyrolysis—the chemical changes that develop flavor.
Step 1: Measure and Prep
Start with 100 to 150 grams of green coffee beans. This is a manageable size for stovetop methods. Larger batches won’t heat evenly. If your beans have been in cold storage, let them sit on the counter for an hour. Roasting frozen beans straight from the freezer causes “tipping,” where the ends scorch before the center heats.
Step 2: Apply Heat and Agitate
For a skillet, preheat on medium for 2-3 minutes. Add beans and start stirring. Do not stop. The beans will turn from green to yellow as they lose moisture. This drying phase takes the longest—usually 5-8 minutes.
Step 3: Listen for First Crack
You’ll hear a distinct snapping sound, like popcorn or cracking twigs. This is first crack. It signals that the bean’s structure is fracturing internally from built-up steam and gases. For a light roast coffee characteristics, this is your cue to stop very soon.
Common mistake: Turning the heat up after first crack to rush a dark roast. This burns sugars on the bean surface, creating a harsh, carbonized flavor that overpowers any origin notes.
Step 4: Develop to Your Level
The time between first and second crack is the development window. – Light Roast: Stop 30-60 seconds after first crack ends. Beans are light brown, dry looking. – Medium Roast: Stop 1:30 to 2:30 minutes after first crack. Beans are medium brown, maybe a few oil spots. – Dark Roast: Stop when you hear the quieter, sharper second crack. Beans are dark brown and oily.
Step 5: Cool Immediately and Fast
This step is non-negotiable. The beans carry residual heat and will continue roasting if left in the hot pan or roaster. Dump them into a metal colander or onto a baking sheet. Shake and stir for 4-5 minutes. This also helps remove the papery chaff that separates from the bean.
TL;DR: Heat, stir, listen for the crack, decide when to stop, then cool the beans aggressively. The development time after first crack is where you define the roast.
What Happens After the Roast?
You have warm, fragrant beans. Do not grind them yet. The roasting process produces significant carbon dioxide.
During the first 12 hours post-roast, the beans actively degas. Grinding immediately traps this gas, and when you brew, it interferes with water contacting the coffee grounds. Your cup will taste sour, weak, and flat. This is why commercial roasters have a “rest” period.
Store the cooled beans in a breathable container, like a paper bag or a ceramic jar with a loose lid, for the first day. After that, you can move them to an airtight container. They will be at peak flavor between 24 hours and 10 days after roasting.
Troubleshooting Your Home Roast
Your first few batches will have flaws. Here’s how to diagnose them.
The beans are scorched on one side.
Cause: Inadequate agitation. On a skillet, you stopped stirring. In a drum roaster, the drum speed was too low or the batch was too large. Fix: Keep the beans moving constantly. For a drum machine, increase the drum speed setting and reduce the batch size by 20%.
The roast tastes grassy or baked, not sweet.
Cause: The heat was too low. The beans “stalled,” spending too long in the drying phase without enough energy to trigger proper first crack. Fix: Increase your initial heat input. On a skillet, use a medium-high heat and a smaller batch to ensure the temperature doesn’t drop when beans are added.
I never heard a clear first crack.
Cause: The beans were too old or dried out, or the environmental noise was too loud. Some very dense beans crack more quietly. Fix: Roast in a quieter environment. Trust color change alongside sound—the beans will turn from yellow to light tan around the expected crack time.
I roasted a beautiful Ethiopian natural process bean on my new Aillio Bullet. The profile looked perfect. I ground it after 4 hours, desperate to taste it. The espresso shot ran blonde and sour, with almost no body. The machine wasn’t faulty. I was. Now I wait a full day.
Roasting’s Edge Cases and Adjustments

Standard instructions assume sea-level conditions and room-temperature beans. Reality is messier.
High-Altitude Roasting
At 5,000 feet, atmospheric pressure is lower. Water boils at a lower temperature, and heat transfer is less efficient. First crack might occur at a bean temperature 5–10°C lower than a sea-level chart says. Your adjustment: Increase your heat application slightly and expect a longer total roast time to achieve the same color development. Do not wait for the “standard” temperature.
Seasoning a New Drum Roaster
The manual for a machine like the Aillio Bullet suggests 2-3 seasoning roasts. The community forum veterans insist on 5-10 dark roasts. The goal is to build up a thin layer of carbonized oils on the drum walls for consistent heat absorption. Skipping this leads to erratic roast times for your first dozen real batches.
Using Alternative Green Beans
Not all Arabica beans roast the same. A dense, high-altitude Guatemalan bean can handle more heat than a softer, low-altitude Brazilian bean. Start with a gentler, longer profile for new origins. This is where a single-origin beans approach teaches you more than a blend.
| Problem | Likely Cause | Immediate Fix |
|---|---|---|
| Uneven color (some light, some dark) | Poor agitation, low drum speed, cold beans | Stir more, increase speed, pre-warm beans |
| Bitter, smoky taste | Roasted too dark, heat too high at end | Drop beans sooner after first crack, reduce end heat |
| Flat, bland flavor | Under-developed, stalled roast | Increase charge temperature, ensure adequate batch size for heat |
| Sharp acidity, grassy notes | Roast stopped too early (before end of first crack) | Extend development time by 30-60 seconds |
TL;DR: Altitude needs more heat. New machines need breaking in. Different bean origins demand profile tweaks. Treat the standard guide as a starting point, not a rule.
Frequently Asked Questions
Can I roast coffee beans in a regular oven?
You can, but it’s the least recommended method. Home ovens have poor airflow and significant hot spots. Spread beans in a single layer on a perforated baking sheet. Stir every 2 minutes. Expect a very uneven roast and a long bake time of 15-20 minutes. It works for large batches where consistency is less critical.
How do I know when the beans are done?
Use a combination of cues: time after first crack, visual color, and sound. For a medium roast, target 90 seconds after the end of first crack. The beans will be a uniform medium brown (like a paper bag). Learning this takes 5-6 batches. Take notes.
Is roasting coffee beans at home cheaper?
Yes, dramatically. Green coffee beans cost about 30-50% less than roasted specialty beans. The equipment payoff is fast if you drink a lot of coffee. A skillet is free, a popper is $20, and a dedicated roaster pays for itself in 6-12 months for a daily drinker.
What are the white flakes coming off the beans?
That’s chaff, the dried silverskin of the coffee cherry. It’s harmless and flavorless. Most of it separates during roasting and cooling. You can blow it off outdoors or simply ignore it—it won’t affect your brew, though some people think it makes a paper filters clog slightly faster.
Why does my home-roasted coffee taste sour?
Two main reasons. First, you ground the beans too soon after roasting (less than 12 hours). Second, you stopped the roast too early, before the end of first crack. The acids haven’t developed into sugars yet. Let the beans rest and extend your development time next batch.
The Bottom Line
Roasting coffee is a tactile skill. You learn by listening for the crack, watching the color shift, and smelling the change from grassy to toasty. Your first batches will be drinkable, not perfect. The fifth batch will be noticeably better.
Start small with a skillet and a half-pound of green beans. Focus on the sound of first crack and the cooling process. Record what you do. The upgrade to a controlled roaster makes sense once you’re frustrated by the limits of manual methods and want to replicate a great roast, not just stumble into one.
The real reward is the flavor you create, not the money you save. A successful home roast unlocks a clarity and sweetness that feels earned. It changes how you taste every other cup.
