
How to Make Cold Drip Coffee at Home: A Complete Tutorial
To make cold drip coffee at home, you need a three-chamber tower, a medium-coarse grind, and precise control over a slow drip rate, typically one drop every 1.5 to 2 seconds for 5 to 8 hours. The standard 1:10 coffee-to-water ratio (60g coffee to \
600ml water) produces a versatile concentrate. The most common failure point is ignoring ambient temperature, which accelerates evaporation and alters your final brew strength by over 15% in a warm kitchen.**
To make cold drip coffee at home, you need a three-chamber tower, a medium-coarse grind, and precise control over a slow drip rate, typically one drop every 1.5 to 2 seconds for 5 to 8 hours. The standard 1:10 coffee-to-water ratio (60g coffee to 600ml water) produces a versatile concentrate. The most common failure point is ignoring ambient temperature, which accelerates evaporation and alters your final brew strength by over 15% in a warm kitchen.
Most guides treat the drip rate as a suggestion. They tell you to aim for a slow drip, then walk away. The reality is that a drip rate set in a 70°F kitchen will behave completely differently in a 78°F room next to a window. Water evaporates from the reservoir. The drip slows unevenly. Your 8-hour brew becomes a 10-hour over-extracted mess that tastes like woody aspirin. You followed the steps, but the environment wasn’t part of the recipe.
This guide walks through the setup, the critical calibration of your drip valve, and the environmental tweaks that separate a bright, complex concentrate from a bitter one. We’ll cover the tools, the ratios, and the real-world adjustments you won’t find in the manual.
Key Takeaways
- Your drip rate is everything. One drop every 1.5 seconds is the manufacturer baseline, but a slower 2-3 second drip can extract more nuance from light roasts, if you account for the extended time.
- Ambient temperature is a silent variable. Brewing in a room warmer than 72°F leads to noticeable reservoir evaporation, throwing off your intended coffee-to-water ratio and final strength.
- Grind slightly finer than you would for immersion cold brew. The continuous flow of water can handle a more uniform, medium-coarse grind (like for Chemex) without over-extracting, which boosts clarity.
- The concentrate is not ready-to-drink. Plan to dilute it 1:1 with water or milk. Straight cold drip is intensely flavorful and syrupy, a little goes a long way.
- Clean every component immediately after brewing. Coffee oils solidify as they dry, especially in the narrow drip valve. A clogged valve is the most common reason for inconsistent flow on the next brew.
Gather Your Cold Drip Setup
You need a dedicated apparatus. A mason jar and a filter won’t cut it. Cold drip, also called Dutch coffee or water drip, requires a vertical tower with three sections: a water reservoir on top, a middle chamber for the coffee grounds, and a bottom carafe to collect the concentrate.
The Hario Water Dripper Clear (model WDC-6) is the most common entry point. Its 600ml capacity is perfect for home use, yielding about four strong servings after dilution. The Yama Glass Cold Drip Coffee Maker is a larger, sturdier option often favored by cafes for its 946ml capacity. Both work on the same principle. The critical difference is the drip valve mechanism. Hario uses a simple plastic knob; Yama uses a glass stopper with a finer control thread.
You also need a good burr grinder. Blade grinders create a mix of dust and boulders. That unevenness will cause channeling, where water finds a path of least resistance through the coffee bed, leading to uneven extraction. Part of the bed over-extracts and turns bitter, while part under-extracts and tastes sour. A consistent medium-coarse grind is non-negotiable.
Your other tools are simple: a digital scale for weighing coffee and water, a timer, and filtered water. The mineral content in your tap water directly affects extraction. Hard water can mute flavors; very soft water might over-extract. Using a tailored water like Third Wave Water or even plain filtered water gives you a consistent starting point.
TL;DR: Buy a three-chamber tower, a burr grinder, and a scale. The Hario WDC-6 is the standard starter. Skip the blade grinder, it guarantees an uneven, muddy-tasting brew.
Coffee and Ratios: The Foundation
Start with 60 grams of coffee for 600 milliliters of water. That 1:10 ratio is the sweet spot for the Hario WDC-6 and a reliable baseline for any tower. It produces a concentrate that is strong but balanced, ready to be diluted.
Bean choice matters more than you think. Light to medium roasts shine in cold drip. The slow, cold extraction pulls out fruity and floral notes that heat can destroy, while minimizing the bitter compounds formed during darker roasting. A single-origin Ethiopian Yirgacheffe will yield a tea-like concentrate with notes of bergamot and blueberry. A darker Brazilian blend will give you more chocolate and nutty tones, but with less acidity.
The standard 1:10 coffee-to-water ratio (60g coffee to 600ml water) for a 600ml cold drip tower yields a concentrate that should be diluted with an equal part water or milk. This ratio balances strength and clarity, preventing the syrupy, overwhelming intensity of a 1:8 ratio or the weak, tea-like result of a 1:12.
Grind size is where practice diverges from pamphlet advice. Most manuals say “medium-coarse,” similar to French press. That works, but it’s safe to the point of being bland. For more flavor clarity, go a shade finer, aim for the texture of coarse sand, similar to a Chemex grind. The continuous drip of water means the grounds are constantly being rinsed, not soaked. A slightly finer grind increases the surface area for extraction without the risk of over-extraction that comes with immersion brewing. Set your burr grinder to a setting around 0.080 inches for a starting point.
Why this works: Cold water extracts coffee solubles much slower than hot water. A finer grind compensates for this by providing more surface area for the water to interact with, but because the water is cold and the contact is via a slow drip (not a soak), the bitter tannins aren’t forced out. You get more flavor without the penalty.
The Critical Step Everyone Gets Wrong: Drip Rate
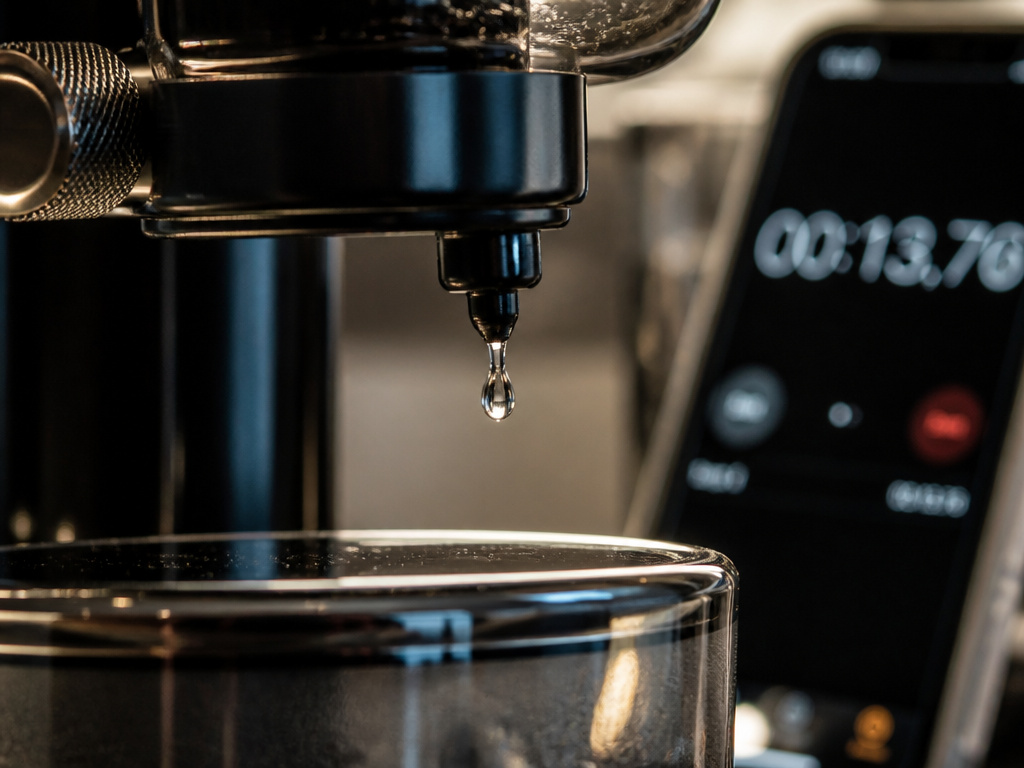
This is the heart of the method. The drip rate controls the contact time between water and coffee, which dictates extraction. Set it too fast, and the water washes over the grounds without pulling enough flavor. Set it too slow, and you risk over-extracting the coffee, pulling out harsh, woody compounds.
The Hario manual suggests one drop every 1.5 seconds. That’s a good target for a 5-7 hour brew with their 600ml capacity. But that’s a starting recipe, not a law. Many experienced users, especially those working with delicate light roasts, prefer a slower rate of one drop every 2 or even 3 seconds. This extends the brew time to 8-12 hours, allowing for a more complete and nuanced extraction of complex sugars and acids.
Common mistake: Setting the drip rate once and walking away for 8 hours, the drip valve is sensitive to changes in water pressure as the reservoir empties, and the rate will slow down as the water level drops, leading to inconsistent extraction across the batch.
Here’s how to set it correctly. Assemble the tower with coffee and water. Open the valve completely for a moment to get the water flowing, then close it to a drip. Use the second hand on a clock or your phone’s stopwatch. Count how many drops fall in 30 seconds. Divide by 30. That’s your drops-per-second rate. Adjust the valve minutely, we’re talking millimeter turns, and count again. It takes patience.
The environment messes with this. A warmer room increases the water’s fluidity slightly, which can speed up the drip. More importantly, warmth causes evaporation from the reservoir. You might lose 50-100ml of water over 8 hours in a warm kitchen. That means your intended 1:10 ratio becomes closer to 1:9, resulting in a stronger, potentially over-extracted concentrate. Brew in a cool, dark pantry or a basement if you can.
| Drip Rate (drops/sec) | Estimated Brew Time | Best For | Risk If Unmonitored |
|---|---|---|---|
| 1.0 | 4-5 hours | Fast batch, dark roasts | Under-extraction, weak flavor, thin body. |
| 1.5 | 5-7 hours | Standard recipe, most roasts | Ideal if temperature is stable below 72°F. |
| 2.0 | 7-9 hours | Light roasts, nuanced extraction | Over-extraction and bitterness if room is too warm. |
| 2.5+ | 10+ hours | Experimental, very light roasts | Evaporation drastically alters ratio; high risk of off-flavors. |
TL;DR: Calibrate your drip rate with a timer. Target 1.5-second intervals, but don’t be afraid to slow it to 2 seconds for light roasts. Check the reservoir halfway through. If the water level has dropped more than an inch, your room is too warm.
A Step-by-Step Walkthrough
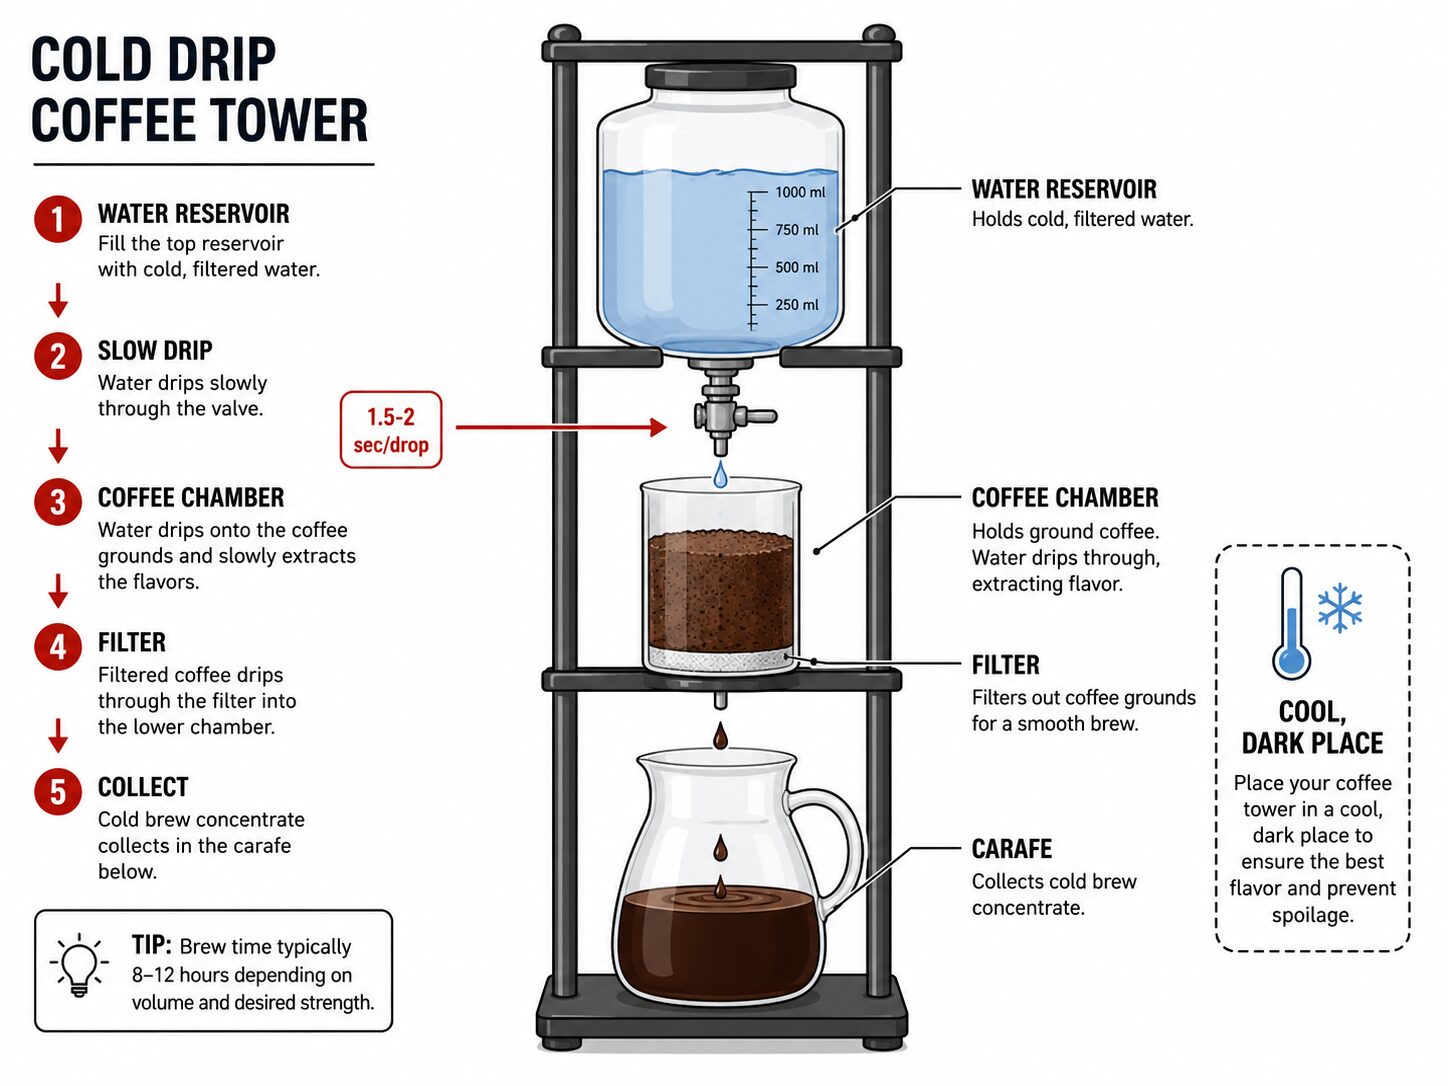
Follow this sequence. Rushing the setup leads to clogged filters and spilled coffee.
- Grind your coffee. Weigh out 60g of beans. Grind to a consistent medium-coarse texture. The grounds should feel like coarse sand, not pebbles. Pour them into the middle chamber of your tower, which should have a paper or cloth filter already placed in it. Gently shake the chamber to level the bed. Do not tamp or press.
- Assemble the tower. Place the coffee chamber onto the bottom carafe. Fill the top reservoir with 600g of cold, filtered water. The weight in grams is equivalent to volume in milliliters for water, so using your scale is the most accurate method.
- Prime and set the drip rate. This is the make-or-break moment. Open the drip valve fully for about three seconds to let water saturate the coffee bed. Close it completely. Now, open it just enough to initiate a drip. Use your timer. Adjust until you achieve a steady rhythm of one drop every 1.5 to 2 seconds. Walk away for 30 minutes, then check again. The rate often settles and may need a tiny re-adjustment.
- Let it drip. Place the entire tower in a cool, dark, and out-of-the-way spot. A kitchen counter away from the stove and windows is fine if your home is cool. Check it after four hours. The reservoir should be about half empty, and the drip should still be steady. If it’s barely dripping, the valve or the coffee bed might be clogged.
- Collect and evaluate. When the dripping stops and the reservoir is empty, carefully remove the top and middle sections. You now have a carafe of deep brown, aromatic concentrate. Taste a teaspoon of it straight. It should be strong, sweet, and complex, not overwhelmingly bitter or sour. If it’s bitter, your drip was likely too slow or your grind too fine. If it’s sour and weak, the drip was too fast or the grind too coarse.
I ruined my third batch with a beautiful Ethiopian natural process bean. I set the drip to 2 seconds and left it overnight in my laundry room. In the morning, the reservoir was nearly dry but only half the coffee had dripped through. The room got too warm, the valve gummed up with oils, and the brew stalled. The concentrate was unbearably bitter and acidic at the same time. Now I never start a batch after 4 PM, and I always check at the halfway point.
TL;DR: Weigh everything, set the drip rate twice, and choose your brewing location as carefully as you choose your beans. The waiting is the easiest part, the setup is where the brew is won.
How to Serve and Store Your Cold Drip Concentrate
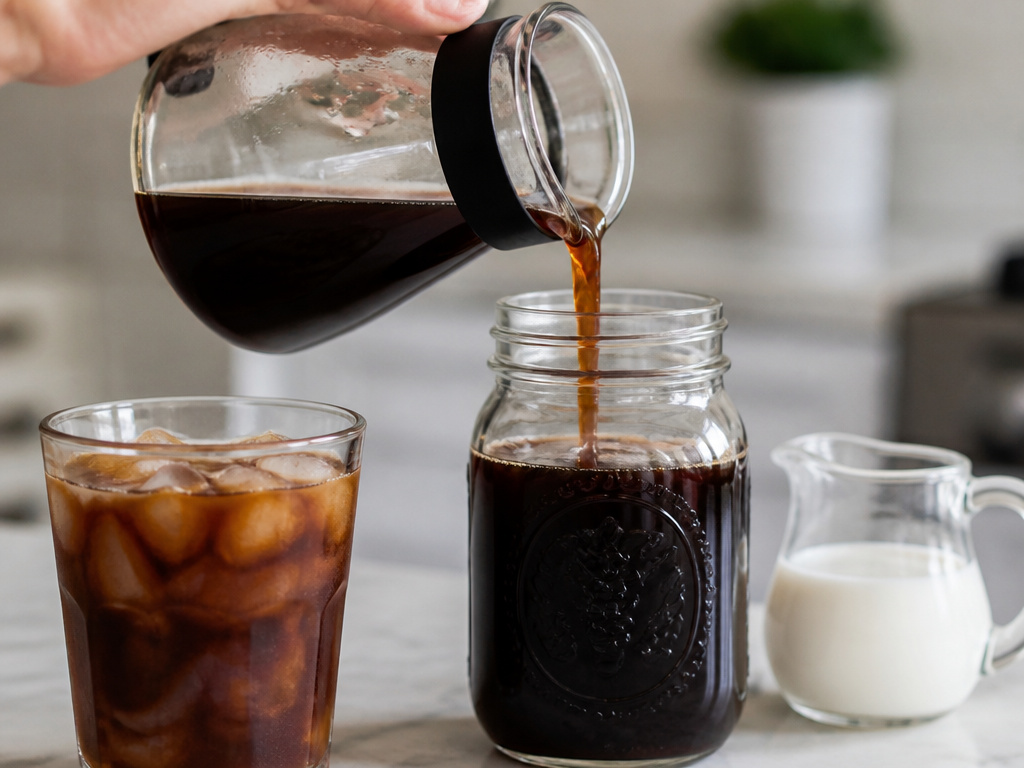
Your carafe holds coffee concentrate, not a ready-to-drink beverage. It is potent. The standard dilution is a 1:1 ratio of concentrate to water, milk, or a dairy-free alternative like oat or almond milk. For an 8-ounce serving, use 4 ounces of concentrate and 4 ounces of your diluent.
Serve it over ice. The melting ice will further dilute it slightly, mellowing it perfectly. You can also heat the diluted mixture gently on the stove or in the microwave for a hot drink that retains the low-acid, smooth character of cold drip.
Storage is straightforward but strict. Pour the concentrate into a clean, airtight glass container like a mason jar. Store it in the refrigerator. Properly stored, it will keep its peak flavor for about 10 days. After two weeks, it begins to taste flat and stale. Do not store it in the carafe that came with your tower, as these often don’t seal completely.
Common mistake: Storing the concentrate in the tower’s carafe with the coffee chamber still attached, leftover grounds continue to steep slowly in the residual moisture, creating a bitter, over-extracted flavor that taints the entire batch within 48 hours.
For serving creativity, treat it like a cocktail ingredient. Add a dash of vanilla extract, a sprinkle of cinnamon, or a teaspoon of brown sugar sweetener. Because the base is so smooth and low in acidity, it pairs wonderfully with flavorings that can be overwhelmed by a more acidic hot brew.
Troubleshooting Your Cold Drip Brew
Things go wrong. Here’s how to diagnose and fix the most common issues.
The drip stops completely. This is almost always a clog. Either the drip valve is gummed up with coffee oils from a previous brew, or the coffee bed is too fine and has become a muddy, impermeable block. Fix: Disassemble the tower and clean the valve thoroughly with hot water. For the future, use a slightly coarser grind and ensure you use a filter paper in the coffee chamber.
The brew tastes sour and weak. Your extraction was too fast. The water passed through the grounds without pulling out enough flavor. Causes: Drip rate too fast, grind too coarse, or coffee amount too small. Fix: Slow your drip rate on the next batch. Use a slightly finer grind. Double-check your coffee-to-water ratio with a scale.
The brew tastes harsh and bitter. Over-extraction. The water spent too much time interacting with the coffee, pulling out undesirable compounds. Causes: Drip rate too slow, grind too fine, ambient temperature too high (causing uneven extraction), or using a dark roast that’s prone to bitterness. Fix: Speed up your drip rate, coarsen your grind, and brew in a cooler location.
The final volume is much less than expected. Evaporation. You lost water from the reservoir before it even dripped through. This concentrates your ratio and leads to over-extraction. Cause: Brewing in a warm, dry, or sunny location. Fix: Always brew in a cool, shaded spot. If your home is consistently warm, consider reducing your total brew time by using a slightly faster drip rate to get the water through the system before too much evaporates.
| Symptom | Likely Cause | Immediate Fix | Long-Term Adjustment |
|---|---|---|---|
| Drip stops mid-brew | Clogged valve or filter | Disassemble and clear obstruction | Clean valve immediately after each brew; use coarser grind. |
| Sour, tea-like taste | Under-extraction | Add concentrate to hot water for a quick drink | Slow drip rate by 0.5 seconds; use finer grind. |
| Bitter, astringent taste | Over-extraction | Dilute more heavily (1:2) with water or milk | Speed up drip rate; use coarser grind; brew in cooler spot. |
| Low yield (<80% of expected) | High evaporation | Top up carafe with cold water to target volume | Move brewing location to a cooler, shaded area. |
Frequently Asked Questions
Can I make cold drip coffee without a tower?
Technically, yes, but not well. You can rig a system with a large water container, a valve, and a separate coffee chamber, but controlling the drip rate with DIY gear is incredibly difficult. The tower is designed for even water distribution and consistent flow. For a simpler cold coffee, a standard cold brew immersion method in a mason jar is more reliable.
Is cold drip coffee stronger than cold brew?
It produces a different kind of strength. Immersion cold brew is typically brewed at a 1:4 or 1:5 ratio, making a ready-to-drink beverage. Cold drip is usually brewed at 1:10, creating a concentrate. Ounce for ounce, the cold drip concentrate is more potent and flavorful, designed to be diluted. The flavor profile is also often brighter and more complex due to the continuous extraction.
How fine should I grind coffee for cold drip?
Use a medium-coarse grind, but on the finer side of that spectrum. A good reference is the grind you’d use for a Chemex pour-over. It should look and feel like coarse sand, not like sea salt. This provides optimal surface area for the slow-dripping water without causing clogging.
Why is my cold drip coffee cloudy?
Cloudiness is usually caused by fine sediment passing through your filter. This is more common if you use a blade grinder or if your paper filter is torn. Ensure you have a good quality paper or cloth filter seated properly in the coffee chamber. Using a high-quality burr grinder for a consistent grind will also minimize fines.
Can I use pre-ground coffee for cold drip?
You can, but you’ll sacrifice quality and control. Pre-ground coffee is almost always ground for drip machines, which is too fine for cold drip. It will likely clog your filter and lead to over-extraction. Furthermore, pre-ground coffee loses its volatile aromatics quickly. For the best results, grind whole beans fresh right before brewing.
How long does cold drip coffee last in the fridge?
Store your cold drip concentrate in an airtight container in the refrigerator. It will maintain its best flavor for 10 to 14 days. After two weeks, it begins to oxidize and taste stale. Always give it a smell test before using, if it smells flat or slightly off, it’s time to make a fresh batch.
Before You Go
Cold drip coffee is a commitment to patience and precision. The reward is a uniquely smooth, vibrant, and complex concentrate that hot brewing can’t replicate. Remember the three pillars: a consistent medium-coarse grind from a burr grinder, a meticulously set and monitored drip rate, and a cool, stable environment for the brew to happen.
Start with the manufacturer’s 1:10 ratio and 1.5-second drip rate. Once you’ve nailed that, experiment. Try a light roast Ethiopian with a 2-second drip. Notice how the flavor changes. Pay attention to your water quality, it’s the solvent for all those flavors. And clean your tower, especially the drip valve, immediately after every use. Oils build up fast.
The process is slow, but the ritual is the point. It’s about setting a system in motion and trusting it to work while you sleep or go about your day. When you finally pour that first diluted glass over ice, you’re tasting the direct result of your calibration and care. No shortcut gets you there.
{
“@context”: “https://schema.org”,
“@type”: “HowTo”,
“name”: “How to Make Cold Drip Coffee at Home”,
“totalTime”: “PT8H”,
“tool”: [
{
“@type”: “HowToTool”,
“name”: “Cold drip tower (e.g., Hario WDC-6 or Yama Glass)”
},
{
“@type”: “HowToTool”,
“name”: “Burr coffee grinder set to medium-coarse”
},
{
“@type”: “HowToTool”,
“name”: “Digital kitchen scale”
},
{
“@type”: “HowToTool”,
“name”: “Timer or stopwatch”
}
],
“supply”: [
{
“@type”: “HowToSupply”,
“name”: “Fresh coffee beans (light or medium roast)”
},
{
“@type”: “HowToSupply”,
“name”: “Filtered or Third Wave Water”
},
{
“@type”: “HowToSupply”,
“name”: “Paper or cloth filter for the coffee bed”
}
],
“step”: [
{
“@type”: “HowToStep”,
“name”: “Weigh and grind your coffee”,
“text”: “Measure 60g of coffee beans for a 600ml batch. Grind to a medium-coarse consistency, slightly finer than for French press but coarser than for pour-over.”
},
{
“@type”: “HowToStep”,
“name”: “Assemble and prepare the tower”,
“text”: “Place a paper or cloth filter in the middle chamber. Add the ground coffee, leveling the bed without tamping. Fill the top reservoir with cold, filtered water.”
},
{
“@type”: “HowToStep”,
“name”: “Set and verify the drip rate”,
“text”: “Open the drip valve until water flows at a rate of one drop every 1.5 to 2 seconds. Use a timer to count drops for 30 seconds to confirm.”
},
{
“@type”: “HowToStep”,
“name”: “Monitor and adjust for environment”,
“text”: “Place the tower in a cool, dark spot away from direct sunlight. Check the reservoir level halfway through; significant evaporation means your room is too warm.”
},
{
“@type”: “HowToStep”,
“name”: “Collect, taste, and store”,
“text”: “Once dripping stops, collect the concentrate from the bottom carafe. Taste it straight. Dilute 1:1 with water or milk and store the rest in an airtight container in the fridge for up to two weeks.”
}
]
}
{
“@context”: “https://schema.org”,
“@type”: “FAQPage”,
“mainEntity”: [
{
“@type”: “Question”,
“name”: “Can I make cold drip coffee without a tower?”,
“acceptedAnswer”: {
“@type”: “Answer”,
“text”: “Technically, yes, but not well. You can rig a system with a large water container, a valve, and a separate coffee chamber, but controlling the drip rate with DIY gear is incredibly difficult. The tower is designed for even water distribution and consistent flow. For a simpler cold coffee, a standard cold brew immersion method in a mason jar is more reliable.”
}
},
{
“@type”: “Question”,
“name”: “Is cold drip coffee stronger than cold brew?”,
“acceptedAnswer”: {
“@type”: “Answer”,
“text”: “It produces a different kind of strength. Immersion cold brew is typically brewed at a 1:4 or 1:5 ratio, making a ready-to-drink beverage. Cold drip is usually brewed at 1:10, creating a concentrate. Ounce for ounce, the cold drip concentrate is more potent and flavorful, designed to be diluted. The flavor profile is also often brighter and more complex due to the continuous extraction.”
}
},
{
“@type”: “Question”,
“name”: “How fine should I grind coffee for cold drip?”,
“acceptedAnswer”: {
“@type”: “Answer”,
“text”: “Use a medium-coarse grind, but on the finer side of that spectrum. A good reference is the grind you’d use for a Chemex pour-over. It should look and feel like coarse sand, not like sea salt. This provides optimal surface area for the slow-dripping water without causing clogging.”
}
},
{
“@type”: “Question”,
“name”: “Why is my cold drip coffee cloudy?”,
“acceptedAnswer”: {
“@type”: “Answer”,
“text”: “Cloudiness is usually caused by fine sediment passing through your filter. This is more common if you use a blade grinder or if your paper filter is torn. Ensure you have a good quality paper or cloth filter seated properly in the coffee chamber. Using a high-quality burr grinder for a consistent grind will also minimize fines.”
}
},
{
“@type”: “Question”,
“name”: “Can I use pre-ground coffee for cold drip?”,
“acceptedAnswer”: {
“@type”: “Answer”,
“text”: “You can, but you’ll sacrifice quality and control. Pre-ground coffee is almost always ground for drip machines, which is too fine for cold drip. It will likely clog your filter and lead to over-extraction. Furthermore, pre-ground coffee loses its volatile aromatics quickly. For the best results, grind whole beans fresh right before brewing.”
}
},
{
“@type”: “Question”,
“name”: “How long does cold drip coffee last in the fridge?”,
“acceptedAnswer”: {
“@type”: “Answer”,
“text”: “Store your cold drip concentrate in an airtight container in the refrigerator. It will maintain its best flavor for 10 to 14 days. After two weeks, it begins to oxidize and taste stale. Always give it a smell test before using, if it smells flat or slightly off, it’s time to make a fresh batch.”
}
}
]
}
