
The Correct Way to Make Coffee in a Percolator | Key Tips
To make coffee in a percolator, use a coarse grind, fill the basket without packing it, and brew for 6-8 minutes once the water starts perking. The single biggest mistake is using a fine grind, which slips through the basket and turns your pot into a muddy, bitter mess.
Most guides treat every percolator the same. They don’t. A stovetop Moka pot works on pressure and needs a finer grind. A classic electric percolator works on gravity and circulation, it will choke on that same fine grind. Using the wrong one guarantees a cup full of silt.
This guide walks through both types. You will learn the model-specific rules, the timing cues you can hear, and the heat adjustments that keep the coffee from turning acrid.
Key Takeaways
- Use a coarse, percolator-specific grind. Finer grinds like espresso or drip will slip through the basket, creating a muddy, over-extracted brew.
- For electric models like the Presto 02811, never immerse the base in water. The manufacturer’s manual explicitly warns this could cause electric shock.
- Start with cold, fresh water in the reservoir. Hot or pre-boiled water can lead to uneven extraction as the grounds saturate at the wrong temperature.
- Brew time starts when you see and hear the water begin to “perk” or bubble up the stem. Let it cycle for 6-8 minutes, then stop it immediately.
- Control bitterness by managing heat. On a stovetop, reduce to low once perking starts. An electric percolator’s fixed heat makes timing your stop even more critical.
The Two Machines Everyone Confuses
You have two main designs: the stovetop Moka pot and the electric percolator. They share a name but work on different principles. Using the wrong technique for your machine is the first failure.
A Moka pot uses steam pressure to force hot water up through a packed basket of finely ground coffee. It makes a strong, concentrated brew. The classic electric percolator, like a Presto 02811, uses a pump-and-gravity system. Boiling water is pumped up a central tube and showers down over coarse grounds in a basket, cycling repeatedly. This constant recirculation is why grind size matters so much.
The Presto 02811 6-Cup Stainless Steel Coffee Percolator manual specifies using “cold, fresh water” and “regular or percolator grind coffee.” It explicitly warns, “Do not use finely ground coffee as it may seep through the basket and into the coffee.”
TL;DR: Identify your machine first. A Moka pot needs fine grounds and pressure. An electric percolator needs coarse grounds and hates pressure.
The Non-Negotiable First Step: The Grind
Your coffee’s grind size decides everything. It is the filter. Get this wrong and no amount of perfect timing will save the pot.
Percolator grind is coarser than drip, approaching French press consistency. The granules should feel like coarse sand or small breadcrumbs, distinct particles, not a powder. When you rub it between your fingers, you should feel the grit, not see it dust your skin.
Common mistake: Using drip or espresso grind in a percolator, the fine particles slip through the basket holes, over-extract in the recirculating water, and produce a bitter, silty cup within the first three minutes of brewing.
Why does coarseness matter? In a recirculating brew, water passes over the grounds dozens of times. A coarse grind exposes less surface area per pass, slowing extraction to a manageable rate. A fine grind exposes maximum area instantly. The first cycle over-extracts the outer layers, and by the fifth cycle, you are stripping bitter tannins from the crushed bean interior. The result is harsh and murky.
If you only have a blade grinder, pulse in short bursts and shake the grinder between pulses to try and achieve a somewhat even coarse texture. For consistent results, a dedicated burr grinder is the tool. The investment matters here more than in any other brew method.
| Grind Size | Feels Like | Use In | Risk in Percolator |
|---|---|---|---|
| Percolator | Coarse sand / small breadcrumbs | Electric Percolator | None — this is the target |
| Drip | Table salt | Auto-drip machines | Some silt, bitter aftertaste |
| Espresso | Powdered sugar | Moka pots, espresso machines | Muddy coffee, clogged basket, extreme bitterness |
TL;DR: Grind coarse. If your grounds look like table salt or powder, you have already failed.
Water, Assembly, and a Critical Safety Note
The sequence is simple, but one misstep risks the machine or the brew. Start with fresh, cold tap or filtered water. Do not use hot water from the tap or pre-heated water. The percolator is designed to heat the water from a cold start, which provides a more predictable extraction timeline as the grounds saturate.
Fill the bottom chamber to just below the steam valve or the indicated fill line. Overfilling can cause water to boil over into the basket prematurely, creating a weak, strange-tasting brew.
Next, insert the empty basket. Fill it with your coarse grounds. Do not pack or tamp. Simply fill it to the top and level it off with your finger or the back of a spoon. The grounds need room to swell as they get wet. If you pack them, you restrict water flow and encourage channeling, where water finds one path through the grounds and leaves the rest under-extracted.
Before you start: Never immerse the base of an electric percolator in water. The Presto 02811 and 02822 manuals state this could cause electric shock. Wipe the base clean with a damp cloth only. Also, ensure the percolator is on a stable, heat-resistant surface away from the edge of the stove or counter.
Assemble the pot. For a stovetop model, screw the top chamber on tightly to ensure a good seal. For an electric model, align the lid and usually turn it to lock. You are now ready for heat.
Heat Control is Your Extraction Lever
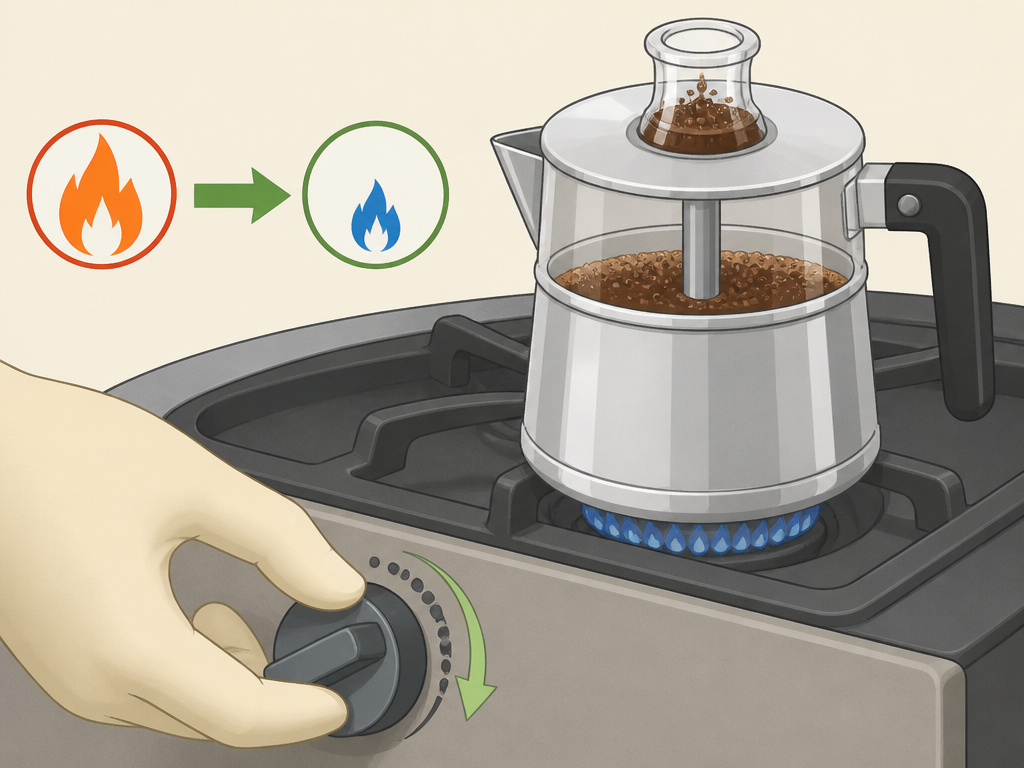
This is where you actively manage flavor. Apply too much heat and the water cycles too violently, scalding the grounds. Too little heat and the water barely perks, leading to a sour, under-extracted brew.
For a stovetop percolator, place it on a burner set to medium heat. Watch for the first signs of perking, you will see coffee begin to bubble up into the clear knob on the lid and hear a distinct, rhythmic blub-blub-blub. As soon as this starts, reduce the heat to low. You want to maintain a gentle, steady perk. A violent, spluttering perk means the water is boiling too hard and burning the coffee.
The insight from experienced users is clear: maintain consistent flow pressure. If the extraction slows or stalls, nudge the heat up slightly. If it starts to sputter aggressively, lift the pot off the heat for a moment to cool it down.
For an electric percolator, you have less control, the heating element is either on or off. Your lever is time. The moment you hear the perk begin, note the time. Most manuals, like the one for the Presto 02822, suggest “approximately one minute per cup” after perking starts. For a full pot, that translates to a 6-8 minute brew window.
Listen to the sound. A healthy perk has a rhythmic, bubbling consistency. When the sound becomes weaker and more sporadic, the brew cycle is finishing. This is your cue to stop.
When to Stop the Brew (The Bitterness Line)
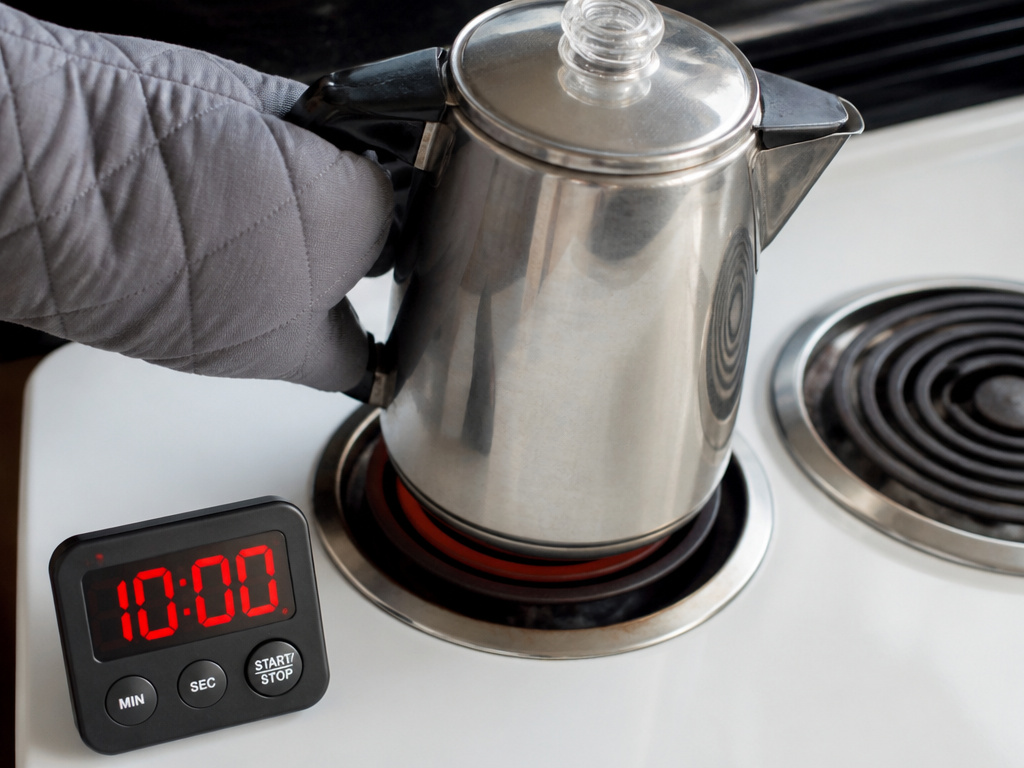
Over-brewing is the second most common fault after a wrong grind. Because the water recirculates, extraction continues until you physically stop it. There is no automatic shut-off.
The bitterness line is about two minutes past the ideal brew time. You have a 6-8 minute window from the first perk. At the 10-minute mark, the coffee will taste noticeably sharper, more astringent, and hollow. The pleasant, robust notes get cooked out, leaving behind acrid compounds.
As soon as your timer goes off, act. For a stovetop model, move it to a cold burner or a trivet. For an electric model, unplug it. Do not let it sit on the keep-warm function if it has one, that is just continued slow cooking.
Once off the heat, you can stir the coffee in the top chamber gently. This equalizes the temperature and blends the brew, as the first coffee up the stem is stronger than the last. Then serve immediately. Percolator coffee does not age gracefully in the pot.
Troubleshooting Your Percolator Coffee
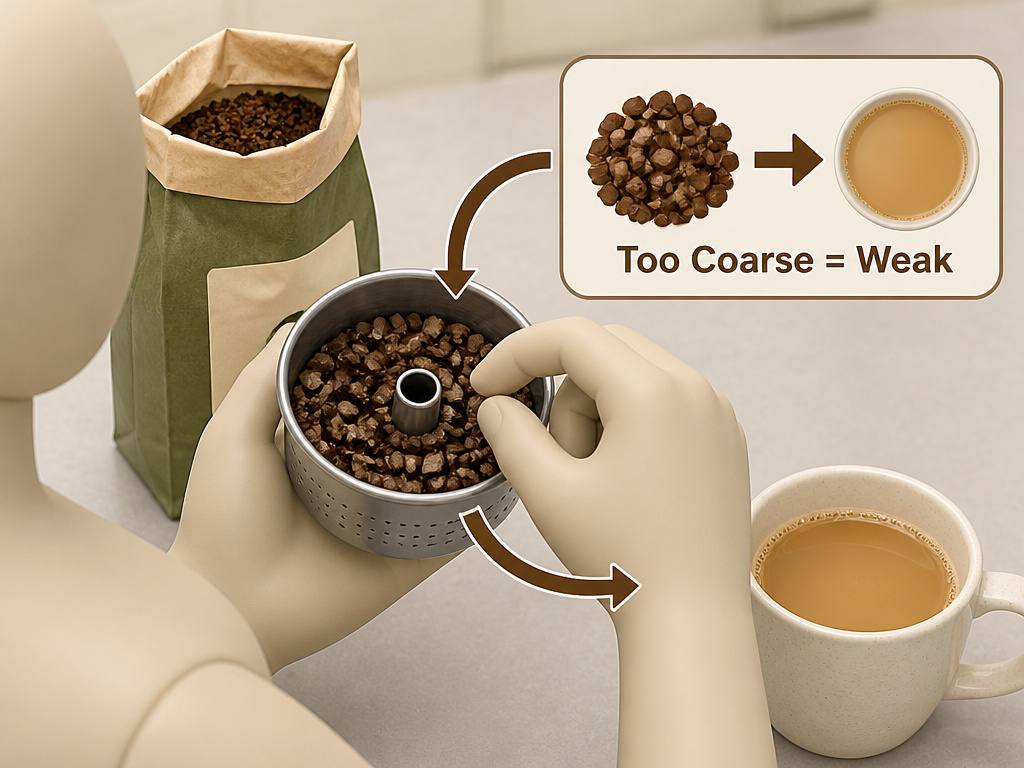
Sometimes things go wrong. The fix is usually in the grind, the heat, or the timing.
Coffee is weak and watery: The grind is likely too coarse, or you did not use enough coffee. The water is flowing through too quickly without extracting enough flavor. Adjust to a slightly finer grind (but not fine) next time, or increase your coffee dose by a tablespoon.
Coffee is bitter and harsh: You over-extracted. The grind is too fine, the heat was too high causing a violent perk, or you let it brew too long. Check your grind first. Then, ensure you reduce heat after perking starts and stick to the 6-8 minute timer.
Grounds in the bottom of your cup: The grind is definitively too fine for your basket. Refer back to the Presto manual warning. You need a proper percolator grind. Alternatively, your basket could be damaged or misaligned, allowing even coarse grounds to escape.
Coffee tastes burnt: The heat was too high, causing the water to boil and scorch the grounds at the bottom of the chamber before they were properly extracted. Always start with medium heat and reduce to low immediately when perking begins.
The percolator doesn’t perk: Ensure you have enough water in the base, it must cover the bottom of the uptake tube. Check that the basket and stem assembly are correctly seated and not clogged with old grounds. On electric models, ensure it is plugged in and the power switch is on.
Choosing Your Coffee Beans
The percolator’s robust, full-bodied extraction method pairs well with certain profiles. You are not looking for subtle, delicate tea-like notes, those will be lost.
Medium to dark roast beans work best. They have the caramelized sugars and deeper chocolate, nut, or spice notes that stand up to and benefit from the percolator’s intense extraction. A classic blonde roast coffee might taste one-dimensional or sour.
Consider a balanced coffee blend designed for drip or French press. Blends are crafted for consistency and a rounded flavor that holds up under various conditions. A bold single-origin coffee from Sumatra or Guatemala can also shine, offering deep earthy or cocoa notes.
Freshness always matters. Use beans roasted within the past 2-4 weeks for peak flavor. The percolator will mercilessly expose stale, flat beans.
Frequently Asked Questions
Can you use regular ground coffee in a percolator?
You can, but you should not. “Regular” ground coffee from the supermarket is typically a medium grind for drip machines. It is finer than ideal for a percolator and will likely produce some silt and increased bitterness. For best results, buy whole beans and grind them coarse, or look for coffee specifically labelled “percolator grind.”
How much coffee do you put in a percolator?
Use one standard coffee measure (about 2 tablespoons) per 6 ounces of water, or roughly 1/2 to 3/4 cup of coarse grounds for a full 12-cup percolator. The exact amount adjusts to taste, but it is better to start with a slightly stronger ratio, as the constant recirculation can mute flavors compared to a single-pass method.
Is percolator coffee stronger than drip?
It is different, not universally stronger. Percolator coffee is often described as more robust, full-bodied, and sometimes more bitter due to the recirculation and higher brew temperature. Drip coffee tends to be cleaner and brighter. Strength is more a factor of your coffee-to-water ratio.
How do you clean a percolator?
After each use, discard the grounds, disassemble the pot, and wash all parts except the electric base with warm, soapy water. Rinse the basket and stem thoroughly to remove all coffee oils. For a deep clean, run a cycle with a mixture of water and white vinegar to descale the interior, then run two cycles with clean water to rinse.
Why does my percolator coffee taste metallic?
This is usually a sign of mineral buildup (scale) inside the pot or a need to season a new aluminum percolator. Descale with a vinegar solution. For a new aluminum model, brew two or three pots of strong, cheap coffee and discard them, this coats the interior and prevents that metallic taste in your future brews.
The Bottom Line
Making great coffee in a percolator is an exercise in restraint. Restrain your grind to coarse. Restrain your heat to low after the first perk. Restrain your brew time to 6-8 minutes.
The machine does not forgive inattention. It will over-extract, burn, and muddle while you are not looking. But when you get the three variables right, coarse grind, gentle heat, strict timing, it delivers a cup with a nostalgic, hearty character that modern machines struggle to replicate. It is a taste of process, not convenience. Keep your coffee grinders set coarse, your timer handy, and your patience ready. The reward is in the pot.
{
“@context”: “https://schema.org”,
“@type”: “HowTo”,
“name”: “How to Make Coffee in a Percolator”,
“totalTime”: “PT10M”,
“tool”: [
{
“@type”: “HowToTool”,
“name”: “Percolator (stovetop or electric)”
},
{
“@type”: “HowToTool”,
“name”: “Coarse ground coffee (percolator grind)”
},
{
“@type”: “HowToTool”,
“name”: “Fresh, cold water”
},
{
“@type”: “HowToTool”,
“name”: “Heat source (stove or outlet)”
}
],
“step”: [
{
“@type”: “HowToStep”,
“name”: “Add cold water to the reservoir”,
“text”: “Fill the percolator’s bottom chamber with fresh, cold water up to just below the steam valve or the marked fill line.”
},
{
“@type”: “HowToStep”,
“name”: “Add coarse ground coffee to the basket”,
“text”: “Fill the perforated basket with a coarse, percolator-grind coffee. Do not tamp or pack it down—just level it off.”
},
{
“@type”: “HowToStep”,
“name”: “Assemble and apply heat”,
“text”: “Secure the basket and top chamber. Place a stovetop percolator on medium-low heat or plug in an electric model.”
},
{
“@type”: “HowToStep”,
“name”: “Monitor the perk and time the brew”,
“text”: “Once the water begins to bubble up through the stem (perking), let it brew for 6-8 minutes for a full pot. Listen for a gentler, rhythmic perk.”
},
{
“@type”: “HowToStep”,
“name”: “Stop the brew immediately”,
“text”: “Remove the percolator from heat or unplug it as soon as the brew time is complete to stop extraction and prevent bitterness.”
}
]
}
{
“@context”: “https://schema.org”,
“@type”: “FAQPage”,
“mainEntity”: [
{
“@type”: “Question”,
“name”: “Can you use regular ground coffee in a percolator?”,
“acceptedAnswer”: {
“@type”: “Answer”,
“text”: “You can, but you should not. \”Regular\” ground coffee from the supermarket is typically a medium grind for drip machines. It is finer than ideal for a percolator and will likely produce some silt and increased bitterness. For best results, buy whole beans and grind them coarse, or look for coffee specifically labelled \”percolator grind.\””
}
},
{
“@type”: “Question”,
“name”: “How much coffee do you put in a percolator?”,
“acceptedAnswer”: {
“@type”: “Answer”,
“text”: “Use one standard coffee measure (about 2 tablespoons) per 6 ounces of water, or roughly 1/2 to 3/4 cup of coarse grounds for a full 12-cup percolator. The exact amount adjusts to taste, but it is better to start with a slightly stronger ratio, as the constant recirculation can mute flavors compared to a single-pass method.”
}
},
{
“@type”: “Question”,
“name”: “Is percolator coffee stronger than drip?”,
“acceptedAnswer”: {
“@type”: “Answer”,
“text”: “It is different, not universally stronger. Percolator coffee is often described as more robust, full-bodied, and sometimes more bitter due to the recirculation and higher brew temperature. Drip coffee tends to be cleaner and brighter. Strength is more a factor of your coffee-to-water ratio.”
}
},
{
“@type”: “Question”,
“name”: “How do you clean a percolator?”,
“acceptedAnswer”: {
“@type”: “Answer”,
“text”: “After each use, discard the grounds, disassemble the pot, and wash all parts except the electric base with warm, soapy water. Rinse the basket and stem thoroughly to remove all coffee oils. For a deep clean, run a cycle with a mixture of water and white vinegar to descale the interior, then run two cycles with clean water to rinse.”
}
},
{
“@type”: “Question”,
“name”: “Why does my percolator coffee taste metallic?”,
“acceptedAnswer”: {
“@type”: “Answer”,
“text”: “This is usually a sign of mineral buildup (scale) inside the pot or a need to season a new aluminum percolator. Descale with a vinegar solution. For a new aluminum model, brew two or three pots of strong, cheap coffee and discard them, this coats the interior and prevents that metallic taste in your future brews.”
}
}
]
}
