
Make Coffee Creamer Without Condensed Milk: Easy DIY Guide
To make coffee creamer without condensed milk, you need a creamy base, a sweetener, and a flavoring. Combine 1 cup of half-and-half (or canned coconut milk for dairy-free) with 1/4 cup of sugar (or maple syrup) in a saucepan. Heat gently just until the sweetener dissolves, then stir in 1-2 teaspoons of vanilla extract off the heat. Cool and refrigerate. This basic formula creates a creamer that lasts 7-10 days.
Most people grab the carton of half-and-half and just pour. That works, but it’s thin. It lacks the body and sweetness of a proper creamer. The real mistake is thinking you need that canned, ultra-sweet condensed milk to get that rich texture. You don’t.
You can build a better creamer from scratch in about three minutes. This guide walks through the simple formula, the best ingredients to use, and how to avoid the one heat-related mistake that ruins the batch.
Key Takeaways
- The core formula is a 1:1/4 ratio of creamy base to sweetener, plus flavoring. A full cup of half-and-half to a quarter-cup of sugar is the sweet spot.
- Canned, full-fat coconut milk is the only reliable non-dairy base that won’t separate in hot coffee. The fat content needs to be at least 15 grams per serving.
- Overheating a dairy base above 180°F causes the proteins to coagulate. You’ll see tiny white curds form within an hour in the fridge.
- Homemade creamer lasts 7-10 days refrigerated. Natural ingredients lack the stabilizers and preservatives in store-bought versions.
- For a completely smooth, no-heat creamer, use an immersion blender. It fully emulsifies the fats and sweeteners, preventing graininess or separation.
The Core 3-Ingredient Formula
Forget complicated recipes. Every homemade coffee creamer without condensed milk is a variation of three components. Getting the ratio right between them is what separates a thin, sweetened milk from a rich, balanced creamer.
The foundation is your creamy base. This provides the body and mouthfeel. Half-and-half is the standard because its fat content (around 10-12%) is high enough to feel luxurious but low enough to mix easily. Heavy cream works for an ultra-rich result, but it can be too thick and may coat the roof of your mouth. Whole milk is the lower-bound limit; anything with less fat will taste watery.
The 1:1/4 Base-to-Sweetener Ratio: For every 1 cup (240 ml) of liquid base, use 1/4 cup (50g) of granulated sweetener. This ratio, drawn from common culinary practice for sweetened dairy preparations, yields a sweetness level comparable to commercial creamers without overpowering the coffee. Halving the sweetener makes it taste flat; doubling it masks the coffee’s flavor.
The sweetener integrates with the base. Granulated white sugar is neutral. Brown sugar or coconut sugar adds molasses or caramel notes, which pair well with vanilla or chocolate. Liquid sweeteners like maple syrup or honey require a slightly different approach, they blend better with a cold-mix method using a blender.
Flavoring is added off the heat. Vanilla extract is the classic. Vanilla bean paste is superior, giving you those visible specks and a deeper, more authentic flavor. This is where you customize. The extract’s alcohol cooks off if added during heating, leaving a flat taste. Always stir it in after the pan is off the burner.
TL;DR: Use 1 cup base to 1/4 cup sweetener, heat just to dissolve, then add flavoring off the heat. This ratio is non-negotiable for balanced sweetness.
Choosing Your Base: Dairy vs. Non-Dairy
Your base liquid decides the creamer’s character, its dietary profile, and its stability in your cup. The choice isn’t just about preference; it’s about chemistry.
| Base Option | Best For | Risk If Chosen |
|---|---|---|
| Half-and-half | A rich, neutral, all-purpose creamer | Can curdle if overheated; lasts 7 days max |
| Heavy Cream | Ultimate richness, keto macros | Can be too thick, may separate if not shaken well |
| Canned Coconut Milk | Reliable dairy-free, stable emulsion | Must be shaken and blended to reincorporate fat |
| Oat Milk Barista Blend | Light dairy-free, mild sweetness | Can thin out in very hot coffee; check for gums |
Half-and-half is the workhorse. Its fat-to-water ratio is engineered for coffee. It won’t overpower like heavy cream and won’t water down like milk. When choosing a half-and-half, avoid ultra-pasteurized if you can find it. The high-heat processing gives it a slightly cooked flavor that comes through in the final creamer.
For a non-dairy coffee creamer that behaves like dairy, canned coconut milk is the only serious contender. The key is the can. You need the full-fat version, where the cream has solidified at the top. That layer is pure coconut fat, your emulsifier. Light coconut milk or cartoned coconut milk beverage is mostly water. It will separate in hot coffee every time, leaving oily droplets on the surface.
I tried making a creamer with a popular almond-cashew milk blend. It tasted great cold. The moment it hit hot coffee, it split into watery bits and floating oil. The fat content was too low and not properly emulsified. Now I only use canned coconut milk for dairy-free, and I blend it with an immersion blender for a full minute.
Oat milk barista editions are a decent middle ground. They contain added oils and stabilizers like gellan gum to help them steam and foam. These same stabilizers can help your creamer stay unified. The flavor is naturally sweet and oaty, which works well with warm spices like cinnamon or nutmeg.
TL;DR: Half-and-half for classic richness, canned coconut milk for stable dairy-free. Always check the fat content on the label, aim for at least 10g per serving for dairy, 15g for non-dairy.
Sweeteners: From Sugar to Sugar-Free
The sweetener does more than add sweetness. It affects the creamer’s texture, shelf life, and how it interacts with the acidity of your coffee.
Granulated white sugar is the benchmark. It dissolves cleanly, adds body without flavor, and acts as a mild preservative. For the 1:1/4 ratio, white sugar is measured by volume. One quarter-cup of white sugar fully dissolved into one cup of base creates a syrup that integrates seamlessly.
Liquid sweeteners require a cold-mix method. If you heat pure maple syrup or honey with dairy, the sugars can caramelize too quickly or cause the proteins to seize. Instead, combine the cold base and syrup in a blender. The mechanical action emulsifies the syrup into the fat. This also works for sugar-free liquid sweeteners like monk fruit extract.
Common mistake: Swapping granulated sugar 1:1 with a powdered sugar-free substitute like erythritol, the erythritol doesn’t dissolve fully with gentle heat and leaves a gritty, cooling sensation in the finished creamer. You must blend it cold.
For a sugar-free coffee creamer, you need a dissolvable sweetener. Allulose is the best option because it behaves almost identically to sugar when heated and doesn’t have the cooling aftertaste of erythritol. If you use a stevia-erythritol blend, you must use a blender. No amount of stirring over heat will get rid of the graininess.
Natural sweeteners bring their own flavors. Maple syrup adds a woody depth. Honey adds floral notes (avoid strong varieties like buckwheat). Agave nectar is very neutral but very sweet, use half the amount. These are all hygroscopic, meaning they attract water. Creamers made with them may thin out slightly over a week in the fridge.
TL;DR: Use white sugar for reliability and texture. For liquid or sugar-free sweeteners, skip the stove and use a blender to achieve a smooth emulsion.
Flavoring Your Homemade Creamer

This is the fun part. Vanilla is the gateway, but the world of extracts, spices, and even freeze-dried fruits is wide open. The rule is simple: extracts and oils go in off the heat; solid ingredients need to be infused.
Start with vanilla. Not all vanilla is equal. Pure vanilla extract is good. Vanilla bean paste is great, it’s a concentrated paste with the seeds. Imitation vanilla will taste artificial and sharp. Use 1 to 2 teaspoons per cup of base.
For other extracts, almond, peppermint, coconut, butter rum, start with 1/2 teaspoon per cup. They are potent. You can always add more, but you can’t take it out. Add these after removing the creamer from heat to preserve their volatile aromatics.
My first batch of peppermint creamer was inedible. I added a full teaspoon of extract during the heating phase. The alcohol and top notes cooked off, leaving behind a bitter, medicinal flavor that ruined a whole pot of coffee. Now I add extracts to the jar after the base has cooled for five minutes.
To incorporate spices like cinnamon, nutmeg, or cocoa powder, you have two paths. For a clear creamer, steep the whole spices in the warm base for 30 minutes, then strain. For a spiced creamer with body, blend the powder directly into the cold base. Cocoa powder needs a blender; whisking will leave clumps.
For adventurous flavors, consider freeze-dried fruit powders. A teaspoon of freeze-dried strawberry or raspberry powder blended into a creamer base creates a vibrant pink creamer with real fruit flavor, no artificial dyes. Pair it with a white chocolate extract for a dessert-inspired cup.
TL;DR: Add liquid extracts off the heat to preserve flavor. For spices or powders, either steep and strain or use a blender. Start with small amounts, extracts are powerful.
Step-by-Step: The Two Methods

You have two main paths: the stovetop method for most dairy-based creamers, and the cold-blend method for non-dairy or sugar-free versions. The goal is the same: a stable, homogeneous mixture.
The Stovetop Method (For Dairy + Granulated Sugar)
- Combine in a saucepan. Measure 1 cup of half-and-half or heavy cream into a small, heavy-bottomed saucepan. Add 1/4 cup of granulated sugar or allulose.
- Warm gently. Place the pan over medium-low heat. Whisk constantly until the mixture is steaming hot and the sugar granules are completely dissolved. You should see no grains at the bottom of the pan. This usually takes 2-3 minutes. Do not let it simmer or boil.
- Remove from heat and flavor. Take the pan off the burner. Stir in 1-2 teaspoons of your chosen vanilla extract or paste. If using other extracts, add them now.
- Cool and store. Let the creamer cool in the pan for 10 minutes, then pour it into a clean mason jar or glass bottle. Seal it and refrigerate. It will thicken slightly as it chills.
Skipping the constant whisking lets sugar sink and caramelize on the bottom of the pan, creating a burnt flavor that permeates the whole batch.
The Cold-Blend Method (For Non-Dairy or Liquid Sweeteners)
- Add everything to the blender. Pour 1 cup of your cold base (canned coconut milk, cold half-and-half) into a blender cup. Add 1/4 cup of maple syrup, honey, or your liquid sweetener. Add your flavorings (vanilla, extracts, cocoa powder).
- Blend until completely smooth. Secure the lid and blend on high for 45-60 seconds. You want to see no streaks or separation. For coconut milk, this ensures the hard cream at the top is fully incorporated.
- Taste and adjust. Give it a taste. If it needs more sweetness or flavor, add a little more and blend for another 10 seconds.
- Store immediately. Pour the creamer directly from the blender into your storage jar and refrigerate. The blending action incorporates air, making it slightly frothy, it will settle.
The cold-blend method is foolproof for avoiding graininess from sugar substitutes. It’s also the only way to get a perfectly smooth chocolate creamer.
Troubleshooting: Fixes for Common Problems
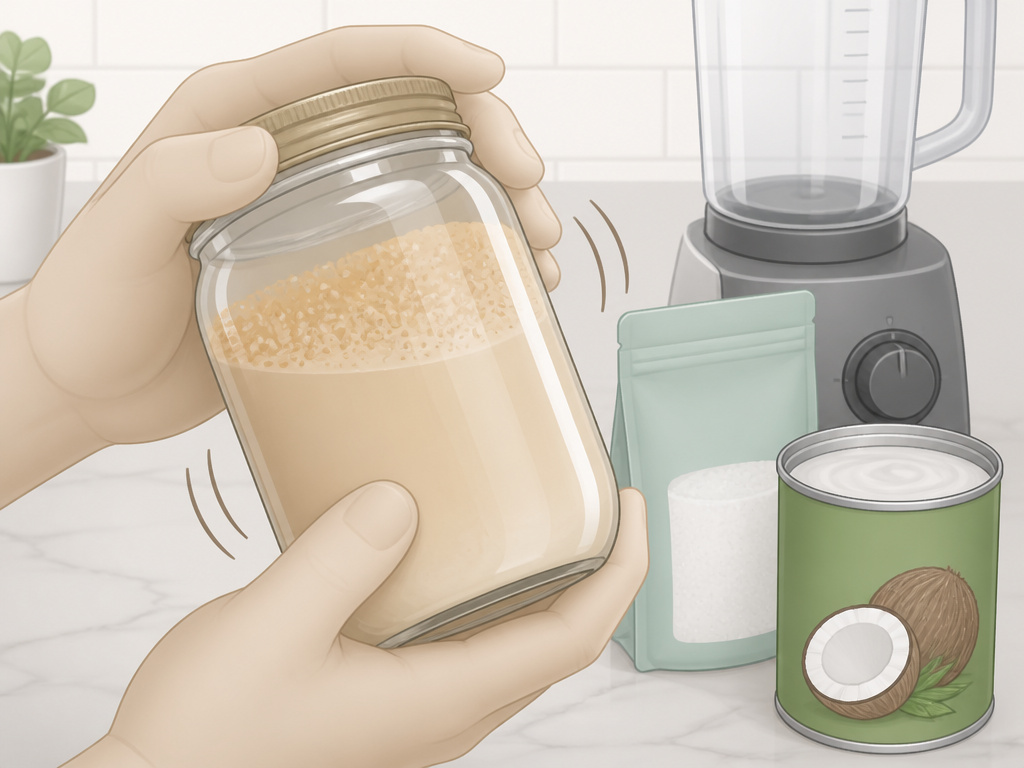
Even a simple recipe can go sideways. Here’s what to do when it does.
Problem: Creamer is grainy or gritty.
This is almost always undissolved sweetener. If you used a granulated sugar-free substitute like erythritol with the stovetop method, it won’t fully dissolve at low temperatures. Fix: Pour the mixture into a blender and blend on high until smooth. Next time, use the cold-blend method for that sweetener.
Problem: Creamer separated in the fridge (oily layer on top).
This is a broken emulsion, common with high-fat bases like coconut milk or heavy cream. The fat has solidified and risen. Fix: Simply shake the jar vigorously for 30 seconds. If it’s stubborn, give it a 10-second blast with an immersion blender. To prevent it, ensure your initial mix is fully homogenized with a blender.
Problem: Creamer tastes “off” or sour after a few days.
Your creamer has spoiled. Homemade creamer lacks preservatives. Dairy-based versions last 7 days. Non-dairy versions with canned coconut milk can last up to 10 days. Always store it in the back of the fridge, not on the door, and use a clean spoon every time.
Common mistake: Storing creamer in a large, half-empty jar, the increased air space speeds up oxidation and bacterial growth, cutting shelf life by at least two days. Use a jar that the creamer nearly fills.
Problem: Creamer curdled when added to hot coffee.
This is a temperature and acidity shock. If your creamer is very cold and your coffee is extremely hot and acidic (like a light roast), the dairy proteins can coagulate. Fix: Let your coffee cool for 60 seconds before adding the creamer. Alternatively, temper the creamer by adding a small spoonful of hot coffee to it first, stirring, then adding it back to the mug.
Frequently Asked Questions
Can I make a large batch and freeze it?
No. Freezing dairy-based creamers breaks the emulsion irreparably. When thawed, they become grainy and separated. Coconut milk bases may fare slightly better, but the texture will still be compromised. It’s best to make a 1-2 week supply and keep it refrigerated.
What’s the best way to get a rich vanilla flavor?
Use vanilla bean paste, not extract. The paste contains the actual seed caviar, giving you those iconic black specks and a more complex, rounded vanilla profile. Add it off the heat to preserve its delicate top notes.
My creamer is too thick. How do I thin it?
Thin it with a little cold, fresh milk of the same type (dairy or non-dairy). Add a tablespoon at a time and stir or shake until it reaches your desired consistency. Do not add water, as it will dilute the flavor.
Can I use this creamer for cold brew or iced coffee?
Absolutely. In fact, it works better than many store-bought creamers that contain thickeners which can clump in cold liquid. Because it’s liquid, it mixes easily into cold brew. For the best results, ensure your creamer is thoroughly chilled before adding it to iced coffee.
Is homemade creamer cheaper than store-bought?
It can be, but the real value is control. You avoid artificial flavors, thickeners like carrageenan, and preservatives. A batch using half-and-half and sugar costs roughly the same as a mid-tier natural creamer. The premium comes from using high-quality ingredients like real vanilla, which you would pay much more for in a pre-made version.
Before You Go
Making coffee creamer without condensed milk strips the process down to its essentials. You control the sweetness, the flavor, and the ingredients. The core formula, a cup of base, a quarter-cup of sweetener, and your chosen flavoring, is a canvas.
Remember the two critical rules: never overheat a dairy base, and always use a blender for sugar-free or non-dairy versions. These steps prevent the most common failures. Your reward is a creamer that tastes pure, integrates perfectly into your cup, and makes your morning ritual feel just a bit more intentional.
Start with the classic vanilla. Once you’ve mastered that, experiment with a cinnamon spice creamer or a chocolate hazelnut blend. The difference it makes is more than just taste, it’s the satisfaction of knowing exactly what’s in your cup.
