
How to Clean a Keurig Coffee Maker Inside and Out in 30 Mins
To clean a Keurig coffee maker, you need to perform two distinct tasks: a routine external clean of removable parts and a periodic internal descaling of the water system. The external clean uses soap and water on the drip tray, water reservoir, and K-Cup holder. The internal descaling requires either the official Keurig descaling solution or white vinegar run through multiple brew cycles, followed by at least 12 rinse cycles with fresh water to prevent residue.
Most people think a quick wipe of the drip tray is enough. They ignore the internal scale buildup until the machine runs slow, tastes bad, or the dreaded descale light glows. That light is a symptom, not a reminder.
This guide walks through both the weekly wipe-down and the quarterly deep clean. It explains why the official rinse count matters and what happens if you cut corners.
Key Takeaways
- Descaling is non-negotiable. Keurig mandates it every 3 months or when the light comes on. In hard water areas, do it monthly.
- The official process requires at least 12 rinse cycles with fresh water after descaling. Skipping rinses leaves citric acid or vinegar in the lines, which taints every cup afterward.
- Never force-clean the exit needle with anything harder than a paperclip. Scratching the brass tube creates ridges that trap coffee oils and accelerate future clogs.
- Flavored hot chocolate or cider pods leave a sticky residue that soap won’t remove. Run a plain water cycle immediately after using them.
- If your machine has been in storage for more than a few weeks, run three full water cycles before brewing coffee. Stagnant water in the internal lines picks up a flat, metallic taste.
The 5-Step Deep Cleaning Process (Including Descaling)
Cleaning a Keurig is a sequence, not a single action. Jumping straight to descaling with a dirty pod holder just pushes grounds into the pump. Follow the order.
Before you start: Unplug the machine and let it cool completely. Descaling involves hot water and steam; starting with a warm machine increases the risk of a pressure-related spray. Have a large mug or bowl ready to catch discharge.
Step 1: Disassemble and Wash Every Removable Part
Open the lid and remove the K-Cup pod holder. Most models let you separate the funnel from the cup holder itself. Pull out the drip tray and its removable cover. If your model has a detachable water reservoir, take that off too.
Wash the drip tray, its cover, the reservoir, and the pod holder in warm, soapy water. The K-Cup pod holder assembly is top-rack dishwasher safe, per Keurig’s official cleaning guide. A soft brush helps dislodge dried coffee splatter from the drip tray corners.
Rinse everything thoroughly. Let the parts air-dry completely before reassembly. Putting a wet pod holder back in invites mold in the dark, damp chamber.
Step 2: Wipe the Exterior and Address the Exit Needle
With the parts removed, you can access the interior brewing chamber. Use a dry paper towel to pick up any loose coffee grounds.
For the exterior, a damp microfiber cloth with a drop of mild dish soap works. Wipe down the housing, lid, and control panel. Avoid spraying cleaner directly on the machine; moisture can seep into button seams.
Now, the exit needle. This is the small brass tube in the ceiling of the brewing chamber that pierces the K-Cup.
Common mistake: Scrubbing the exit needle with a brush or wire — this scratches the soft brass. Scratches create microscopic ridges that trap coffee oils, which then oxidize and attract mineral scale. The clog you’re trying to prevent arrives faster.
Instead, straighten a paperclip. Gently insert it into the needle’s opening to dislodge any visible paper or coffee ground blockage. No scraping, just a gentle prod. Reassemble the clean, dry parts.
Step 3: Choose Your Descaling Agent and Fill the Reservoir
You have two options: the Keurig-branded descaling solution or plain white vinegar. The manufacturer’s solution is a formulated citric acid blend. A full 14 fl oz bottle is designed to mix with water in the reservoir.
The widespread user alternative is a 50/50 mix of white vinegar and water. Vinegar’s acetic acid also dissolves calcium carbonate scale. Community discussions cite it as effective and cheaper.
| Descaling Agent | Best For | Primary Risk if Misused |
|---|---|---|
| Keurig Descaling Solution | Users following official protocol | Incomplete rinsing leaves citric acid residue, causing sour-tasting coffee for several cycles. |
| White Vinegar | Cost-conscious owners in soft-water areas | Vinegar odor can linger in silicone seals and internal lines through 15+ rinse cycles. |
The choice often comes down to your water hardness. For severe scale, the formulated solution may be more reliable.
Step 4: Run the Descaling Cycles
Place your largest mug on the drip tray. Ensure the machine is reassembled and plugged in. Power it on.
Pour your chosen descaling mixture into the empty water reservoir. For the official solution, use the entire bottle mixed with water to the fill line. For vinegar, use the 50/50 mix.
Initiate a brew cycle for the largest cup size without inserting a K-Cup. The hot liquid will discharge into your mug. Discard it. Repeat this process, running cycle after cycle, until the reservoir is completely empty. This ensures the solution contacts every heated surface and internal water path.
Step 5: The Critical Rinse Phase (Do Not Shortcut)
This step is where almost every guide undersells the effort. Flushing the acid out is more important than putting it in.
Keurig’s official descaling instructions mandate “at least 12 rinse cycles” using fresh water after the descaling solution. This is not a suggestion. The internal thermal tube and pump have nooks where descaling agent can pool.
Fill the reservoir with fresh, cold water. Run a full brew cycle into a mug and discard. Do this twelve times. Yes, twelve. After cycle eight or nine, taste the discharged water. If you detect any sourness or acidity, keep rinsing until the water runs completely neutral.
TL;DR: Disassemble and wash parts first, then descale, then rinse with at least 12 water cycles. The rinse count is a fixed spec, not a variable.
What Happens If You Don’t Clean Your Keurig?
Neglect has a predictable timeline. The problems are mechanical and chemical, not just cosmetic.
The first sign is often flavor drift. Your coffee tastes slightly off—flat, or with a sharp, papery note. This is coffee oils and mineral scale beginning to coat the thermal heating element and water lines. The heater must work harder, which can lead to inconsistent brew temperature.
Within a few months in a hard water area, scale buildup physically restricts the narrow internal water path. The machine takes longer to brew a cup. The pump strains, producing a louder, labored sound. Eventually, a complete blockage can occur, leading to error codes or a machine that heats but dispenses no water.
The most insidious issue is biofilm. The dark, damp environment inside the machine, combined with organic residue from coffee, can promote bacterial growth. This is why a musty smell sometimes emerges from a rarely cleaned brewer.
The Flavored Pod Problem
Using a hot chocolate or apple cider K-Cup is like running syrup through your machine. The sugars and starches in these drinks leave a sticky film that water alone doesn’t remove.
If you run a flavored pod, immediately run a plain hot water cycle afterward. This simple flush prevents the residue from drying and hardening inside the brew chamber and exit needle. Letting it sit guarantees a more difficult clean later.
Keurig Cleaning Tools and Supplies You Already Own
You do not need a specialty kit. The effective tools are likely in your kitchen.
- Microfiber cloths or paper towels: For the exterior wipe-down. Microfiber lifts grime without lint.
- Soft-bristled brush (or old toothbrush): Ideal for scrubbing the drip tray and reservoir corners. The soft bristles won’t scratch plastic.
- White vinegar or Keurig descaling solution: The descaling agents.
- Dish soap: For washing removable parts.
- A paperclip: The only tool that should touch the exit needle.
A dedicated burr coffee grinder produces a consistent grind, but for cleaning, simplicity wins. Avoid using abrasive scrub pads, steel wool, or harsh chemical cleaners like bleach. They can damage plastic finishes and leave toxic residues inside the water system.
How Often Should You Descale a Keurig?
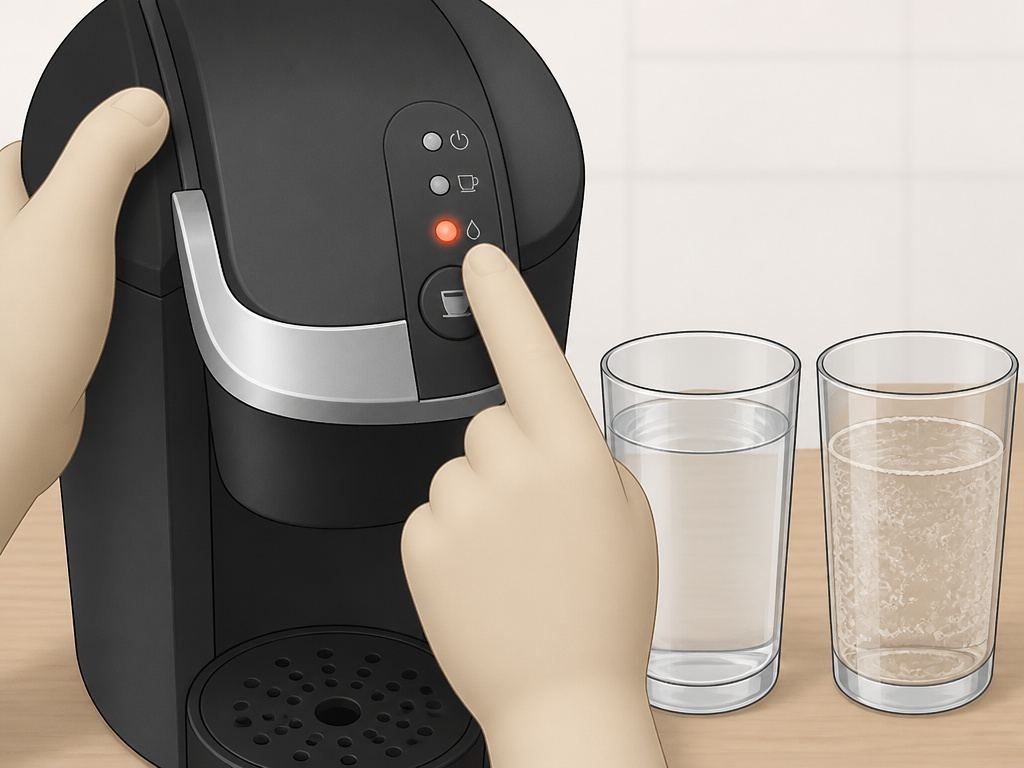
Keurig’s baseline is every 3 months or when the descale light illuminates. Treat this as the absolute maximum interval, not a target.
Your actual schedule depends on two factors: water hardness and usage frequency.
| Usage Scenario | Recommended Descaling Frequency | Why It Differs |
|---|---|---|
| Soft Water, Daily Use | Every 3–4 months | Minimal mineral content; scale forms slowly. |
| Hard Water, Daily Use | Every 4–6 weeks | High calcium/magnesium content accelerates scale buildup, risking clogs. |
| Infrequent Use (a few times a week) | Every 2–3 months | Stagnation allows minerals in standing water to deposit on heating elements. |
| After Using Flavored Pods | Immediate hot water flush | Prevents sugary residue from baking onto components, requiring a full clean sooner. |
The descale light is a sensor-based alert, but it’s reactive. It triggers after scale has already built up enough to affect performance. Proactive descaling in hard water regions prevents the problem before the light ever comes on.
For other machine upkeep, like replacing a Breville coffee machine filter or understanding Bunn coffee maker filters, the principle is the same: follow the manufacturer’s interval, but adjust for your conditions.
Frequently Asked Questions
Can I use vinegar to descale my Keurig?
Yes, white vinegar is a widely used and effective alternative to the branded solution. Use a 50/50 mix with water. The critical caveat is the extended rinse time. Vinegar odor can cling to silicone seals, so you may need to run 15 or more fresh water cycles until the output smells and tastes completely neutral.
How do I clean a Keurig that hasn’t been used in months?
First, discard any old water in the reservoir. Wash all removable parts as described. Then, before brewing coffee, run at least three full cycles of fresh water through the machine. This flushes stagnant water from the internal lines. If the machine smells musty, a full descaling cycle (vinegar or solution) is recommended before first use.
Why does my coffee taste sour after descaling?
This almost always means incomplete rinsing. Descaling agents are acids. If residual acid remains in the system, it will sour your next several brews. The fix is to run more fresh water cycles—potentially beyond the recommended 12—until the discharged water tastes perfectly clean and neutral.
Is the Keurig descaling solution worth the cost?
For owners with very hard water or those who are sensitive to the potential vinegar smell, yes. The formulated solution is designed for the machine’s materials and typically requires fewer rinse cycles to become odor-free. For most users with moderate water, vinegar works fine if you commit to the lengthy rinse.
Can I clean the exit needle with a toothpick?
dry toothpick is safer than metal but can still snap and leave fibers inside the needle. A dry, straightened paperclip is the best tool. The goal is gentle dislocation, not abrasive scrubbing. For a visual guide on handling small parts, consulting a Braun coffee maker manual for similar components can be helpful.
Before You Go
Cleaning your Keurig is straightforward once you separate the external wash from the internal descale. Remember the 12-rinse rule—it’s the difference between a maintained machine and one that makes bad coffee. Pay attention to your water hardness and flavor your descaling schedule to it, not just a calendar. Finally, that quick water cycle after a flavored pod saves a much longer cleaning session later. Your machine will run quieter, heat faster, and your morning cup will taste as it should.
