
How Do I Percolate Coffee? The Complete Step-by-Step Guide
To percolate coffee, you circulate boiling water through a basket of coarse grounds repeatedly. Start with pre-boiled water, use a grind like coarse sea salt, and brew for about one minute per cup. Stop the moment the percolation turns from a steady flow to a sputter.
Most guides get the starting temperature wrong. They tell you to pour cold water into the pot. That mistake guarantees a weak, uneven first cycle because the water isn’t hot enough when it first hits the coffee. The entire brew suffers.
This guide walks through both stovetop and electric methods, explains the mechanics from the original patents, and gives you the specific timings and failure modes that turn a bitter, over-extracted mess into a clean, strong cup.
Key Takeaways
- Always start with pre-boiled water in the base, not cold water. Cold water brews its first cycle at a temperature too low for proper extraction.
- Use a grind slightly coarser than for drip coffee. Aim for the texture of coarse sea salt, not powder. A finer grind will over-extract and clog the basket.
- Brew for approximately one minute per cup of water. The Presto 02811 and Farberware FCP240 manuals both specify this timing. Go longer and the coffee turns bitter.
- The moment the percolation changes from a steady, gentle flow to a violent sputter, remove the pot from heat. That sputter means the water is boiling over the grounds, burning the coffee.
- Do not use softened water. The Presto manual warns it causes excessive foaming, which can force grounds into the pot and make a muddy brew.
The Core Mechanism of a Percolator
A percolator works on a simple, closed-loop pump system. Understanding this loop is the difference between controlling the brew and just watching it bubble.
A percolator heats water in its bottom chamber until it boils and creates steam pressure. This pressure forces hot water up a central pump tube. The water exits the top of the tube, showers over the coffee grounds held in a perforated basket, then filters down through the grounds and back into the bottom chamber to be reheated and cycled again.
This process is detailed in Ivar Jepson’s 1956 patent (U.S. Patent 2,773,446) assigned to Sunbeam Corporation. The patent focuses on the heating element and tube design that makes this automatic recirculation possible. The goal is constant, even saturation.
If you pour cold water into the base, the first cycle happens before the water reaches a full boil. That first pass extracts only the most soluble acids, leaving the deeper sugars and oils behind in the bean. Every subsequent cycle then over-extracts those early acids. You get a cup that’s simultaneously sour and bitter.
TL;DR: The pump tube recirculates boiling water over the grounds. Start with already-hot water to ensure the first extraction cycle is at the right temperature.
Stovetop vs. Electric: Two Machines, One Principle
The core percolation physics are identical. The difference is in control. A stovetop model puts the heat dial in your hand. An electric model has a thermostat.
| Aspect | Stovetop Percolator | Electric Percolator |
|---|---|---|
| Heat Control | Manual, via your stove knob. | Automatic, via internal thermostat. |
| Best For | Camping, precise manual brewing, understanding the process. | Set-and-forget convenience, consistency in a kitchen. |
| Critical Watch Point | The visible percolation in the clear top knob. | The indicator light (e.g., Presto 02811‘s “signal light”). |
| Risk If Unwatched | Boil-over and scorched coffee in under 30 seconds. | Extended “Keep Warm” cycling that continues extraction on a hot plate. |
Electric models like the Hamilton Beach 40614 add a keep-warm function. This holds coffee at about 180°F (82°C). Do not leave coffee on this setting for more than an hour. The prolonged heat slowly cooks the coffee, developing a stale, flat flavor.
The stovetop method demands more attention. You are the thermostat. This makes it superior for learning the visual and auditory cues of a good percolation cycle, which directly translates to better coffee on any machine.
TL;DR: Stovetop offers control and education; electric offers convenience. Both require you to stop the brew at the right moment.
The Three Non-Negotiables: Grind, Water, Dose
Get these three elements wrong, and no amount of perfect timing will save your cup. This is where most first attempts fail.
1. The Right Grind Is Coarse, But Not Too Coarse
You need a grind that allows water to flow through freely over multiple cycles but still offers enough surface area for extraction. The universal advice is “coarse.”
Ignore that. It’s too vague.
Aim for a consistency slightly coarser than standard drip grind. Think coarse sea salt or breadcrumbs. If your grounds feel like powder between your fingers, you’ve gone too fine. That powder will compact, restrict water flow, and over-extract into bitterness. A proper burr coffee grinder is the only tool that gives you this consistency repeatably.
Common mistake: Using a fine grind for faster extraction — the basket clogs by the third cycle, pressure builds, and the resulting coffee is harsh and astringent.
2. Water Quality and Temperature
Use filtered water if your tap water tastes off. But heed a specific warning from the Presto 02811 manual: avoid softened water. The manual states softened water can cause “excessive foaming.” This foam can carry fine grounds out of the basket and into your pot.
The temperature rule is absolute. Start with hot, preferably already boiling, water in the bottom chamber. This ensures the first percolation cycle happens at an effective extraction temperature (195-205°F). Starting cold means your first cycle is a weak, under-extracted wash.
3. How Much Coffee to Use
The standard ratio is one tablespoon of coarse ground coffee per cup of water. For a 12-cup percolator, that’s 12 tablespoons. A kitchen scale is better: aim for 55 to 60 grams of coffee per liter of water.
Do not pack or tamp the grounds into the basket. Just level them off with your finger. Tamping creates a dense puck that restricts water flow and causes channeling.
Step-by-Step: Stovetop Percolation
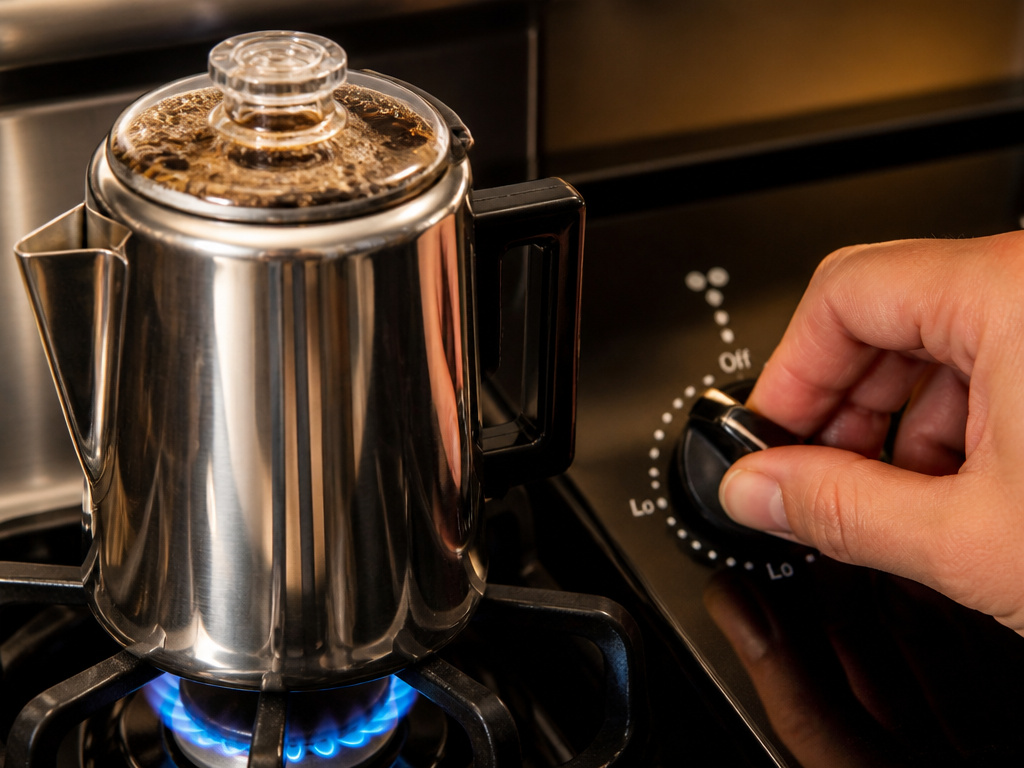
This is the hands-on method. You’ll see, hear, and smell the process.
- Boil water separately. Fill your kettle and bring it to a full boil. This is your most important step.
- Grind your coffee. Measure your beans and grind to the coarse sea salt consistency. For a strong blonde roast coffee, you might use a slightly heaped tablespoon.
- Assemble the percolator. Pour the boiling water into the empty bottom chamber. Place the basket in the top. Add the grounds to the basket and level them. Insert the pump tube into the center hole and seat the top lid. Leave the lid’s small opening uncovered so you can see the percolation.
- Apply medium-low heat. Place the percolator on the stove. Set the burner to medium-low. Watch the clear top knob or well.
- Reduce heat at first percolation. Once you see coffee bubbling up into the knob in a steady, rhythmic flow, immediately reduce the heat to the lowest setting that maintains that flow. A violent, spluttering flow means the heat is too high.
- Time the brew. Start a timer. Brew for approximately one minute per cup of water. For a full pot, this is 8-12 minutes.
- Stop at the first sputter. The moment the gentle percolation sound changes to a rapid, angry sputter, immediately remove the percolator from the heat. This sputter means water is boiling over the grounds, not flowing through them. It scorches the coffee.
- Serve immediately. Pour the coffee right away. Leaving it sitting on the hot metal will continue a slow, degrading extraction.
Skipping step one and using cold water means your first 4-5 minutes of brewing are ineffective. The coffee will taste weak and sour no matter how long you let it go.
TL;DR: Boil water first, grind coarse, reduce heat when flow starts, and pull the pot at the first sound of sputtering.
Step-by-Step: Electric Percolation
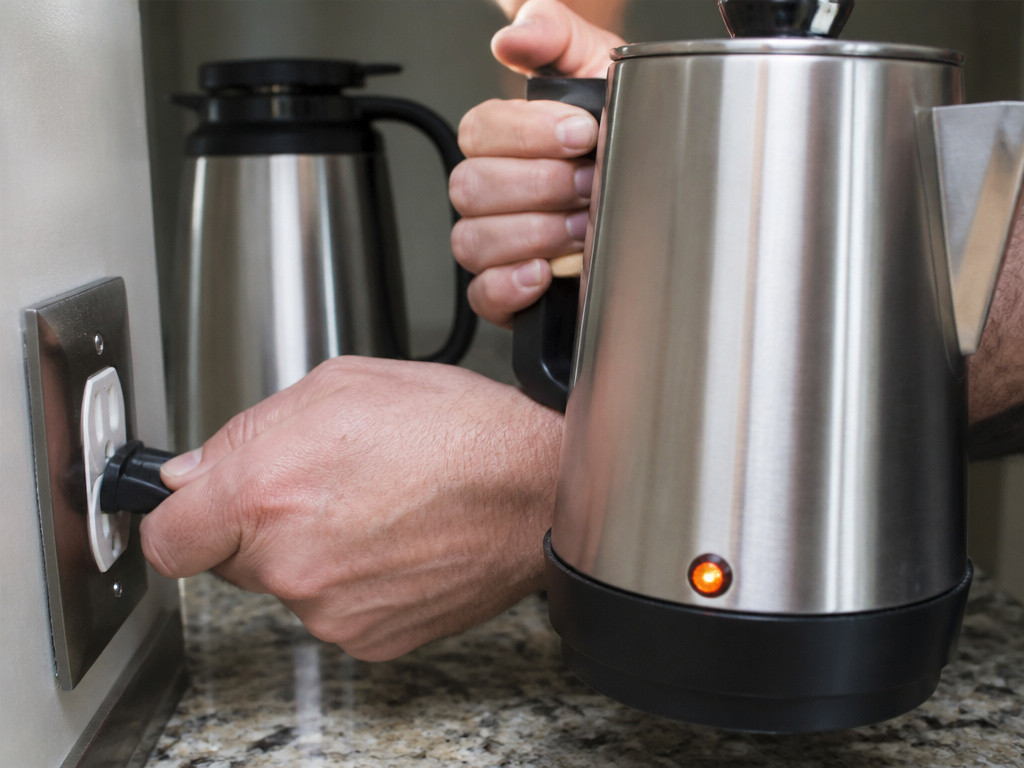
Electric models simplify the heat control but introduce a new variable: the keep-warm cycle.
- Add hot water to the cold pot. Even though the machine will heat it, start with the hottest water from your tap. Some manuals, like the Farberware FCP240, specify a minimum water level (e.g., 2 cups).
- Prepare the basket. Add your coarse grounds to the basket. Use the same one-tablespoon-per-cup ratio. Do not overfill past the basket’s rim.
- Assemble and start. Place the basket and tube assembly into the pot. Secure the lid. Plug in the percolator and turn it on. The heating light will illuminate.
- Listen and watch. You will hear the percolation begin. On models like the Presto 02811, a signal light will turn on or change color when brewing is complete. This typically aligns with the one-minute-per-cup timing.
- Disengage the keep-warm function. As soon as the brew cycle finishes, unplug the machine. If you must use the keep-warm feature, transfer the coffee to a separate insulated carafe. Leaving it on the hot plate continues a slow extraction that turns the coffee bitter and flat within 20 minutes.
I won’t use the keep-warm function on my Hamilton Beach. I brewed two identical pots, left one on warm for 45 minutes and poured the other into a thermos. The warmed pot tasted flat and tinny. The thermos pot was still bright and clean. The heating plate cooks the coffee.
Why Does My Percolated Coffee Taste Bitter (or Sour)?

Percolation is a balancing act between time, temperature, and grind. Off-flavors are a direct diagnostic tool.
| Symptom | Likely Cause | The Mechanism & Fix |
|---|---|---|
| Coffee tastes bitter, harsh | Brewed too long, grind too fine, heat too high. | Over-extraction. Tannins and bitter compounds are pulled out late in the cycle. Reduce brew time by 15-30 seconds or coarsen your grind. |
| Coffee tastes sour, weak | Brewed too short, water too cold, not enough coffee. | Under-extraction. Only the bright acids dissolved. Ensure you start with hot water, use enough coffee, and brew for the full minute per cup. |
| Coffee tastes flat, stale | Left on keep-warm cycle too long. | The constant heat drives off volatile aromatics and continues extracting bitter notes. Serve immediately or decant to a thermos. |
| Muddy grounds in the cup | Softened water, overfilled basket, or clogged filter. | Excessive foaming from softened water carries fines. Or, water overflowed a packed basket. Use non-softened water and don’t tamp. |
A sour note often comes from that cold-water start. A bitter note is usually a timing issue. If your coffee is both sour and bitter, you almost certainly started cold and then let it brew too long trying to fix the weakness.
Percolation vs. Other Brew Methods
Percolation is often compared unfavorably to drip or immersion brewing. The criticism usually centers on over-extraction. That’s a fair concern if the method is misapplied.
Common mistake: Assuming percolation is inherently inferior — when done correctly with coarse grounds, precise timing, and hot water, it produces a uniquely full-bodied, robust cup that highlights different coffee flavor profiles than a delicate pour-over.
It shares more DNA with the drip coffee method than you might think. Both are percolation methods—water passes through a bed of grounds once. The difference is the recirculation. A drip brewer passes water through once; a percolator passes the same water through multiple times. This amplifies strength but also risk. It’s less forgiving than immersion methods like a French press.
Choose percolation when you want a strong, hearty cup, perhaps with a dark roast or a blended coffee built for body. Choose a pour-over for clarity and nuance in a delicate single-origin coffee.
Frequently Asked Questions
Can I use pre-ground coffee in a percolator?
You can, but it’s a gamble. Most pre-ground coffee is ground for drip machines, which is often too fine for percolation. It will likely over-extract and taste bitter. If you must use it, reduce your brew time by 15-20 seconds and be vigilant for sputtering.
How do I clean a percolator?
Disassemble it completely after each use. Discard the grounds and rinse all parts. Wash the pot, basket, and tube with warm, soapy water. Never use abrasive scrubbers on aluminum models, as they can scratch and create off-flavors. For mineral deposits, run a cycle with a 50/50 water and white vinegar solution, then rinse thoroughly with clean water.
Is percolated coffee stronger than drip coffee?
Yes, typically. The recirculation extracts more solids, resulting in a higher concentration of coffee compounds. This creates a bolder, more robust body. It is not inherently more caffeinated, but it tastes stronger due to this increased extraction.
Why does my percolator make a gurgling sound?
steady, rhythmic gurgle is the sound of proper percolation—water being forced up the tube and showering down. A rapid, chaotic sputtering is the sound of water boiling over the grounds. That’s your cue to immediately remove the heat. The gurgle is good. The sputter is bad.
Can I percolate tea?
Technically yes, but it’s not ideal. The high temperature and recirculation will over-extract tannins from tea leaves, making it extremely bitter. Tea is best brewed with a single infusion at a controlled temperature.
The Bottom Line
Percolation is a classic method that rewards precision. Its bad reputation comes from decades of people using cold water, fine grounds, and walking away until the pot screams.
Start with boiling water. Use a coarse grind. Watch the flow and listen for the change from gurgle to sputter. Stop the brew then, not a minute later. Follow those rules and you’ll get a cup with a depth and strength that modern drip machines struggle to match. It’s a hands-on process. That’s the point.
