
Find Your Fit: The Complete Coffee Filter Size Chart Guide
A coffee filter size chart matches three things: your brewer’s model, the filter’s physical shape (cone, basket, or disc), and its designated number or name. The number on a cone filter, like #2 or #4, corresponds to a specific top diameter and cone angle defined by the manufacturer, not just cup capacity.
Most charts list shapes and numbers but skip the physical consequence of a mismatch. You find out when the brew stalls at the five-minute mark or boiling water spills over the counter.
This guide maps every major filter type, cone, basket, flat-bottom, and disc, to its brewer. You’ll get the OEM specs, a diagnostic table for brew problems, and the one hack that lets you adapt a cheap filter in a pinch.
Key Takeaways
- Cone filter numbers (#1, #2, #4, #6) are manufacturer-specific sizes. A Melitta #2 has a 7-8 cup capacity in their system, but it’s the physical fit that matters.
- A filter that’s too large will buckle and choke the flow. A filter that’s too small won’t hold the grounds, leading to overflow and a weak, under-extracted cup.
- Flat-bottom filters (Kalita Wave, April Brewer) create a different water flow pattern than cone filters (Hario V60), demanding their own specific paper.
- The AeroPress uses a unique 6.35 cm (2.5-inch) diameter circular paper filter. Reusing it more than three times wears the micro-perforations and lets fines through.
- Always check the OEM manual first. The model number on your machine’s base is the fastest path to the right filter.
The Core Coffee Filter Size Chart (And Why Numbers Matter)
Forget cup counts printed on boxes. The number on a cone filter is a physical spec.
Melitta’s OEM pour-over instructions define it clearly: a #1 filter fits their 1-cup brewer, a #2 fits the 2-6 cup brewer, and a #4 fits the 8-12 cup brewer. The cone angle and top diameter are different for each. Put a #4 in a #2 cone, and the excess paper has nowhere to go. It folds inward over the grounds. Water pools above the fold, and your brew time stretches past six minutes. The result is over-extracted, bitter coffee.
The ISO 6668:2018 standard for coffee sensory analysis preparation implies standardized filtration media. This underpins why manufacturers like Melitta specify filter dimensions, consistent flow is required for repeatable results.
TL;DR: Filter numbers are blueprints, not suggestions. A mismatch changes the hydrodynamics of your brew.
Cone Filter Dimensions & Compatibility
This table translates the common numbered cone system into physical fit and risk.
| Filter Number | Best For (Melitta System) | Top Diameter (Approx.) | Risk If Mismatched |
|---|---|---|---|
| #1 | Single-cup pour-over brewers | ~4.5 inches | In a larger cone, grounds spill over the filter’s short sides during the pour. |
| #2 | 2-6 cup pour-over brewers | ~5.5 inches | In a #4 cone, it sits too low. Water bypasses grounds near the rim, causing weak, uneven extraction. |
| #4 | 8-12 cup pour-over brewers | ~6.5 inches | In a #2 cone, it collapses. Flow stalls, brew time doubles, and the cup turns astringent. |
| #6 | Large commercial brewers | ~8+ inches | Will not physically seat in any home brewer. Attempting to force it tears the paper. |
The #2 is the home-brew workhorse. Its 5.5-inch top diameter matches a vast array of automatic drip machines with a cone-shaped basket. If your machine has a tall, slender plastic cone inside, it likely takes a #2.
Common mistake: Assuming #4 filters are just “for more coffee”, putting one in a standard drip machine. The cone walls buckle, touch the grounds, and block the drip holes. Your machine’s heater cycles off before the carafe is half full.
Flat-Bottom vs. Cone: A Flow Dynamics Guide
The shape of your filter dictates how water moves through the coffee bed. Get this wrong, and you fight the brewer’s design.
Cone filters (Hario V60, Melitta) channel water toward a single point at the bottom. This can accelerate flow. Flat-bottom filters (Kalita Wave 185, April Brewer) spread water across a wider bed. The flow is more consistent and forgiving. Each requires its own paper.
- Kalita Wave 185 Filters: These are flat, with a pleated side and a flat bottom. They have three small drip holes. The paper is thicker than standard cone filters. Using a cone filter in a Kalita Wave lets water rush down the sides, missing the center grounds.
- Hario V60 Filters: These are true cones, thinner paper, with a single large hole at the tip. The tabbed version has a seam. A flat-bottom filter will not form the correct shape in a V60. It blocks the air flow, creating a vacuum that stalls the drawdown.
You cannot interchange them. The paper’s thickness and shape are engineered for that brewer’s specific drainage. A V60 needs fast flow; its paper is thin. A Kalita aims for steady saturation; its paper is thicker to moderate the drip.
Basket Filters & Automatic Drip Machines
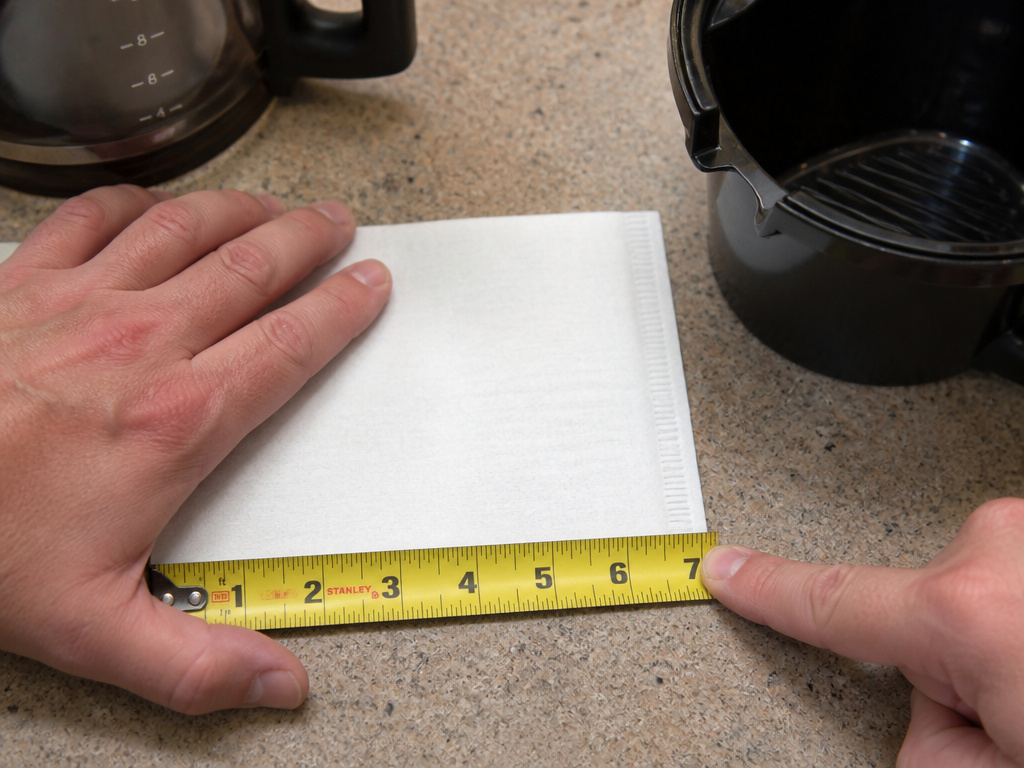 Basket filters are the rectangles or squares that fold into a basket shape. Size is everything.
Measure the basket in your machine. The rim diameter is the key number. A 8-12 cup machine typically uses a size #4 basket filter (about 8.5 x 5.5 inches unfolded). A 1-4 cup machine might use a size #2 basket (about 7 x 4 inches). Using a too-small filter means coffee grounds slip over the edge into the carafe. A too-large filter crumples at the sides, blocking water paths and leading to overflow.
Some machines are brand-specific. Bunn coffee maker filters often have a unique profile or a notch for their spray head. A generic basket might fit loosely, causing the spray to miss the grounds entirely. Always check your manual.
The same goes for high-end machines. A Breville machine filter might be a proprietary shape or include a rubber gasket. Using a standard basket can compromise the seal and water temperature.
Specialty & Disc Filters
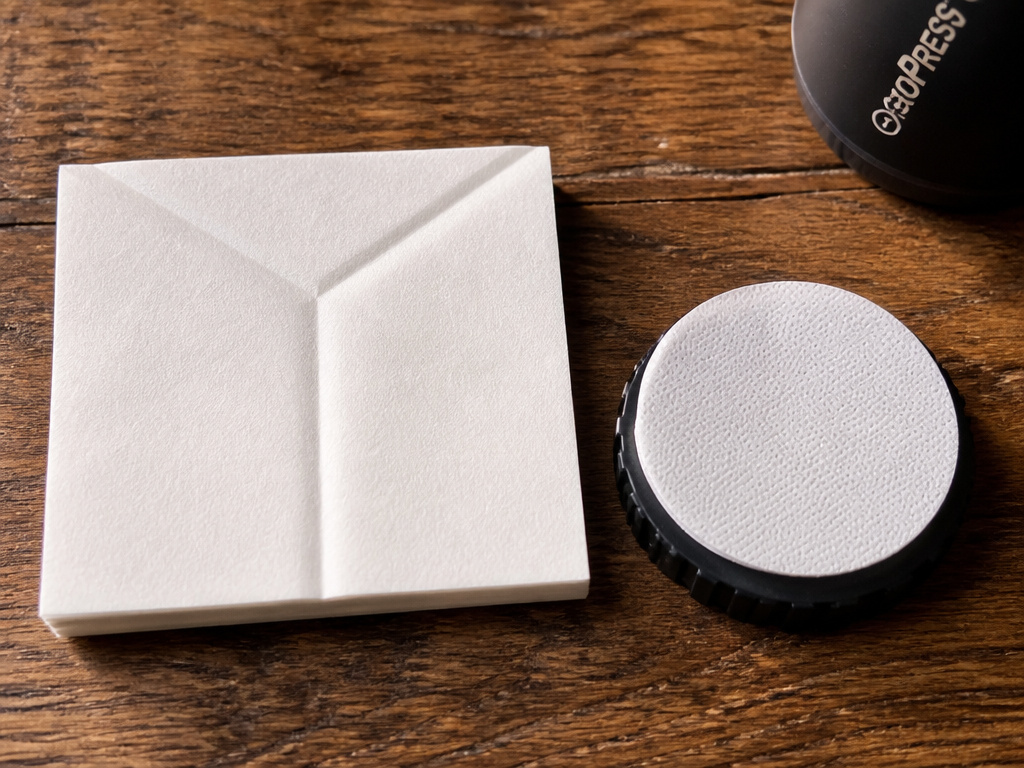 This category is defined by exact model matching. There is no universal size.
- Chemex Bonded Filters: These are the thick, square filters that fold into a cone. They are designed for Chemex’s unique glass pour spout, which also acts as an air channel. The paper is 20-30% thicker than standard filters. A regular cone filter in a Chemex will clog the air channel, creating a vacuum lock. The brew stops entirely.
- AeroPress Filters: The official AeroPress paper filter is a disc 6.35 cm (2.5 inches) in diameter, per the product page. It’s micro-perforated. After three uses, those perforations widen. Fine silt passes into your cup, making it murky and adding grit. Metal disc filters are a different game, they require a much finer grind.
I rinsed and reused an AeroPress filter seven times once, trying to be frugal. By the fifth brew, the cup had a visible silt layer at the bottom. By the seventh, it tasted flat. The paper was just worn out.
TL;DR: For Chemex and AeroPress, buy the OEM filters first. Third-party options are a gamble on thickness and flow rate.
How to Measure and Adapt When You’re Unsure
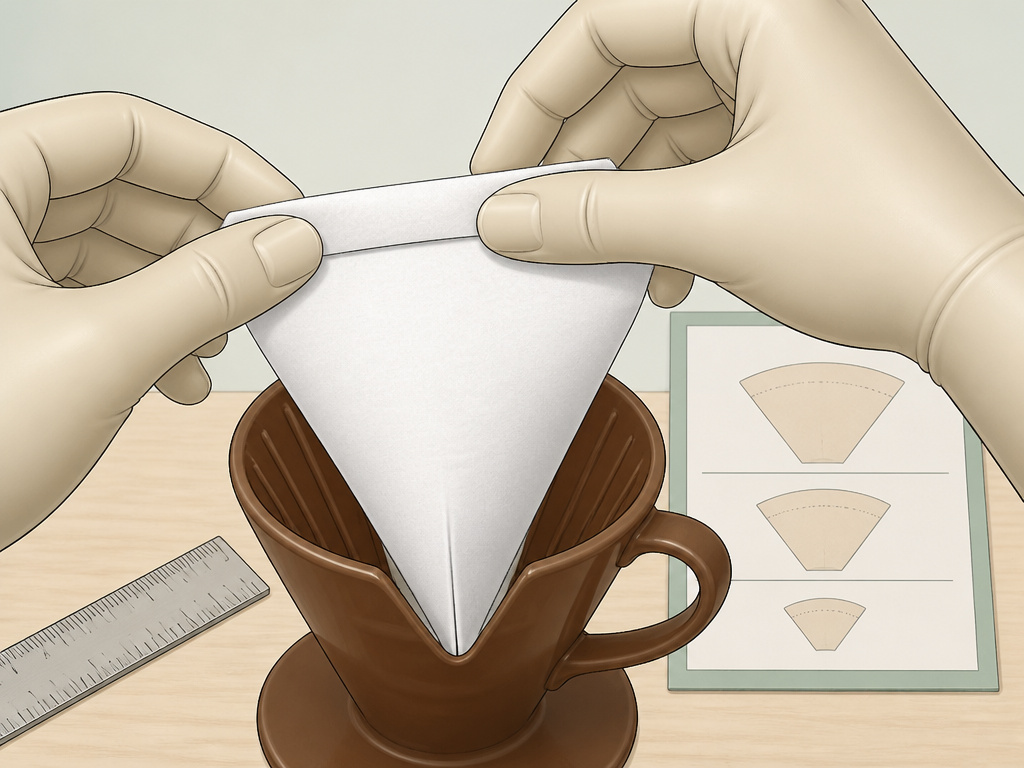 No model number? No manual? You can still find the right filter.
- Clean and dry the filter basket or dripper.
- Take two key measurements: For a cone, measure the top opening’s diameter. For a basket, measure the length and width of the basket itself.
- Match to the chart. If your cone top is roughly 5.5 inches, it’s a #2. If your basket is about 8.5 x 5.5 inches, it’s a #4 basket.
- Test with a single filter. Does it seat fully without collapsing or gaping?
What if you only have the wrong size? The YouTube hack for a dollar-store #4 cone in a smaller dripper works. You fold the bottom portion up, leaving a centimeter at the top, to shorten the cone. It creates a double layer at the tip which slows flow a bit. It’s a serviceable fix, not a permanent solution. The fold must be crisp, or it directs water in a weird channel.
Common mistake: Trying to trim a too-large filter with scissors. The cut edge introduces loose fibers that clog the pores of the paper. Your brew will stall every time.
Diagnostic Table: Filter Problems & Solutions
When your brew goes wrong, the filter is a likely culprit. Use this table to diagnose.
| Symptom | Likely Filter Issue | Immediate Fix |
|---|---|---|
| Brew takes >6 minutes | Filter too large, collapsed | Use a smaller number (e.g., switch #4 to #2). Ensure filter is fully seated. |
| Water overflows basket | Filter too small, or folded wrong | Use a larger basket filter. For cones, ensure the filter’s seams are aligned. |
| Weak, watery coffee | Grounds bypassing filter | Filter is too small or the basket is overfilled. Reduce dose or get larger filter. |
| Grit or silt in cup | Worn reusable filter or wrong paper | For AeroPress, replace paper filter. For metal, use a finer grind setting. |
| Bitter, astringent taste | Flow stalled, over-extraction | Check for filter collapse. Use a faster-flowing paper (e.g., untabbed V60 paper). |
Frequently Asked Questions
Are #4 coffee filters the same as #2?
No. A #4 filter has a larger top diameter and a different cone angle than a #2. Putting a #4 in a #2 brewer will cause the paper to fold inward, choke the flow, and drastically over-extract your coffee. They are not interchangeable.
What happens if you use the wrong size coffee filter?
Using a filter that’s too large causes collapse and stalled brewing, leading to bitterness. Using a filter that’s too small can cause overflow, grounds in your carafe, and weak, under-extracted coffee. Both ruin the cup.
Can I use a basket filter in a cone brewer?
No. The shapes are incompatible. A basket filter will not form the correct cone shape. It will block water flow and likely tear. Always match the filter shape (cone, basket, disc) to your brewer’s design.
How many times can you reuse an AeroPress paper filter?
You can rinse and reuse an AeroPress paper filter 2-3 times. By the fourth use, the micro-perforations wear, allowing fine coffee silt to pass through. This makes the cup gritty and muddies the flavor.
Where can I find the right filter for my specific coffee maker?
The fastest way is to check the model number on the base of your machine and search for “[model number] filter.” The next best is to consult the manufacturer’s manual, which will specify the filter type and size number.
The Bottom Line
A coffee filter is not a commodity. Its size, shape, and thickness are precision components in your brewing system. The number on the box is a physical spec, not a vague suggestion. Match it to your brewer’s model, or you are engineering a failure, stalled flow, overflow, or a cup of grit.
Start with your machine’s model number. Cross-reference it with the OEM guide. Keep a box of the right paper filter types on hand. For methods like drip coffee brewing, the right #2 cone makes the routine bulletproof. When you explore different coffee bean types, like a bright light roast coffee, that consistent filtration lets its true flavor come through.
