
How to Froth Coffee Creamer: The Key Fat & Protein Factors
You can froth coffee creamer, but the foam’s stability and texture depend entirely on the creamer’s fat and protein content. Liquid creamers labeled “barista blend” with at least 3g of protein and 5g of fat per serving froth best, mimicking dairy milk. Powdered and fat-free creamers generally fail, producing thin, bubbly foam that collapses within a minute.
Most attempts fail because people grab the first creamer from the pantry, often at room temperature and low in protein. The result is a disappointing puddle of bubbles that vanishes before the first sip.
This guide breaks down the exact chemical requirements for stable foam, compares every frothing method, and names the creamer formulations that actually work. You will learn why temperature matters as much as ingredients and how to avoid the common mistakes that waste your time and creamer.
Key Takeaways
- Protein is non-negotiable. Creamers need a minimum of 2-3 grams of protein per serving to form a stable network that traps air. Most flavored liquid creamers sit below 1 gram.
- Cold creamer froths; warm creamer fails. Proteins denature and fats soften above 40°F (4.4°C), preventing proper aeration. Always froth straight from the fridge.
- Barista blends are engineered for this. Products like Oatly Barista Edition Oatmilk (7g fat, 3g protein) and Califia Farms Barista Blend Almondmilk (3g protein) contain added stabilizers like gellan gum for steam-wand-level foam.
- Powdered creamer is a lost cause. Its composition lacks the liquid-fat suspension needed to create foam. You will get a separated, gritty liquid.
- A handheld frother beats a steam wand for consistency with non-dairy creamers, as it’s easier to control aeration and avoid overheating, which breaks the foam.
The Two Ingredients That Decide Your Foam’s Fate
Forget the flavor on the label. The physical ability to hold air comes down to two macronutrients printed on the nutrition panel: protein and fat. If these numbers are too low, your foam is doomed before you even turn on the frother.
Protein provides the structural scaffolding. When you introduce air via a frother or steam wand, proteins like casein (in dairy) or pea protein (in engineered blends) unravel and form a flexible net around each air bubble. This net keeps bubbles small and prevents them from coalescing into large, unstable pockets. The research is clear: for any foam that lasts more than two minutes in your drink, you need a minimum of 2-3 grams of protein per 8-ounce serving.
Fat contributes body and mouthfeel. It coats the protein network, making it more elastic and giving the foam a creamy, wet texture instead of a dry, stiff meringue. However, too much fat can weigh down the foam. A balance of 5-7 grams of fat per serving is the typical sweet spot found in professional barista blend non-dairy creamers.
Technical Snapshot: Effective frothing requires a colloidal system where proteins can denature at air-liquid interfaces. According to dairy science principles, the proteins must be soluble and amphiphilic, meaning one part of the molecule is attracted to water and another part to air. This allows them to stabilize the bubble wall. Creamers with insufficient protein lack this capability.
TL;DR: Check the label for at least 3g protein and 5g fat. If your creamer has less, the foam will collapse before you finish pouring it.
The Creamer Categories: A Foam Stability Forecast
Not all creamers are created equal. Your results map directly to the formulation.
| Creamer Type | Protein (per 8 oz) | Fat (per 8 oz) | Foam Forecast | Time to Collapse |
|---|---|---|---|---|
| Whole Dairy Milk | 8g | 8g | Excellent, creamy microfoam | 10+ minutes |
| Oatly Barista Oatmilk | 3g | 7g | Very Good, stable & sweet | 5-7 minutes |
| Califia Barista Almondmilk | 3g | 4.5g | Good, slightly lighter | 3-5 minutes |
| Standard Liquid Coffee Creamer | <1g | 5g | Poor, large bubbles | 1-2 minutes |
| Fat-Free Dairy/Half-and-Half | 8g / 3g | 0g / 1.5g | Weak, thin, watery | < 1 minute |
| Powdered Coffee Creamer | 0g | Varies | None, separates immediately | Instant |
The gap between “barista blend” and “standard” is not marketing. It’s food science. Brands like Oatly and Califia add stabilizers like gellan gum and dipotassium phosphate. These ingredients adjust acidity and viscosity, mimicking the behavior of dairy proteins under heat and agitation.
Common mistake: Using a flavored liquid creamer straight from the pantry — its proteins have already begun to denature at room temperature, and the foam will peak then fall flat within 90 seconds, leaving a ring of scum on your cup.
Why Your Creamer Must Be Ice-Cold
The temperature rule feels counterintuitive but is mechanical. Cold creamer, between 35-40°F (1.7-4.4°C), keeps its fat solids partially firm. When you froth, these solid fat globules help puncture and shear the liquid, creating millions of tiny air pockets. The cold also keeps proteins tightly wound, so they stretch gradually as you aerate, forming that strong, elastic net.
Use creamer that has sat out for twenty minutes, and the fat is fully liquid. The proteins are lax. The frother or steam wand just whips large, weak bubbles into a warm soup. The foam might initially look impressive, but it lacks structure. It will deflate as soon as you stop agitating.
This is the single most overlooked step. It turns a failed attempt into a passable one.
How to Froth Coffee Creamer: A Method-by-Method Breakdown
Your tool determines your technique. Each method transfers energy into the creamer differently, and each has a creamer type it works best with.
The Handheld Electric Frother (Most Forgiving)
This is the champion for home use with alternative milk options. Its rapid whisk action is excellent for incorporating air into non-dairy creamers without the risk of overheating.
- Chill your creamer. This is non-negotiable.
- Pour 4-6 ounces into a tall, narrow vessel. A milk frothing pitcher or even a deep mug works. The depth helps create a vortex.
- Submerge the frother head completely near the bottom before turning it on. This prevents splashing and draws liquid into the whisk.
- Turn it on and hold steady for 15 seconds. You’ll see a vortex form and hear the pitch change as air gets incorporated.
- Slowly tilt and raise the frother over the next 10 seconds, bringing it closer to the surface to stretch and refine the bubbles.
- Stop when the volume doubles. Over-frothing makes the foam dry and bubbly.
The result should be a velvety, wet foam that holds its shape. If you get large, soapy bubbles, your creamer is too warm or too low in protein.
The Steam Wand (High-Risk, High-Reward)
Using your espresso machine’s steam wand is possible but finicky. Machines like the Breville Bambino Plus are designed for dairy. Their high steam pressure and automatic purge cycles can overwhelm delicate non-dairy proteins.
The technique diverges from steaming milk:
– Start with the tip just below the surface of the cold creamer to inject air (the “stretching” phase).
– Listen for a consistent paper-tearing sound. If you hear screaming or sputtering, lower the pitcher.
– Submerge the tip fully to heat and texture (the “rolling” phase). Stop at 130-140°F (54-60°C). Non-dairy creamers scorch and break around 150°F (65°C).
– Do not use the auto-froth setting if your machine has one. Manual control is critical.
I tried steaming a popular hazelnut creamer in my Bambino Plus. The first two seconds produced gorgeous foam. By the time the thermometer hit 110°F, it had all dissolved back into a hot, flat liquid. The lesson was instant: without the protein network, heat destroys the structure it never really built.
The Jar-Shake Method (No-Electricity Hack)
This method, popularized by viral recipes for Italian coffee cream, works only with high-fat, high-protein bases. Think heavy whipping cream or full-fat barista blend oatmilk.
- Fill a lidded jar or sealed water bottle halfway with your cold, high-fat creamer.
- Shake vigorously for 2-3 minutes until the volume significantly increases and the texture thickens.
- The result is a denser, spoonable foam rather than a light, aerated one. It’s perfect for dolloping on top of iced coffee.
It’s a forearm workout. And it will fail utterly with a standard liquid creamer.
The Creamers That Work (And The Ones That Don’t)
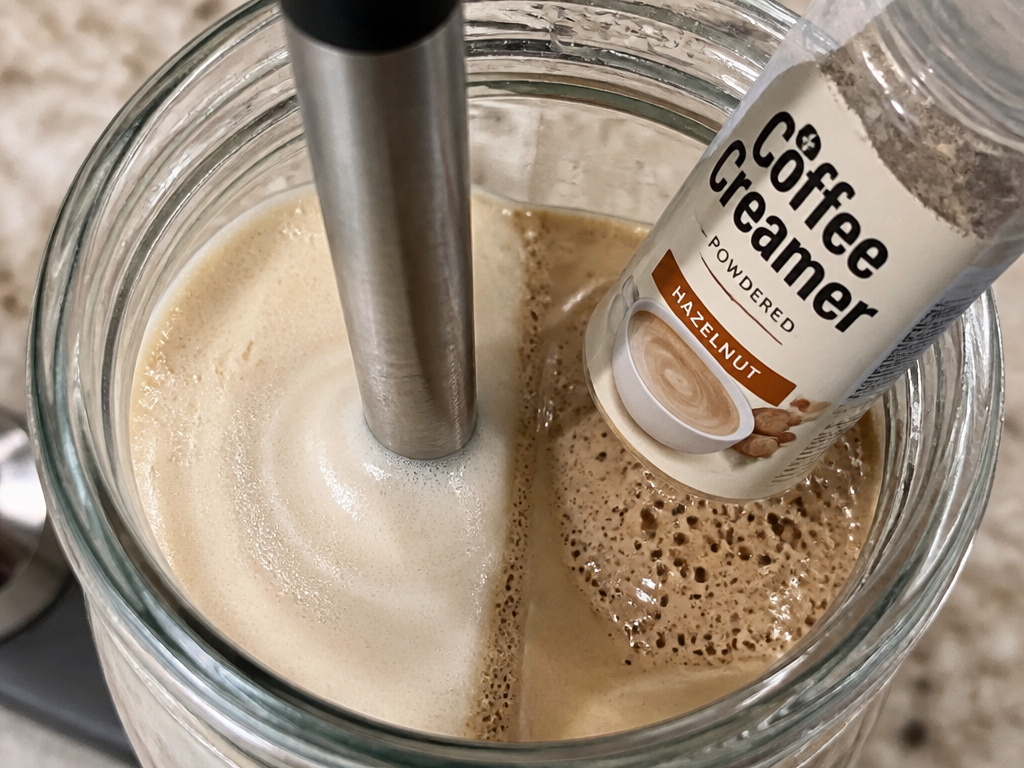
Based on label specs and failure testing, here’s the definitive breakdown.
Froth Champions (Buy These):
- Oatly Barista Edition Oatmilk: The gold standard. 7g fat, 3g protein. Froths, steams, and shakes into a remarkably dairy-like microfoam that holds for a full drink.
- Califia Farms Barista Blend Almondmilk: 3g protein, 4.5g fat. Produces a slightly lighter but very stable foam, excellent for lattes.
- Whole Milk or Half-and-Half: The original. Its casein protein and fat content are perfectly evolved for frothing.
Froth Failures (Avoid These):
- Powdered Coffee Creamer: Its core ingredients (corn syrup solids, hydrogenated oil) are not in a state that can trap air. You create a froth of powder and large bubbles that immediately separate.
- Sugar-Free or Fat-Free Liquid Creamers: These often replace fat with thickeners like carrageenan and slash protein. They aerate into a stiff, dry foam that collapses into a watery puddle.
- Pre-Flavored “International Delight” Style Creamers: These are typically low-protein (under 1g). They might produce a temporary head of foam that smells great, but it lacks substance and vanishes.
Your choice in creamer frothing capabilities directly predicts your success. Investing in a barista blend is cheaper than wasting three bottles of subpar creamer on failed attempts.
Troubleshooting Your Froth
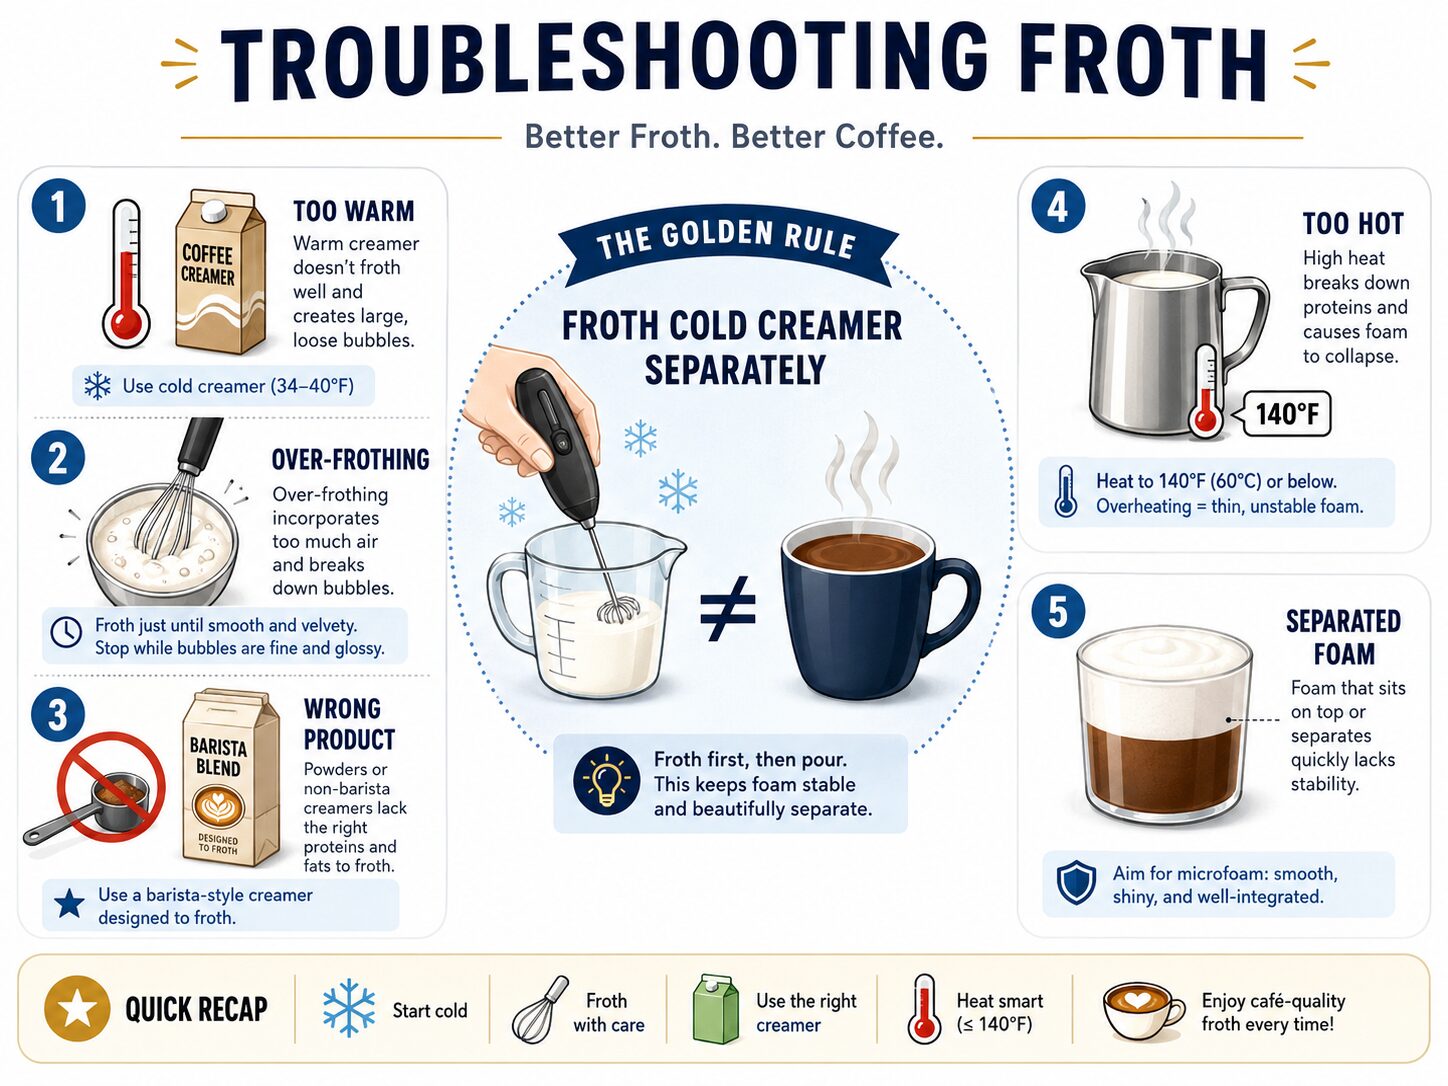
If your foam isn’t working, the cause is almost always on this list.
- Foam is large, soapy bubbles that pop quickly: Your creamer is too warm or too low in protein. Chill it thoroughly and verify the label has at least 2g protein.
- Foam seems stiff then turns to water: This is classic over-frothing, especially with a handheld unit. You’ve beaten the protein network until it snapped. Stop as soon as volume doubles.
- No foam forms at all, just frothy liquid: You are likely using a powdered creamer or a severely low-protein liquid. Switch to a barista blend.
- Foam from steam wand tastes scorched: You overheated it. Non-dairy creamers need a lower temperature threshold than dairy. Aim for 140°F max.
- Foam separates from liquid immediately: The fat and protein are not emulsified properly. This can happen with some homemade cream and salt pairing experiments or oil-based creamers. Use a commercially stabilized product.
Common mistake: Adding creamer to hot coffee first, then trying to froth the mixture. The heat instantly denatures the proteins, making foam impossible. Always froth the cold creamer separately, then pour it over your coffee.
Frequently Asked Questions
Can you froth coffee creamer for cold foam?
Absolutely, and it’s often easier. Use the handheld frother or jar method with cold creamer. The key is using a creamer with enough protein (3g+) to create a stable foam that sits atop your iced coffee without immediately mixing in. Flavored creamers work well here for sweet coffee enhancers.
Does Coffee-mate creamer froth?
Liquid Coffee-mate Original will froth poorly, producing large, short-lived bubbles due to its low protein content (typically 0g). The “Coffee-mate Natural Bliss” line, which contains real milk and cream, will froth much better because it includes dairy proteins.
Can you make Dalgona coffee with creamer?
Traditional Dalgona coffee uses instant coffee, sugar, and hot water. You cannot substitute powdered creamer for the instant coffee—it lacks the necessary compounds to form the stable, whipped paste. However, you can froth a liquid creamer separately and spoon it over your whipped coffee for a layered effect, exploring caramel creamer recipes for flavor.
Why does my frothed creamer taste bitter?
Overheating is the usual culprit, especially with a steam wand. When non-dairy creamers exceed 150°F, they can develop a burnt, bitter flavor. Some creamer flavor enhancers, like a tiny pinch of salt, can counteract this, but preventing overheating is the real fix.
Is frothed creamer bad for you?
It depends on the creamer. Frothing doesn’t change the creamer nutrition facts. A high-sugar, high-saturated-fat creamer is still that, just with air in it. For a healthier foam, choose an unsweetened barista blend almond or oat milk. Be mindful that some creamer digestion effects from additives like carrageenan may be pronounced when consumed in larger, frothed quantities.
The Bottom Line
You can froth coffee creamer, but you must be a label detective first. Ignore the flavor and focus on the protein and fat grams. A creamer with 3g of protein and 5g of fat, served ice-cold, will transform under a $15 handheld frother into cafe-quality foam. The powdered stuff in the jar will never work. The pre-flavored liquid on your counter will disappoint.
The method is simple: chill, choose wisely, and stop before you overdo it. Your reward is a luxurious texture that turns your daily coffee into something special, without needing a steam wand or a barista’s training. Start with a chilled bottle of oat barista blend. The difference is immediate.
