
Learn How to Make Coffee with an Espresso Machine Properly
To make coffee with an espresso machine, you need to match three things: dose weight (18 grams is the standard target), grind fineness (aim for a 36-gram shot in 25-30 seconds), and tamping pressure (15-20 pounds for an even, level puck). The machine’s 9 bars of pressure force hot water through this compacted coffee puck, extracting the concentrated espresso. Deviating from this balance by more than 2 grams of dose or 5 seconds of time produces a sour or bitter shot.
Most people get this wrong because they chase the 30-second extraction time like it’s a law. It’s not. That timer starts the moment water hits the coffee, and on machines with a 5-second pre-infusion, your actual high-pressure extraction is only 20-25 seconds. Grind for the timer and you’ll over-extract a dark roast or under-extract a light one every time.
This guide walks through the physical steps, from heating the machine to pulling the shot, and explains why each variable matters. You’ll learn how to diagnose a sour pull, why a $20 scale beats guesswork, and when to ignore the manufacturer’s manual.
Key Takeaways
- An 18-gram dose yielding 36 grams of liquid in 25-30 seconds is your baseline, but light roasts often need 35+ seconds and a finer grind to avoid sourness.
- Tamping is about levelness, not force. An uneven tamp causes channeling, water finds the weak spot and over-extracts one area while under-extracting the rest.
- The built-in grinder on machines like the Breville Barista Express has 25 steps, but the sweet spot for most medium roasts is between 4 and 7. Going outside that range often means stale beans or a need for machine adjustment.
- Pre-infusion soaks the puck at low pressure for 5-10 seconds. If your machine doesn’t do it automatically, manually start and stop the pump for 5 seconds to mimic it, it reduces channeling by up to 40%.
- Water matters. Hard water scales heating elements in 3-6 months. Use filtered or third-wave water to protect a $500+ machine.
The Gear That Actually Matters
You need five things. A machine, a grinder, a scale, a tamper, and a basket. The machine provides pressure and hot water, around 200°F at 9 bars. The burr coffee grinder creates the fine, consistent particles that create resistance. A blade grinder makes dust and boulders, which is why every espresso guide tells you to avoid it.
The scale is non-negotiable. Eyeballing 18 grams is a 2-gram swing, which changes extraction time by 4-5 seconds. A $20 digital scale with 0.1-gram resolution ends the guesswork.
The tamper should fit your basket snugly. A 58mm basket needs a 58.5mm tamper. A loose fit leaves a ring of untamped coffee around the edge, and water blasts through that gap.
Before you start: The group head and portafilter are metal and reach 200°F. Handle them with a dry towel. Wet grounds create steam when locked in, which can burn your hand. Also, never open the water reservoir while the machine is heating, the steam release can scald.
Why Your Grinder Is More Important Than Your Machine
A $200 machine with a proper grinder makes better espresso than a $2000 machine with a bad one. Pressure is just water pushed by a pump. The coffee puck provides the resistance. Inconsistent grind size creates weak spots. Water follows the path of least resistance, over-extracting the fine particles and under-extracting the large ones in the same puck. That’s why a burr coffee grinder is the first upgrade any serious home barista makes.
TL;DR: Buy a scale first, then a good grinder. The machine comes third.
Dose, Yield, Time: The Espresso Math
This is the triangle you dial in. Dose is coffee in. Yield is espresso out. Time is how long the water takes to get there.
| Variable | Target Starting Point | What Happens If It’s Off |
|---|---|---|
| Dose | 18 grams | Under-dosing (16g) speeds up the shot, making it sour. Over-dosing (20g) chokes the machine, making it bitter. |
| Yield | 36 grams (2:1 ratio) | A 1:1 ratio (18g in, 18g out) is a ristretto—intense, sometimes syrupy. A 3:1 ratio is a lungo—thinner, more bitter. |
| Time | 25-30 seconds total | Under 20 seconds: sour, acidic, weak. Over 35 seconds: bitter, astringent, hollow. |
The 2:1 ratio is a starting point for medium roasts. Dark roasts extract faster, you might prefer a 1.5:1 ratio in 22 seconds. Light roasts extract slower, a 2.5:1 ratio in 35 seconds can balance the acidity.
Common mistake: Chasing the 30-second time without weighing yield, you’ll grind finer to hit the time, but if your yield is 45 grams, you’ve over-extracted. The shot will taste bitter and dry.
The 30-Second Extraction Myth
Manufacturer manuals, like the one for the Breville Barista Express Impress, cite a 30-second extraction for a double shot. That includes pre-infusion. If your machine pre-infuses for 5 seconds, your high-pressure extraction is only 25. Grind for the full 30 and you add 5 seconds of over-extraction. The result is a bitter note that lingers on the back of your tongue.
For light blonde roast beans, ignore the 30-second rule altogether. Their dense cellular structure requires longer contact. Start at 32 seconds and go up to 38 if the shot still tastes sour. The crema will be lighter, almost honey-colored.
The 7-Step Pull (and the One Step Nobody Skips)
The process isn’t complicated, but each step has a consequence. Skip one and the shot tells you.
- Heat everything. Turn on the machine. Run a blank shot (no coffee) through the portafilter to warm it. A cold portafilter steals heat from the water, dropping brew temperature by 10°F. That’s the difference between sweet and sour.
- Weigh and grind. Dose 18 grams of beans into your grinder. For a Breville Barista Express, the grind setting between 4 and 7 usually works for medium roasts. The manual lists 25 settings, but the outer ranges are for drastic adjustments.
- Distribute. Dump the grounds into the portafilter. They’ll form a mound. Use a WDT tool, a few thin needles, to stir and break clumps. If you skip this, the tamp creates density channels. Water will find those channels.
- Tamp level. Place the tamper on the grounds and press down with 15-20 pounds of force. The goal is a flat, even surface. More force doesn’t extract better, it just compresses the puck more. An uneven tamp is the number one cause of channeling.
- Lock and go. Secure the portafilter into the group head. Place your cup on the scale, tare it, and start the pump.
- Watch the yield. The first drops should appear 5-8 seconds after starting the pump. Stop the pump when the scale reads 36 grams.
- Record and taste. Note the time from pump on to pump off. Taste the espresso. Sour means grind finer or increase yield. Bitter means grind coarser or decrease yield.
Most people skip step 3. They tap the portafilter to settle the grounds and call it good. Tapping does not distribute, it lets the larger particles settle at the bottom, creating a layered puck. The water will penetrate the top layer of fines quickly, then stall at the denser bottom layer. You get a shot that starts fast, then drips, and tastes both sour and bitter.
TL;DR: Weigh your coffee, distribute with a WDT tool, tamp level, and stop by weight, not time.
What Channeling Looks and Tastes Like
Channeling is when water blasts a hole through the coffee puck. Visually, the espresso stream will sputter or come out in two uneven threads. In the cup, it tastes simultaneously sour (from the under-extracted coffee around the channel) and bitter (from the over-extracted coffee in the channel path). It’s the signature of poor distribution or an uneven tamp.
The fix is always in the prep. WDT, then tamp. If you see channeling after that, your grind is too fine, the water can’t penetrate evenly, so it finds one weak spot.
When the Standard Process Breaks
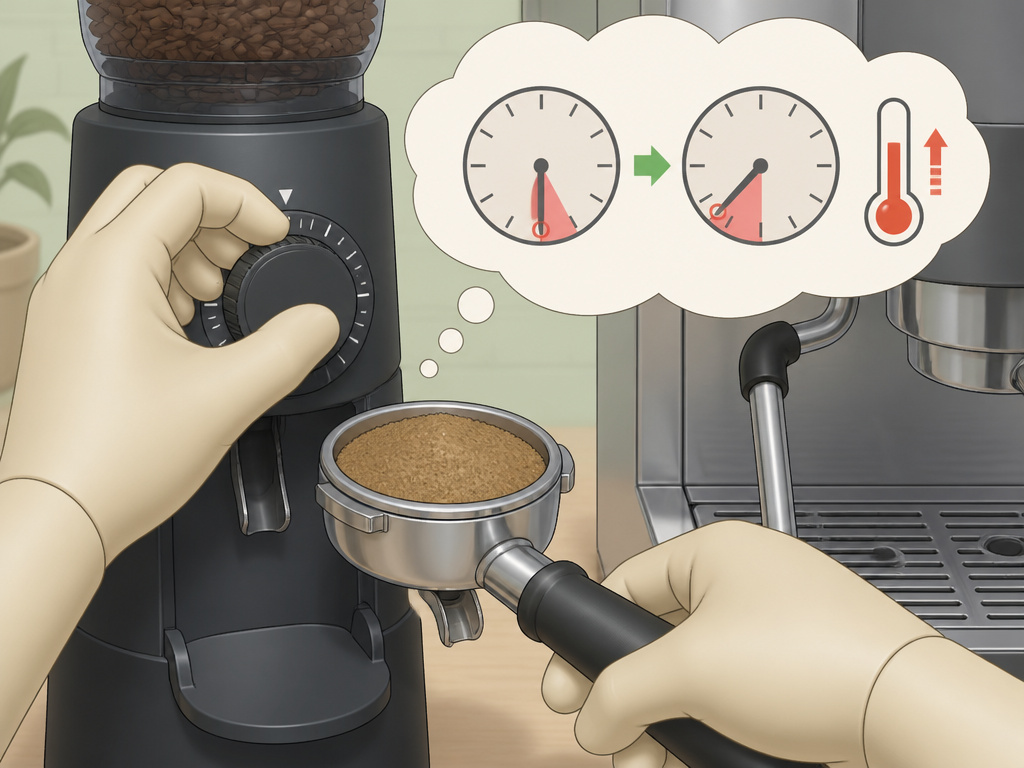
The 18g dose, 30-second shot works for a medium roast at sea level. Change one variable and the whole system shifts.
Pulling Shots with Light Roasts
Light roasts are denser. They resist water. The standard 30-second extraction will under-extract, leaving you with a bright, acidic, sometimes tea-like shot. To compensate, you need more time and often more heat.
- Grind finer than you would for a medium roast.
- Increase the yield to a 2.5:1 or even 3:1 ratio (18g in, 45-54g out).
- If your machine allows, increase the brew temperature by 2-4°F.
- Expect extraction times of 32-38 seconds.
The crema will be thinner and paler. That’s normal. The flavor should be complex and sweet, not sour.
The High-Altitude Problem
Water boils at a lower temperature as elevation increases. In Denver, water boils at 202°F, not 212°F. Your espresso machine’s boiler might not reach the target 200°F brew temperature. The cooler water extracts less, accentuating acidity.
If you live above 3,000 feet and your shots are persistently sour, you have two levers: grind finer to increase contact time, or increase the dose to create more resistance. A third, more advanced fix is to adjust the machine’s pressure stat, but that requires opening the casing.
Manual Pre-Infusion on Simple Machines
The Gaggia Classic Pro manual doesn’t mention pre-infusion. The machine has a 15-bar pump and a simple on/off switch. But the user community widely adopts “temperature surfing” and manual pre-infusion to improve consistency.
To manually pre-infuse: turn the pump on for 3 seconds, then off for 5, then on again to finish the shot. Those 3 seconds of low pressure wet the entire puck before full pressure hits, reducing channeling. It mimics the low-pressure pre-infusion cycle of more expensive machines.
Machine-Specific Quirks You Won’t Find in the Manual
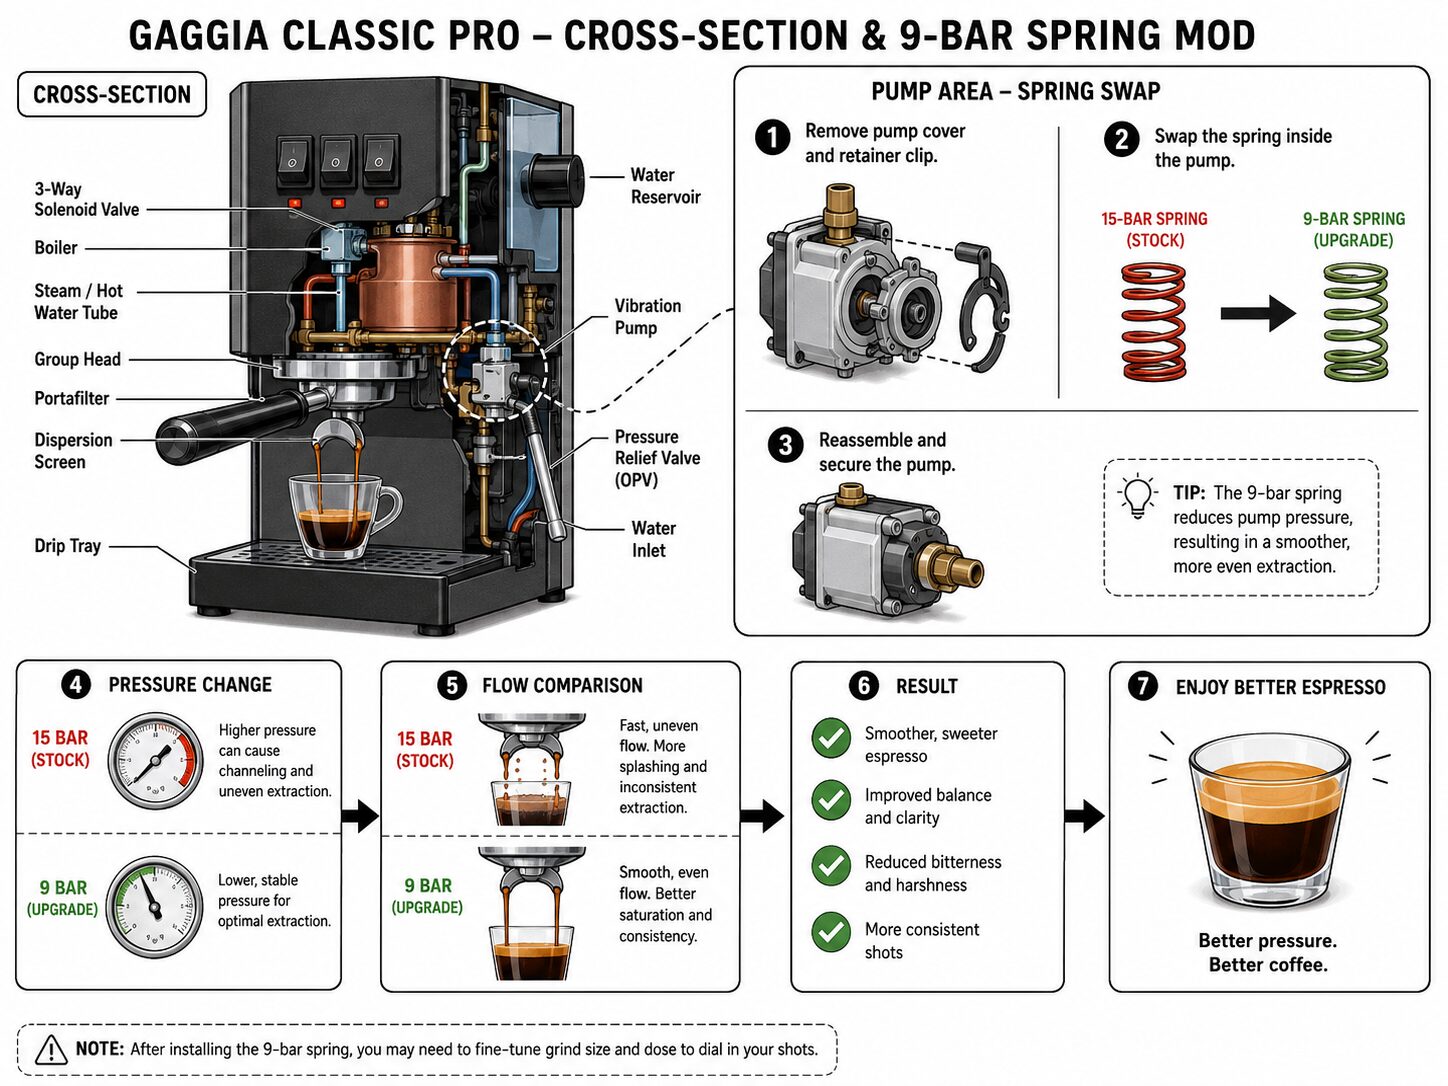
Your machine’s manual tells you how to operate it safely. It doesn’t tell you how the community has hacked it for better results.
The Breville Barista Express Impress has an “Intelligent Dosing” system and an “Assisted Tamping” lever that applies a 7kg (15lb) tamp. It’s consistent, which is great for beginners. But the built-in grinder’s 25 steps aren’t fine enough for some light roasts. You might find yourself between settings, 4 is too fast, 3 is too slow. The community fix is to adjust the internal burr setting, a process detailed in advanced forums but not in the manual.
The Gaggia Classic Pro has a 15-bar pump, which is too high for ideal espresso extraction (9 bars is standard). Most owners install a 9-bar spring mod, a simple $20 part swap that dramatically improves shot quality. The manual obviously doesn’t mention this.
I ran my Gaggia Classic Pro stock for a year. Every third shot would channel, and I blamed my tamp. After the 9-bar mod, the channeling stopped. The machine just needed less pressure to work with the coffee, not against it.
Maintenance Is Non-Negotiable
Espresso machines are pumps and heaters. Hard water leaves mineral deposits, scale, that coat the heating element. The element overheats, the thermostat fails, and you’re looking at a $150 repair. Backflushing with water after each use and descaling with citric acid every month if you have hard water prevents this.
The Breville espresso machine filter cartridge needs replacement every 2-3 months. Ignoring it lets scale build up downstream of the filter, in the thermoblock or boiler. That’s a warranty-voiding repair.
| Task | Frequency | Consequence If Skipped |
|---|---|---|
| Backflush with water | After each use | Coffee oils solidify in the group head, restricting flow and affecting temperature stability within a week. |
| Descaling | Every 1-3 months (based on water hardness) | Scale buildup insulates the heating element, causing overheating and eventual failure. The machine may start tripping thermal fuses. |
| Replace water filter | Every 2-3 months | Scale forms past the filter, leading to the same failures as not descaling. |
| Clean steam wand | After each use | Milk sugars caramelize inside the wand, blocking it permanently. |
From Espresso to Drink
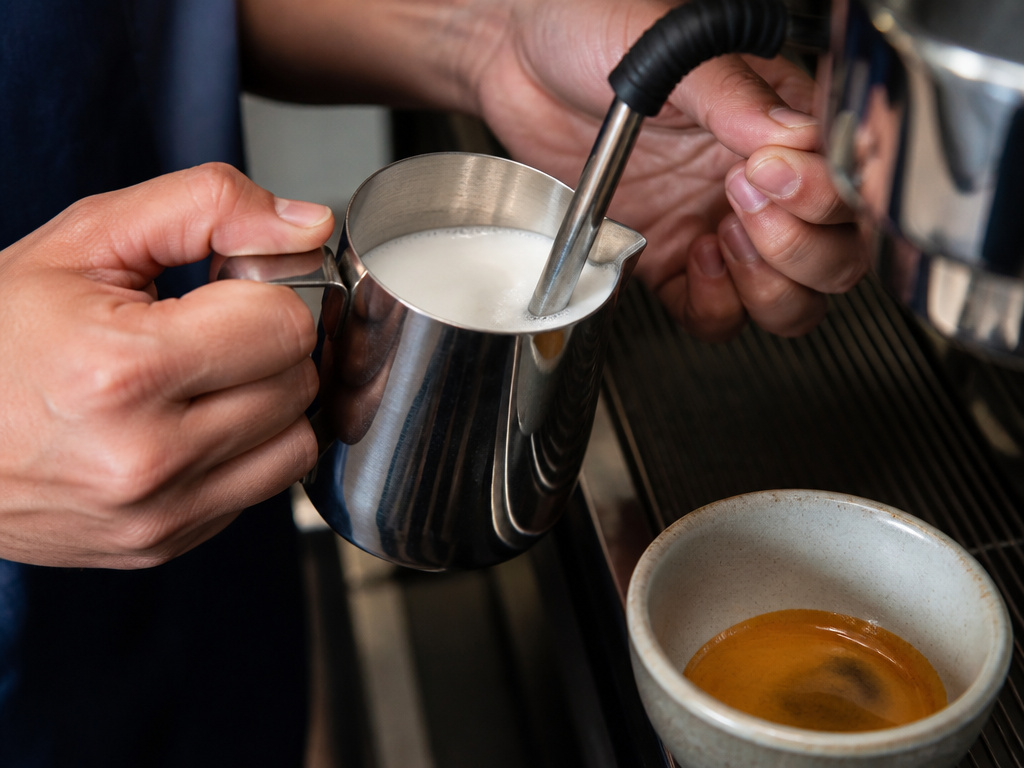
A straight shot is the test. Once you can pull a balanced one, you can build anything. A cafe americano is just espresso topped with hot water. The key is to add the water to the cup first, then pour the espresso on top. It preserves the crema.
For milk drinks, texture is everything. Steam the milk to create microfoam, tiny, uniform bubbles. Stretch the milk too much and you get dry, stiff foam that sits on top. Not enough and you have hot milk with no body. The sweet spot is a quiet, paper-tearing sound, not a loud screech.
Common mistake: Steaming milk with cold, wet espresso in the cup, the shot continues to extract from residual heat, turning bitter by the time you pour. Pull the shot directly into the steaming pitcher, steam the milk, then combine.
If you’re using almond milk, know that it contains stabilizers and fats that don’t behave like dairy. It requires more aeration at the start to create a stable foam. Don’t submerge the wand as deeply.
Frequently Asked Questions
Can I use pre-ground coffee in an espresso machine?
You can, but you shouldn’t. Pre-ground coffee is ground for drip, not espresso. It’s too coarse. The water will rush through, producing a weak, sour shot. Even “espresso grind” pre-ground coffee loses the volatile oils and CO2 that create crema within minutes of grinding. The result is a flat-tasting drink with no body.
Why is my espresso so sour?
Sourness means under-extraction. The water didn’t spend enough time in contact with the coffee to pull out the sweeter, deeper compounds. The fix is usually to grind finer. If you’re already at the finest setting on your grinder, increase the dose by 0.5 grams or increase the yield by 2-3 grams. Also, make sure your machine is fully heated, a cold group head is a common culprit.
What’s the difference between a single and double shot?
single shot uses a single basket (7-9 grams of coffee) and yields about 1 ounce (30ml) of espresso. A double shot uses a double basket (14-18 grams) and yields 2 ounces (60ml). Most home machines and modern cafes use double baskets as the standard because they’re more forgiving and produce a more balanced shot. The single basket is notoriously difficult to tamp evenly.
How fine should espresso be ground?
Espresso grind should feel like fine sand or table salt. If it feels powdery like flour, it’s too fine and will choke the machine. If it feels gritty like kosher salt, it’s too coarse and the shot will run fast. The exact setting varies wildly between grinders. Start in the middle of your grinder’s range and adjust based on shot time.
Do I need a special type of coffee bean for espresso?
No. Any coffee bean can be used for espresso. Traditional espresso blends are often darker roasts because they’re easier to extract and produce more crema, but some of the most interesting shots come from light-roast single-origin coffee. The roast affects the flavor profile, not the machine’s ability to brew it. Choose beans you enjoy drinking.
The Bottom Line
Making coffee with an espresso machine is a balancing act between dose, grind, and time. The 18g dose and 30-second shot is a starting template, not a finish line. Light roasts need more time. High altitude needs a finer grind. Your machine’s manual gives you the basics, but the real learning happens when you taste a sour shot and know to grind finer.
Invest in a good grinder first. A scale second. Those two tools will improve your espresso more than a machine upgrade ever will. Keep your machine clean, pay attention to the water you use, and steam your milk immediately after pulling the shot. The difference between a good home espresso and a great one isn’t thousands of dollars. It’s about five grams of coffee and five seconds of time.
